As you have used the Standard version of Stellar Data Recovery for Mac, you understand the usefulness and performance of this ultimate data recovery tool. But, you haven’t yet harnessed the full capacity of Stellar Data Recovery as some of the best features are available with the higher versions.
If you need to use the advanced functions of Stellar Data Recovery, such as data recovery from lost volume or CD/DVD, create recovery drive, create/load image, etc., you need to upgrade your existing Standard version to Professional, Premium, or Technician version.
Steps to Upgrade Stellar Data Recovery for Mac
Below, we’ve mentioned the step-by-step process of upgrading Stellar Data Recovery Standard edition to Professional, Premium, or Technician edition. But before proceeding, you need to ensure that you have an active internet connection. Then, follow these steps:
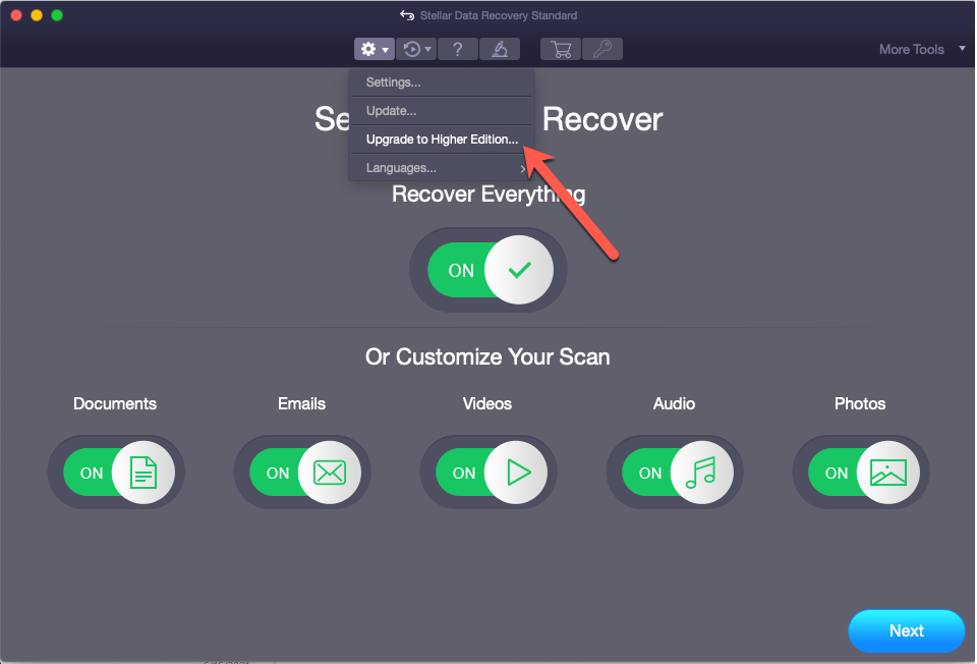
Step 1: Run Stellar Data Recovery Standard and click on the ‘Preferences’ ![]() .
.
Step 2: Select ‘Upgrade to Higher Edition’.

If you don’t find the ‘Upgrade to Higher Edition’ option in the dropdown list, you need to activate your Standard edition.
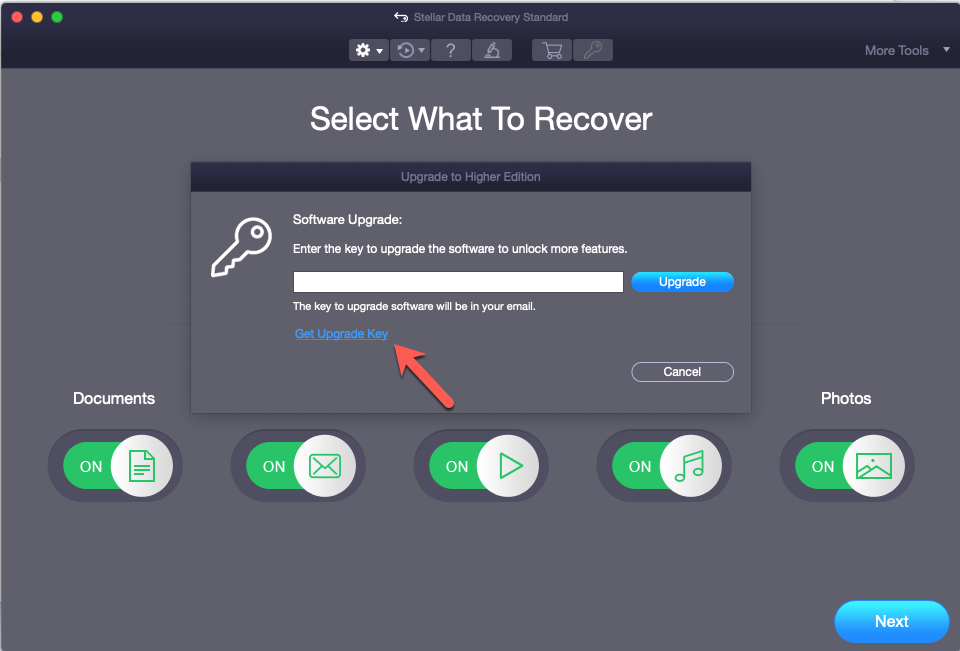
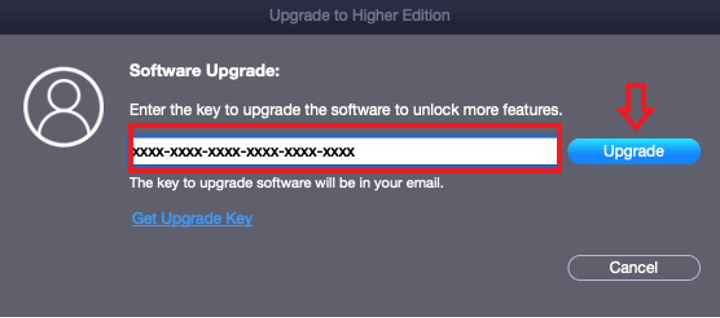
Step 3: A new tab of ‘Software Upgrade’ appears. Enter the ‘Key’ you have received on the purchase of higher edition. If you don’t have the key, click the ‘Get Upgrade Key’ link to purchase the software.

Step 4: Once you entered the ‘Key’, click the ‘Upgrade’ button.

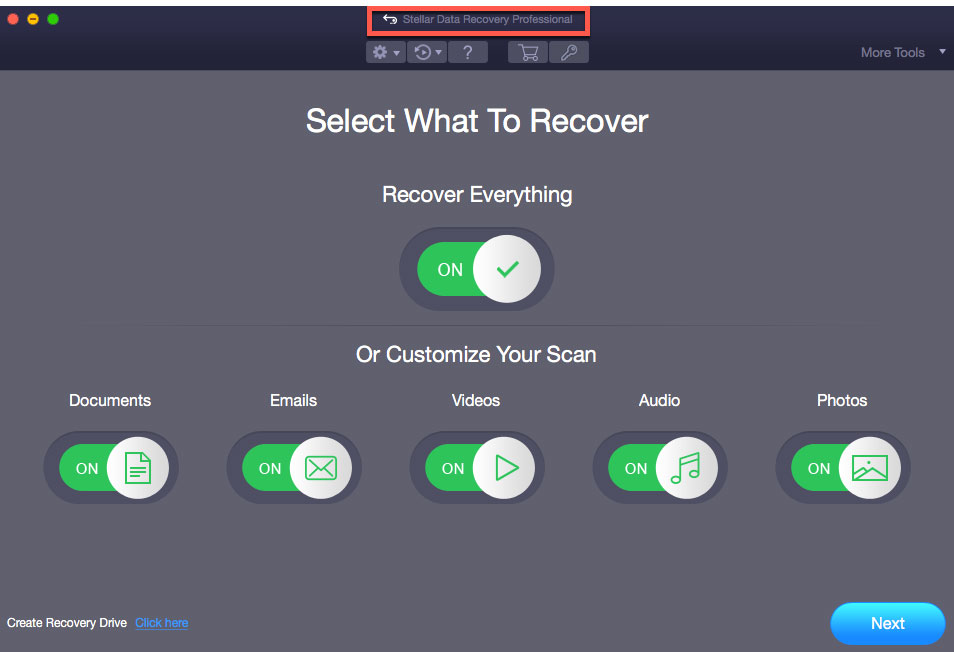
Your Stellar Data Recovery Standard for Mac will get upgraded to the edition you have purchased (Professional, Premium, or Technician edition).

Note: The edition to which you have upgraded would be updated on the UI header of the software.


