Microsoft Exchange Server is one of the widely used email servers. Many large and middle-level organizations rely on the Exchange servers for their entire business-related online communications. However, at times, due to improper server shut down, dirty shutdown, or any other hardware/software problem, the Exchange server database gets corrupt and the mailboxes become completely inaccessible.
In such conditions, you can take the help of Stellar Repair for Exchange to repair the damaged or corrupt Exchange database file and restore the precious mailboxes and mail items.After repairing the corrupt EDB file, the software recovers the mailboxes and saves them in an Outlook PST file. This file can be directly accessed through MS Outlook or imported into Exchange to regain access to all the mailbox data.
Stellar Exchange Server Recovery software recovers your inaccessible Exchange mailboxes in a few easy steps. The below steps will give you a clear idea of the same.
Steps to Recover Inaccessible Exchange Server Mailboxes
- Run Stellar Repair for Exchange software and then click Browse to manually choose the corrupt EDB file or use the Find button to locate it automatically.
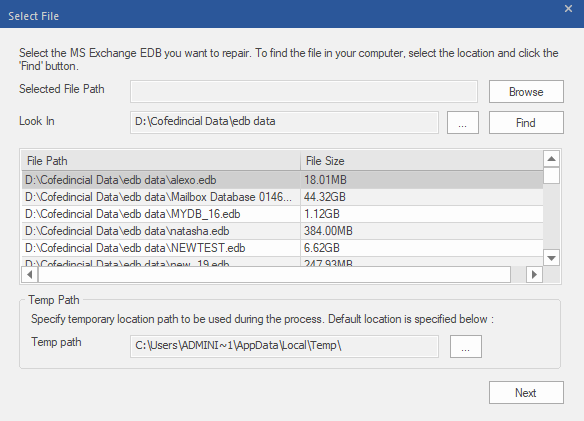
- After choosing the damaged EDB file, click Next and then select Quick Scan or Extensive Scan mode.
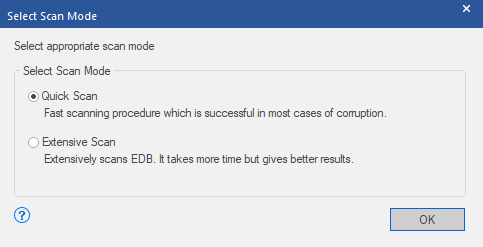
Note: You can choose the 'Quick Scan' for a faster scanning process. If 'Quick Scan' does not provide the desired results or you think so, you can choose the 'Extensive Scan' option.
- Click OK to start the scan and repair process.
- After the scan, all recoverable mailboxes with the mail folders appear in a three-pane window.
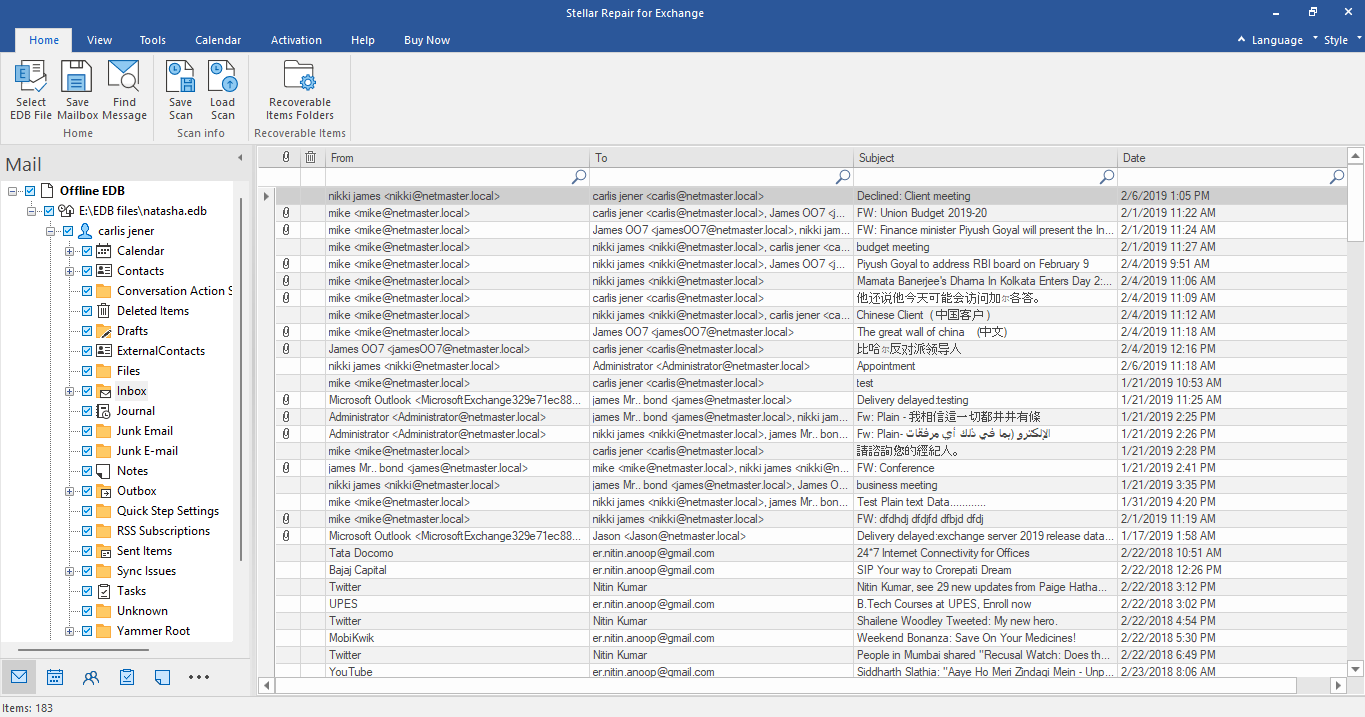
Note: The left pane lists all the recoverable mail folders. The right-top pane shows all the items in the selected folder and the right-bottom pane shows the content of the selected mail item in the upper pane.
- From the left pane of the window, choose all or any particular mailbox and click the 'Save Mailbox' icon from the toolbar.
- Select a format, such as PST, and then click 'Next.'
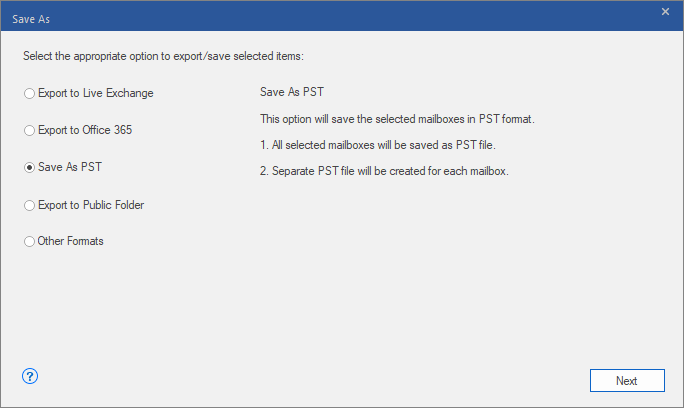
- Click 'Browse' to choose a save location and then click 'OK.'

Tip: If the PST file to be exported is larger than 45 GB, check the Auto Split PST File box. This will divide the file into smaller segments, each with a maximum size of 45 GB
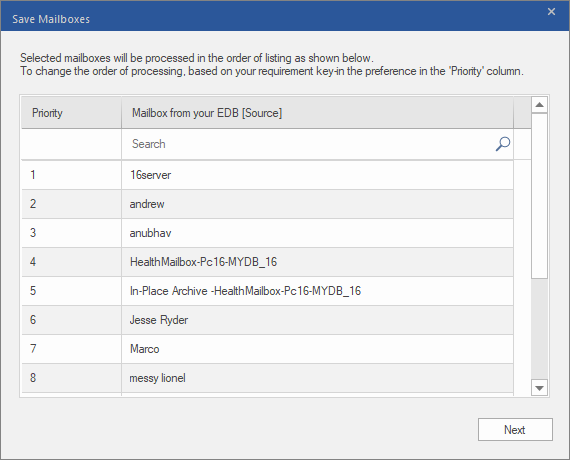
- In the Save Mailboxes window, you can set the mailbox recovery priority. This helps you export and save critical mailboxes first than others. After changing priority, click 'Next.'
- In the Save window, the progress of the mailbox saving process is displayed. The software facilitates faster recovery with parallel processing. It processes up to 8 mailboxes* together in PST, live Exchange, or Office 365.

Additionally, you can perform the following tasks after the scan by using Stellar Repair for Exchange:
Search & Save
- If you want to search and save any particular emails from the recovered files, then click on 'Find Message' from Home ribbon.
- Specify the criteria to search your desired mails from the given attributes and click the 'Search' button to search the mails. Search results will appear in the window.
- To save the search results, either right-click on messages to save them individually or click the 'Save Mailbox' icon from the Home menu, select the format, specify the destination folder, and click 'OK.'
Apply Filters
- You can Use the Apply Filters option to exclude mailboxes Deleted or Junk email or emails from a specific sender. Additionally, you can include the emails from particular date range.
- The option is available in the Select Destination dialog box (if PST or other format is selected) or Map Mailboxes window (when you select Office 365 or live Exchange).
To export recovered mailboxes directly to live Exchange or Office 365, check out these quick guides:
Export recovered mailboxes to live exchange server
Exchange-to office 365 migration
*NOTE: Parallel processing requires at least 8 GB free RAM.


