Stellar Converter for EDB exports mailboxes directly from Exchange Database files (EDB) to Live Exchange or Office 365. The software offers ‘Advance Filter’ option to exclude redundant or unwanted data before exporting the mailbox data.
Here are the steps to use Advance Filter while exporting mailboxes from EDB to Live Exchange or Office 365.
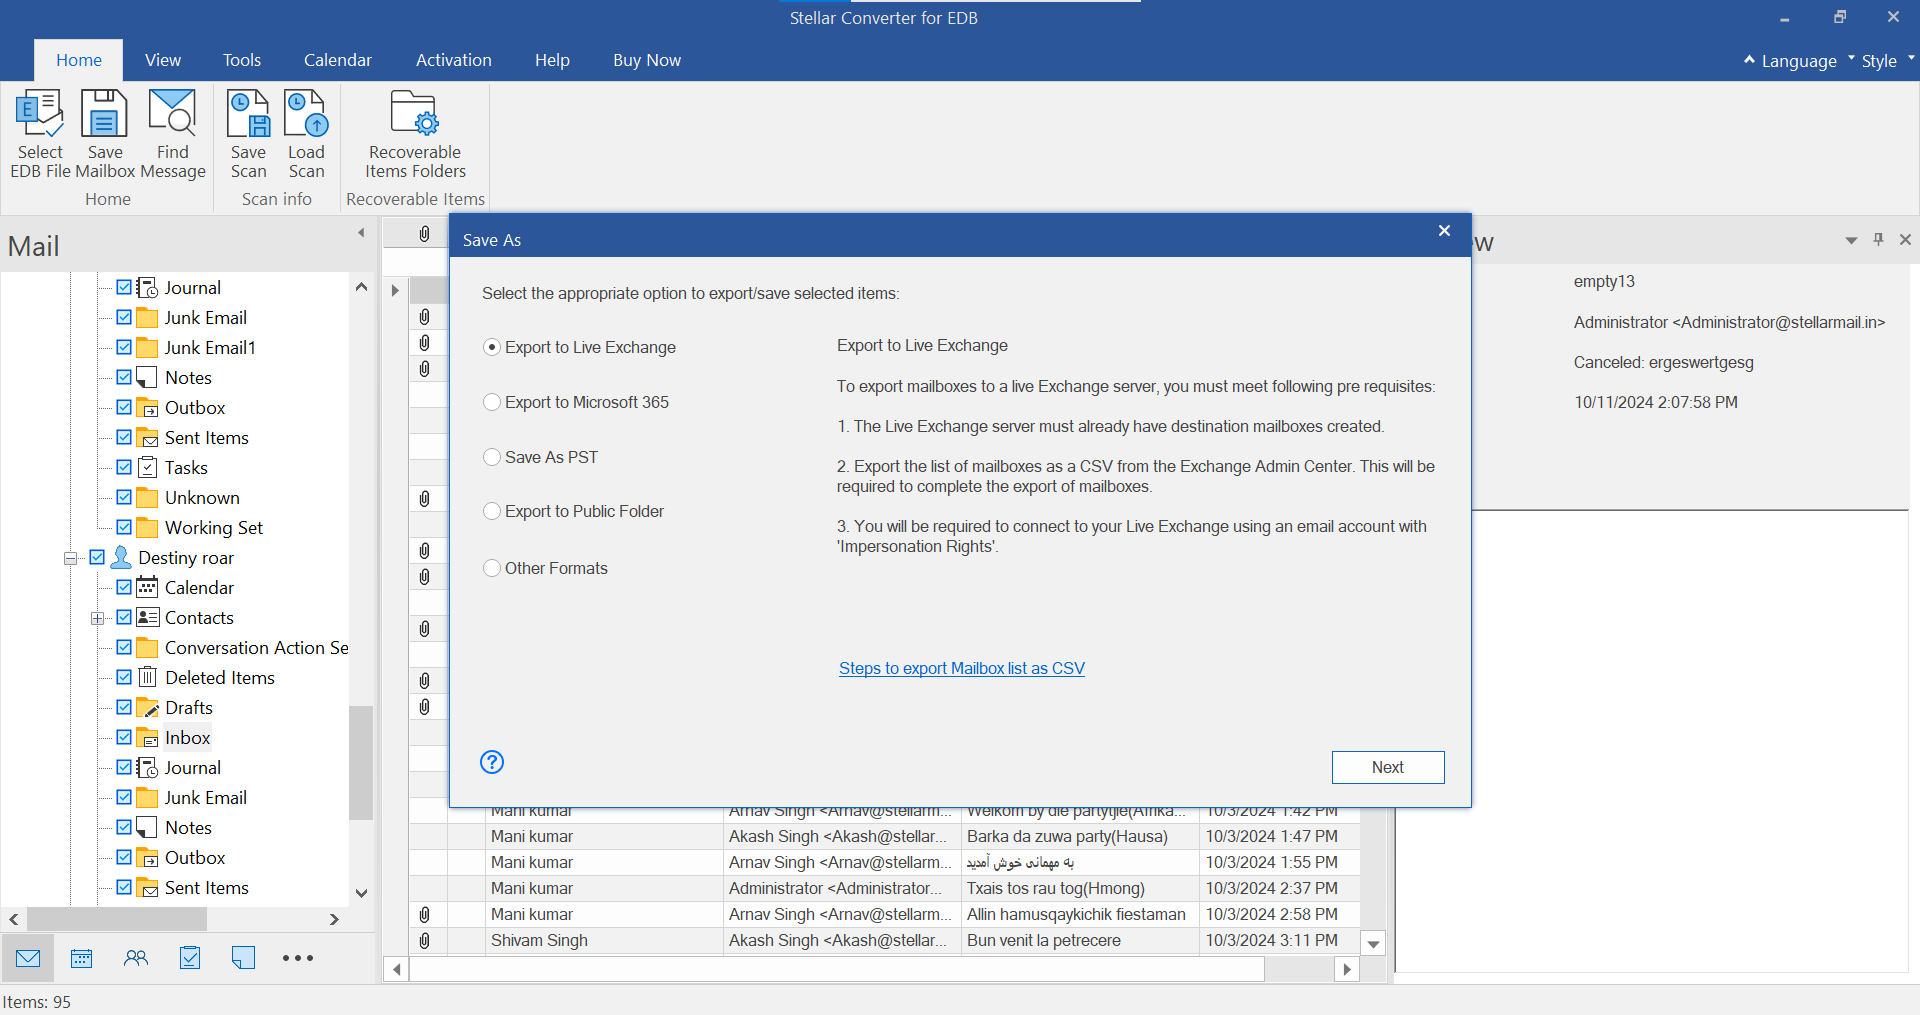
- Export mailbox to Live Exchange with Advance Filter option
- Once the software has scanned the EDB file mailbox-data, click Save, and select the option Live Exchange as shown in the screen below:
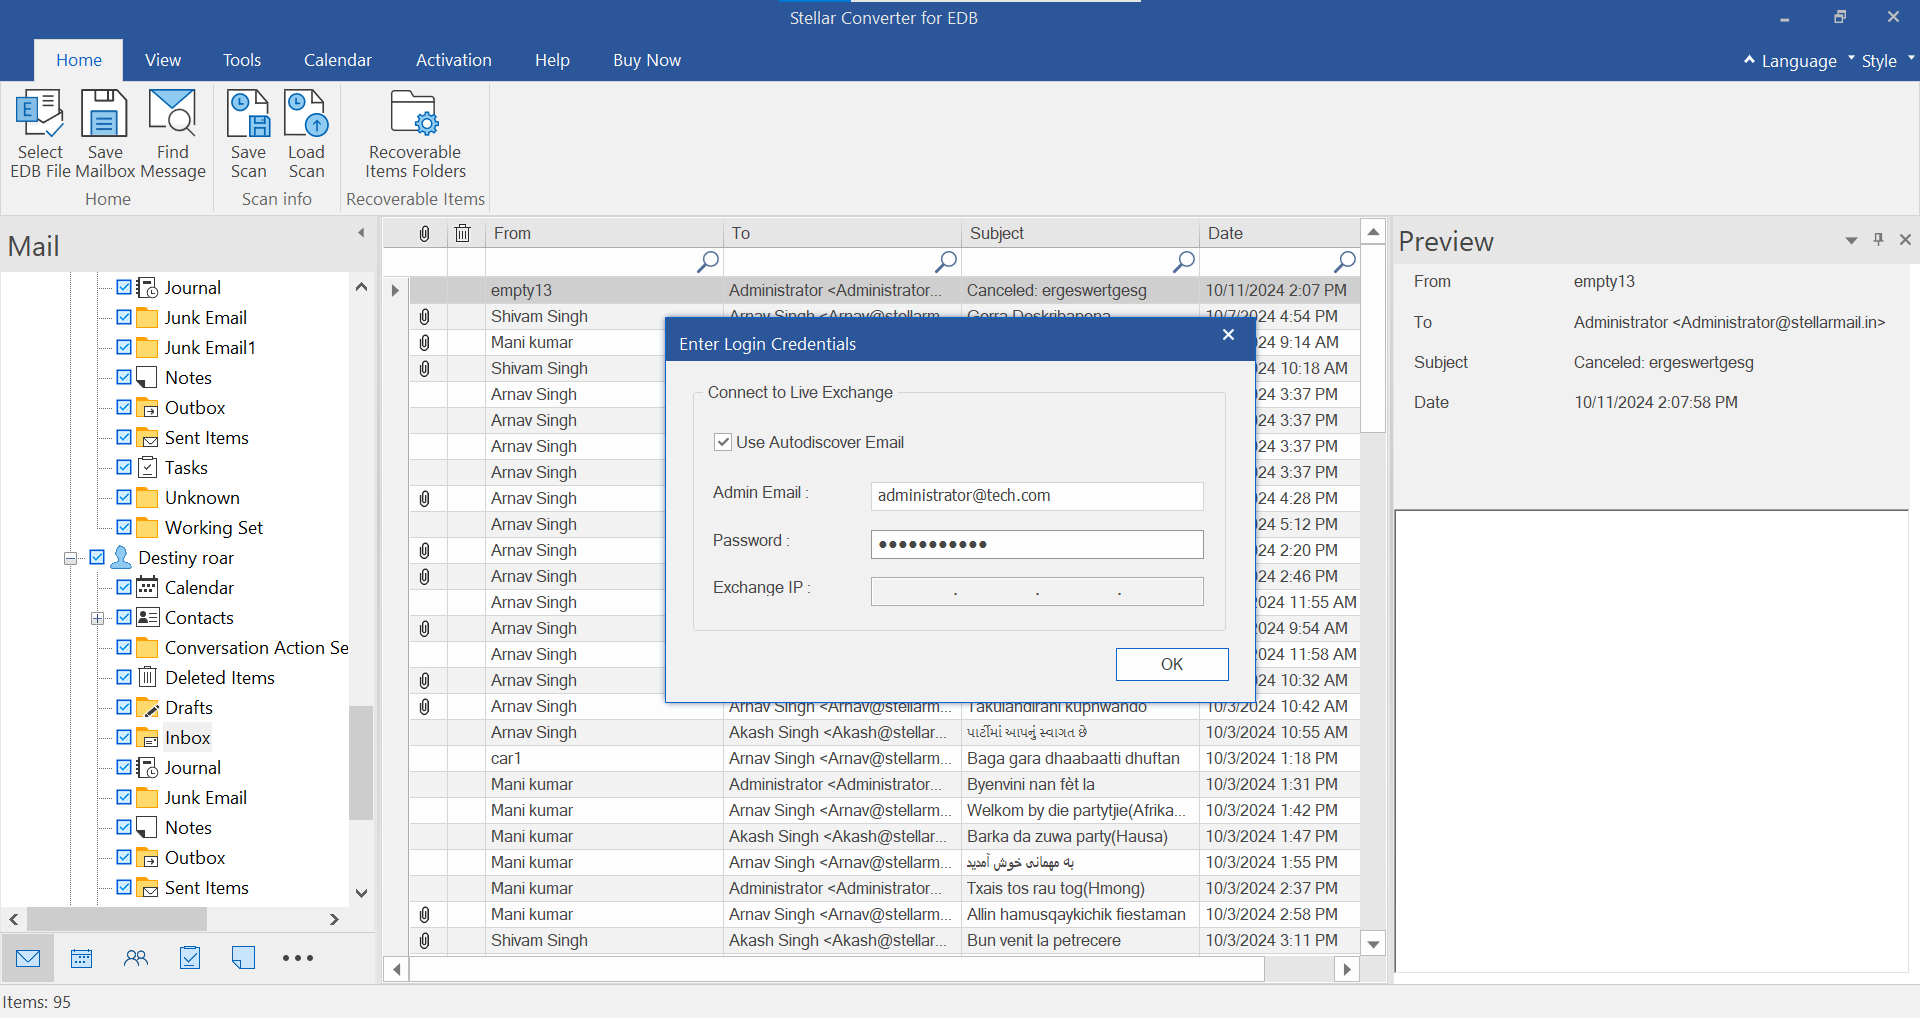
- The Enter Login Credentials dialog box appears, offering two methods to connect to the Live Exchange Server: Use Autodiscover Email and manually enter the server details.
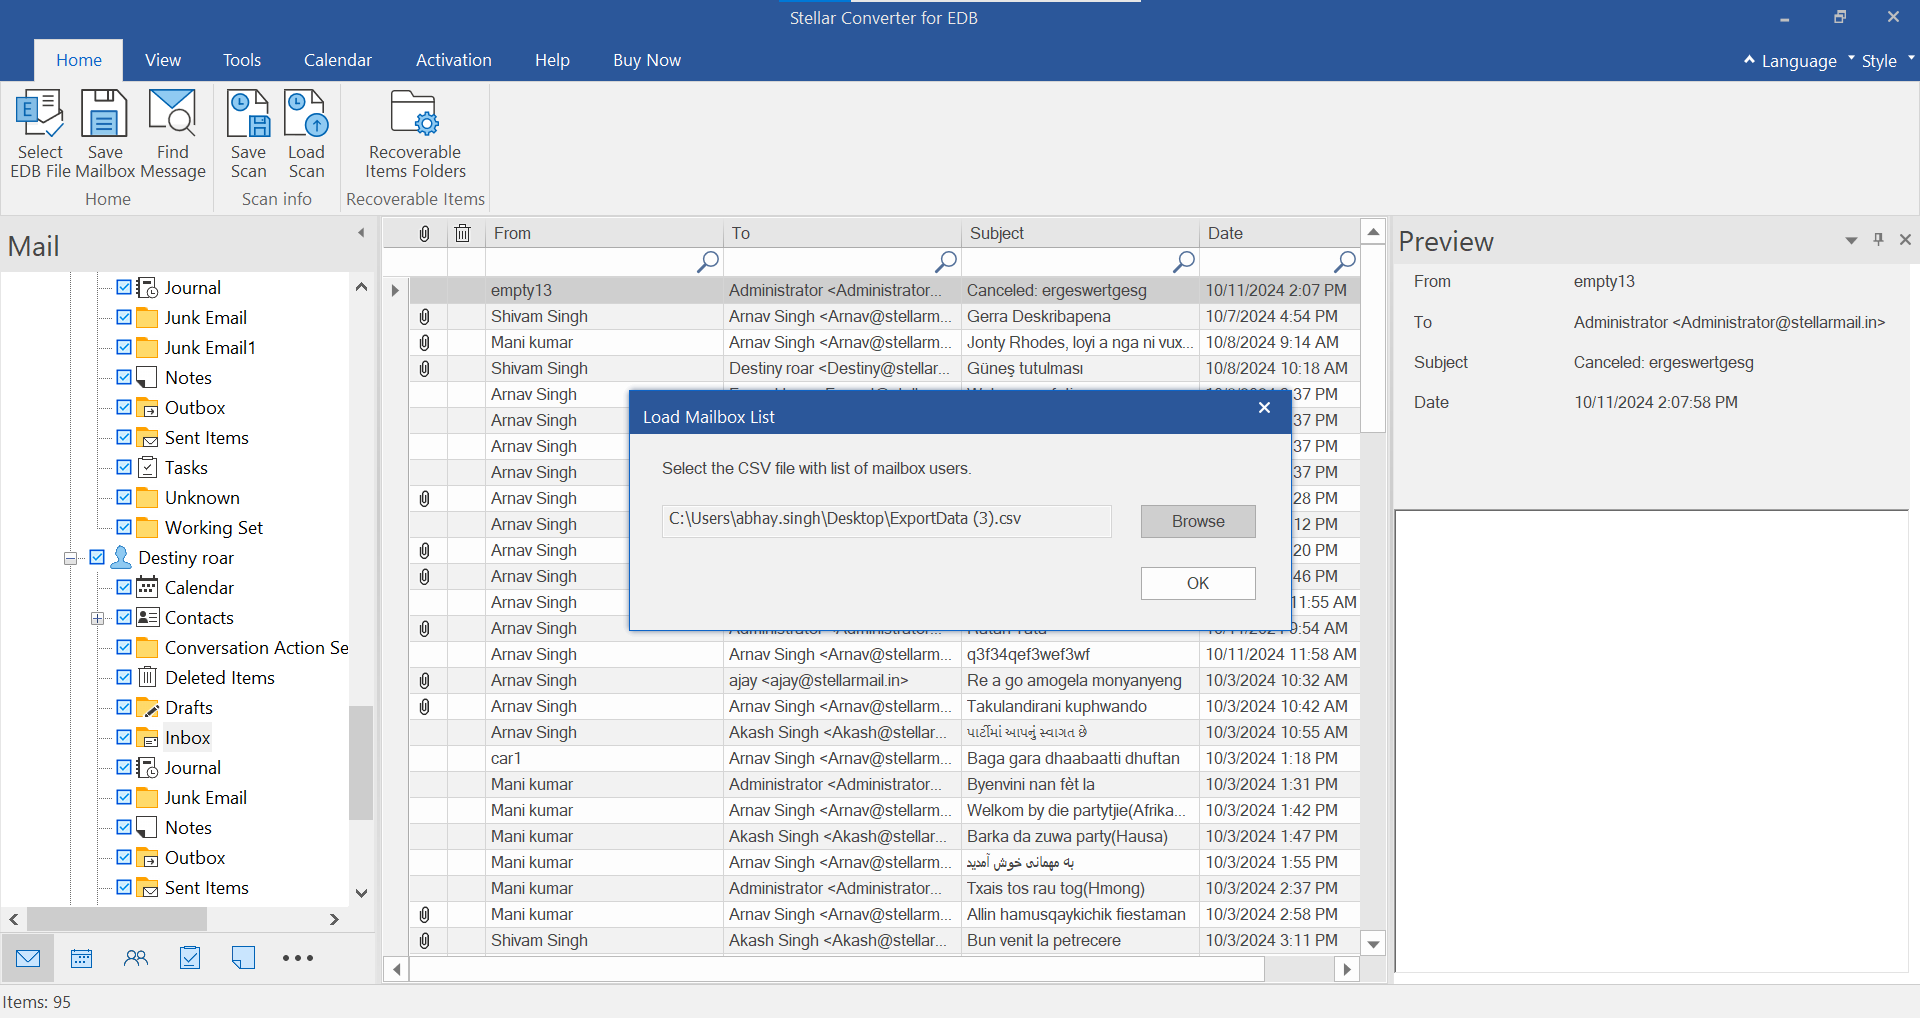
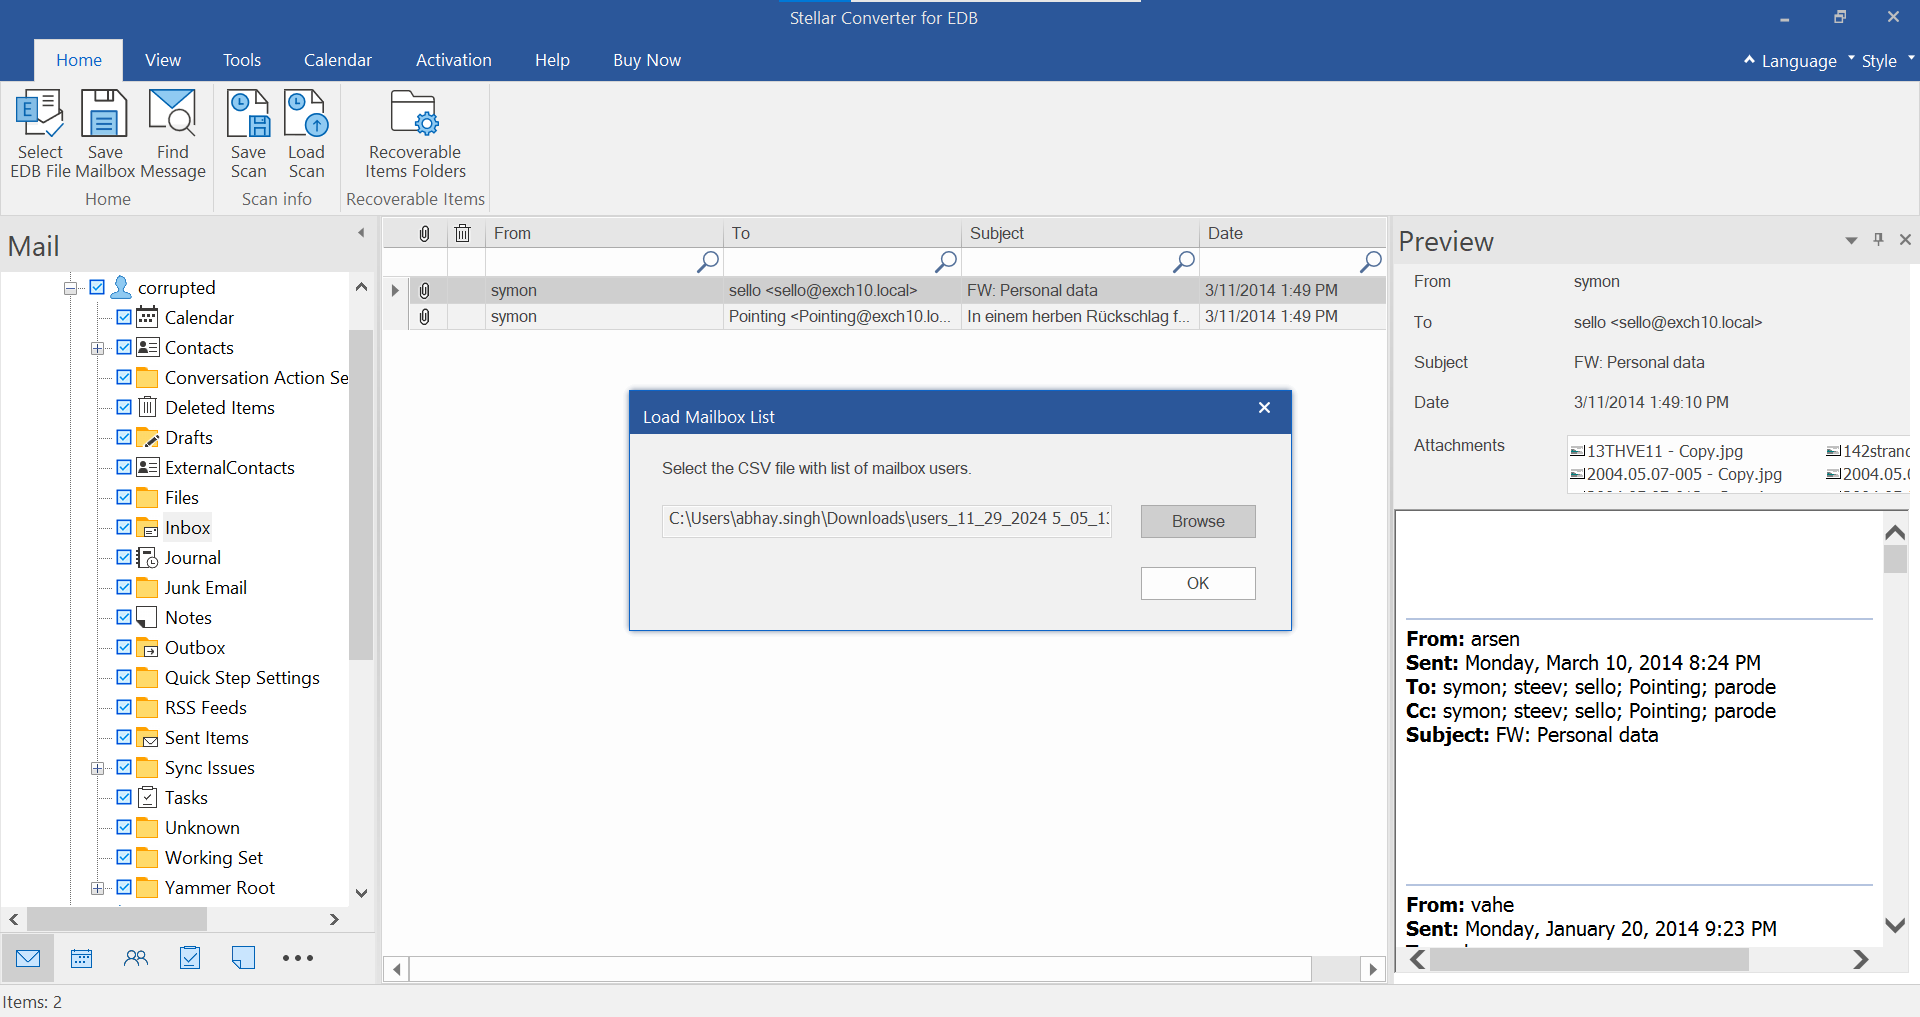
- The Load Mailbox List dialog box will appear. Click the Browse button to select the CSV file containing the list of mailbox users. Click OK.
- Click Ok and the Map Mailbox screen will appear. Select the checkbox for mailboxes to Apply Filter.
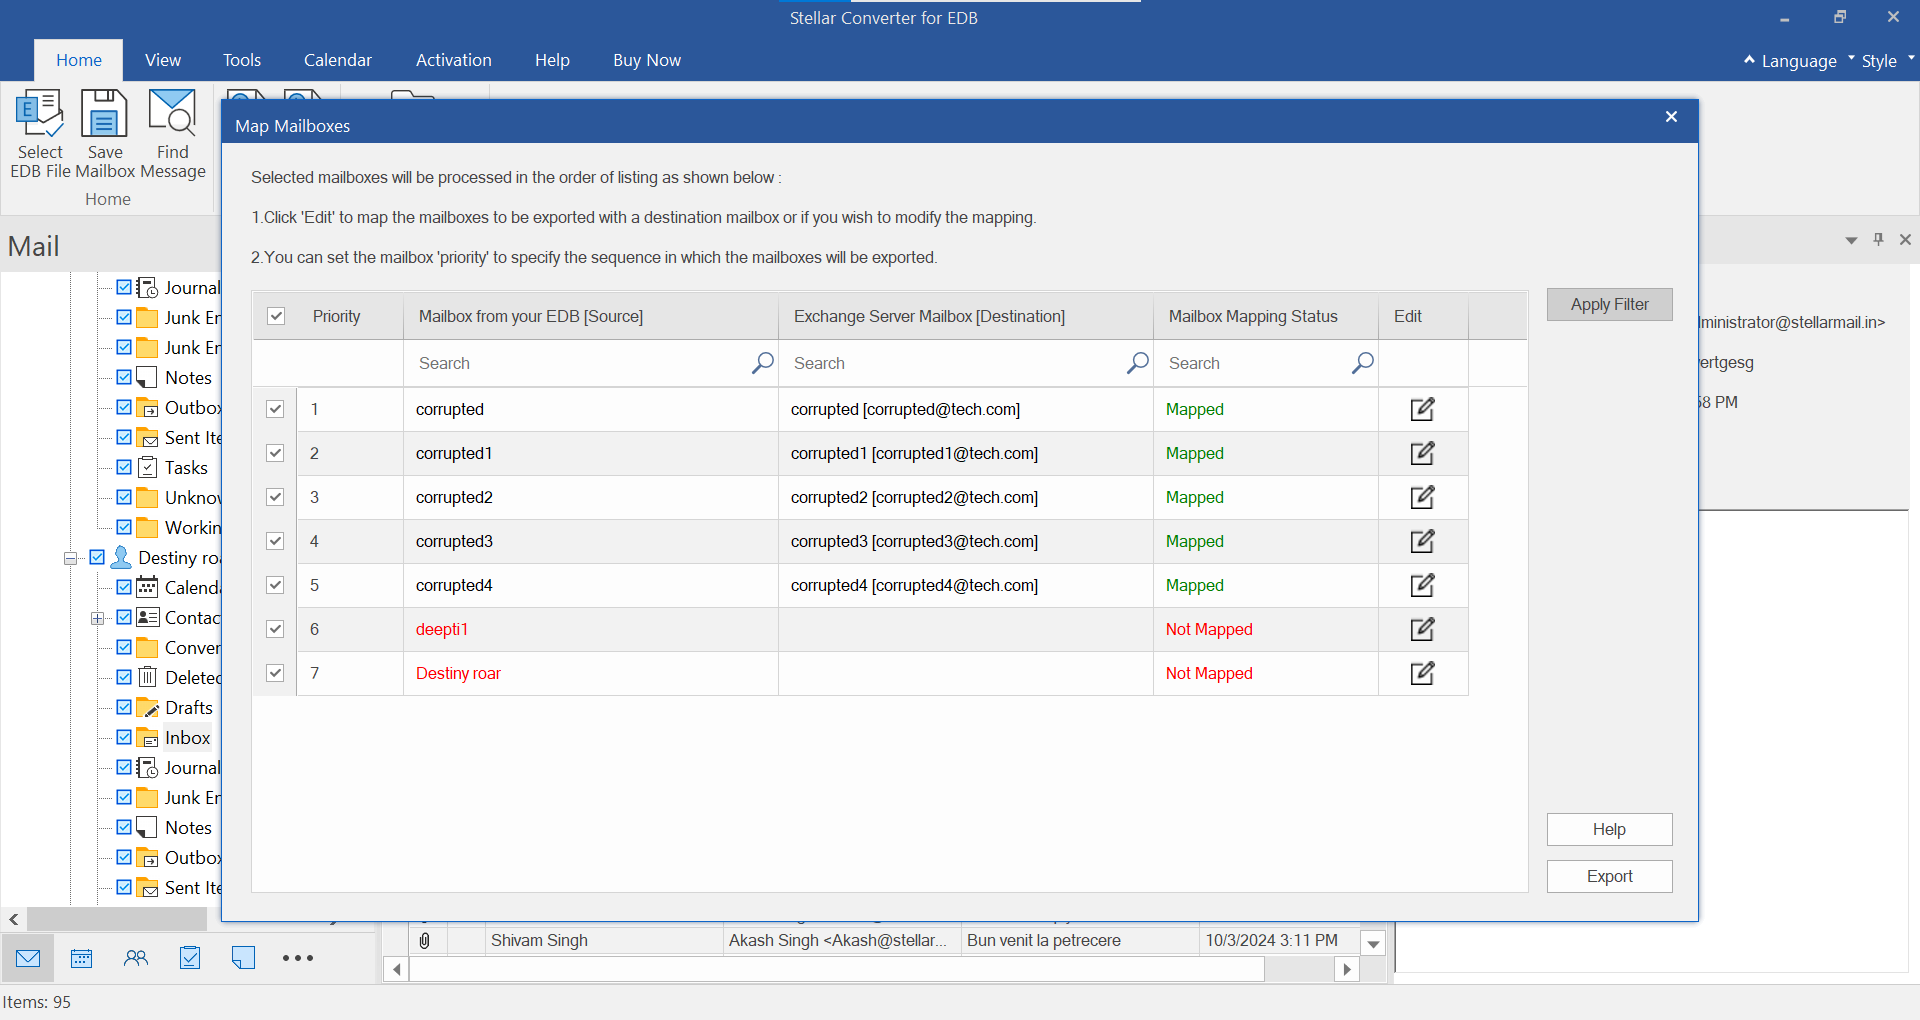
- Click the Advance button to filter the scanned results. Apply Filter screen will appear.
Stellar Converter for EDB provides three filter options in Offline EDB conversion:
- Exclude: This filter allows users to exclude mails from Junk Mail Folder and Deleted Mail Folder.
- Date Range: This filter allows the user to specify a starting and ending date for which the user wants to include the mails for saving/ exporting.
- Sender IDs to be excluded: This filter allows the user to exclude the mails from a list of specified senders. To exclude the mails, enter the complete E-mail addresses of the sender and click on Add to List. The mentioned E-mail addresses will be listed in the E-mail addresses list box. Click Next.

6. Click Next to apply the changes and export the data to Live Exchange server.
- Once the software has scanned the EDB file mailbox-data, click Save, and select the option Live Exchange as shown in the screen below:
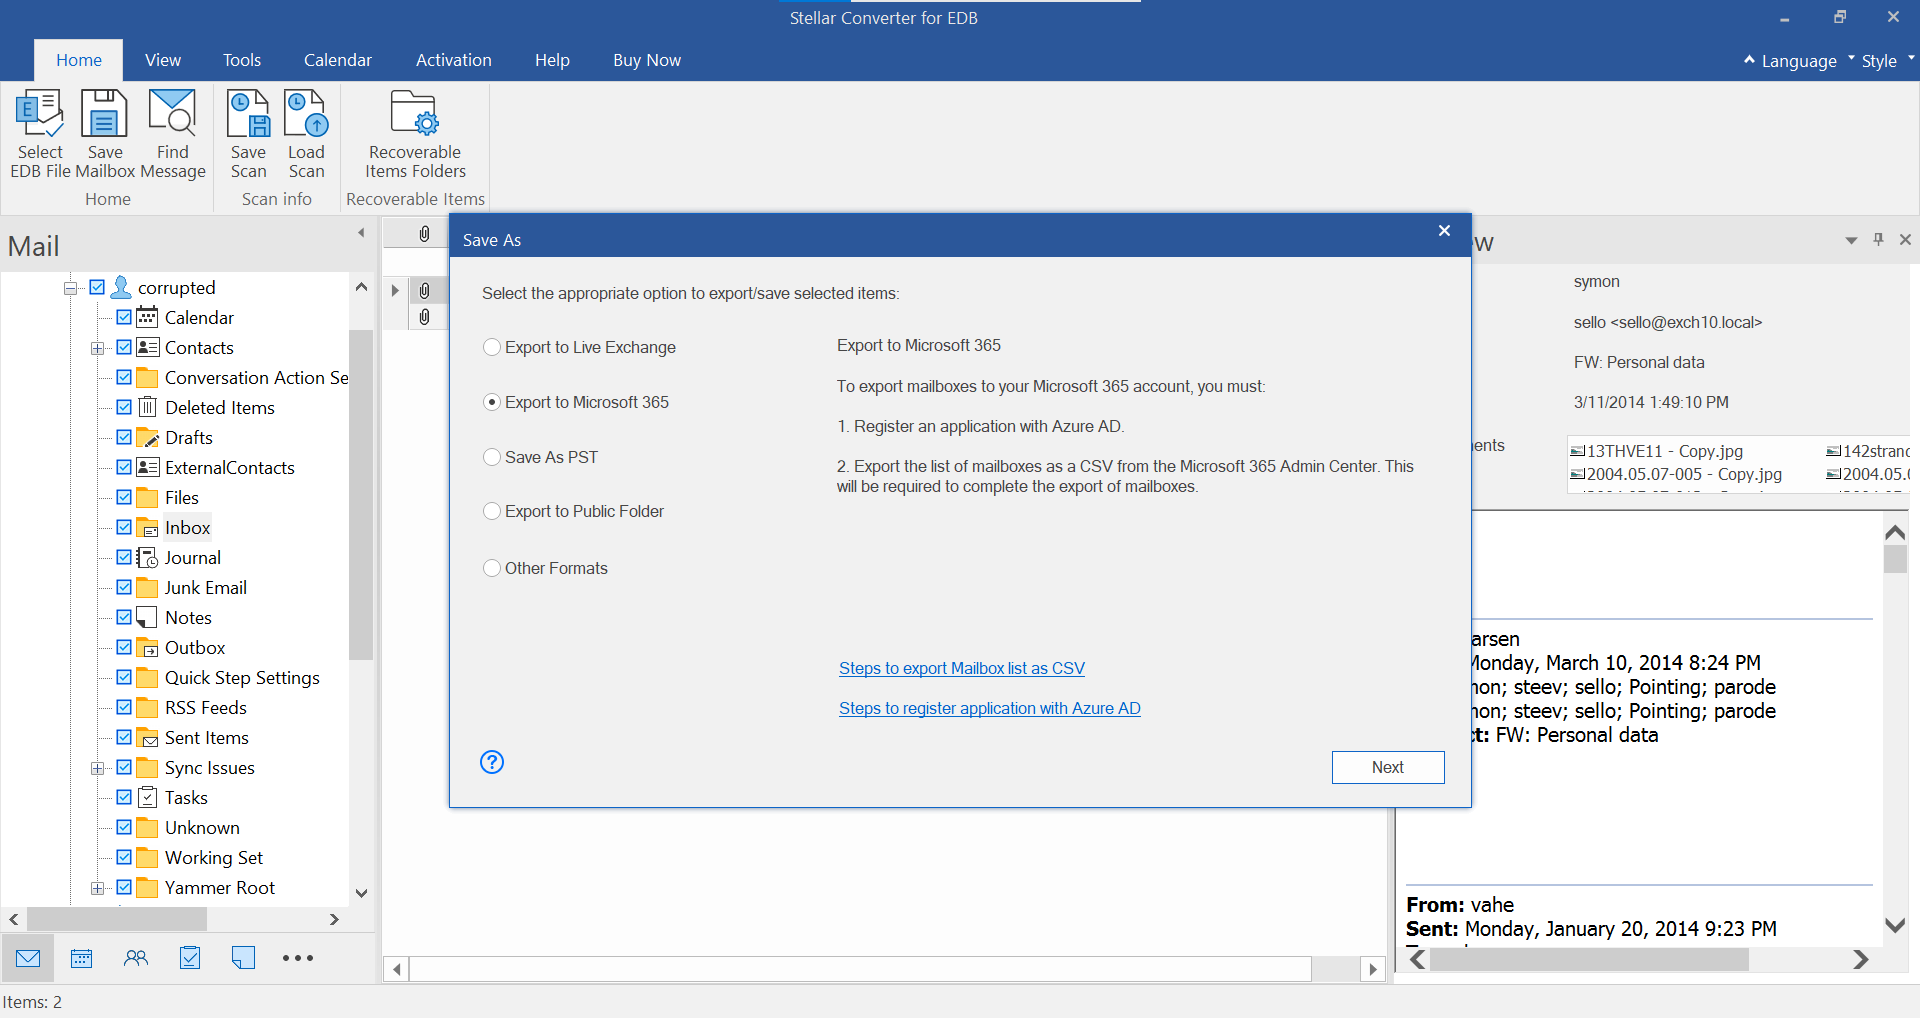
- Export mailbox to Office 365 with Advance Filter option
- Select the checkbox for Office 365
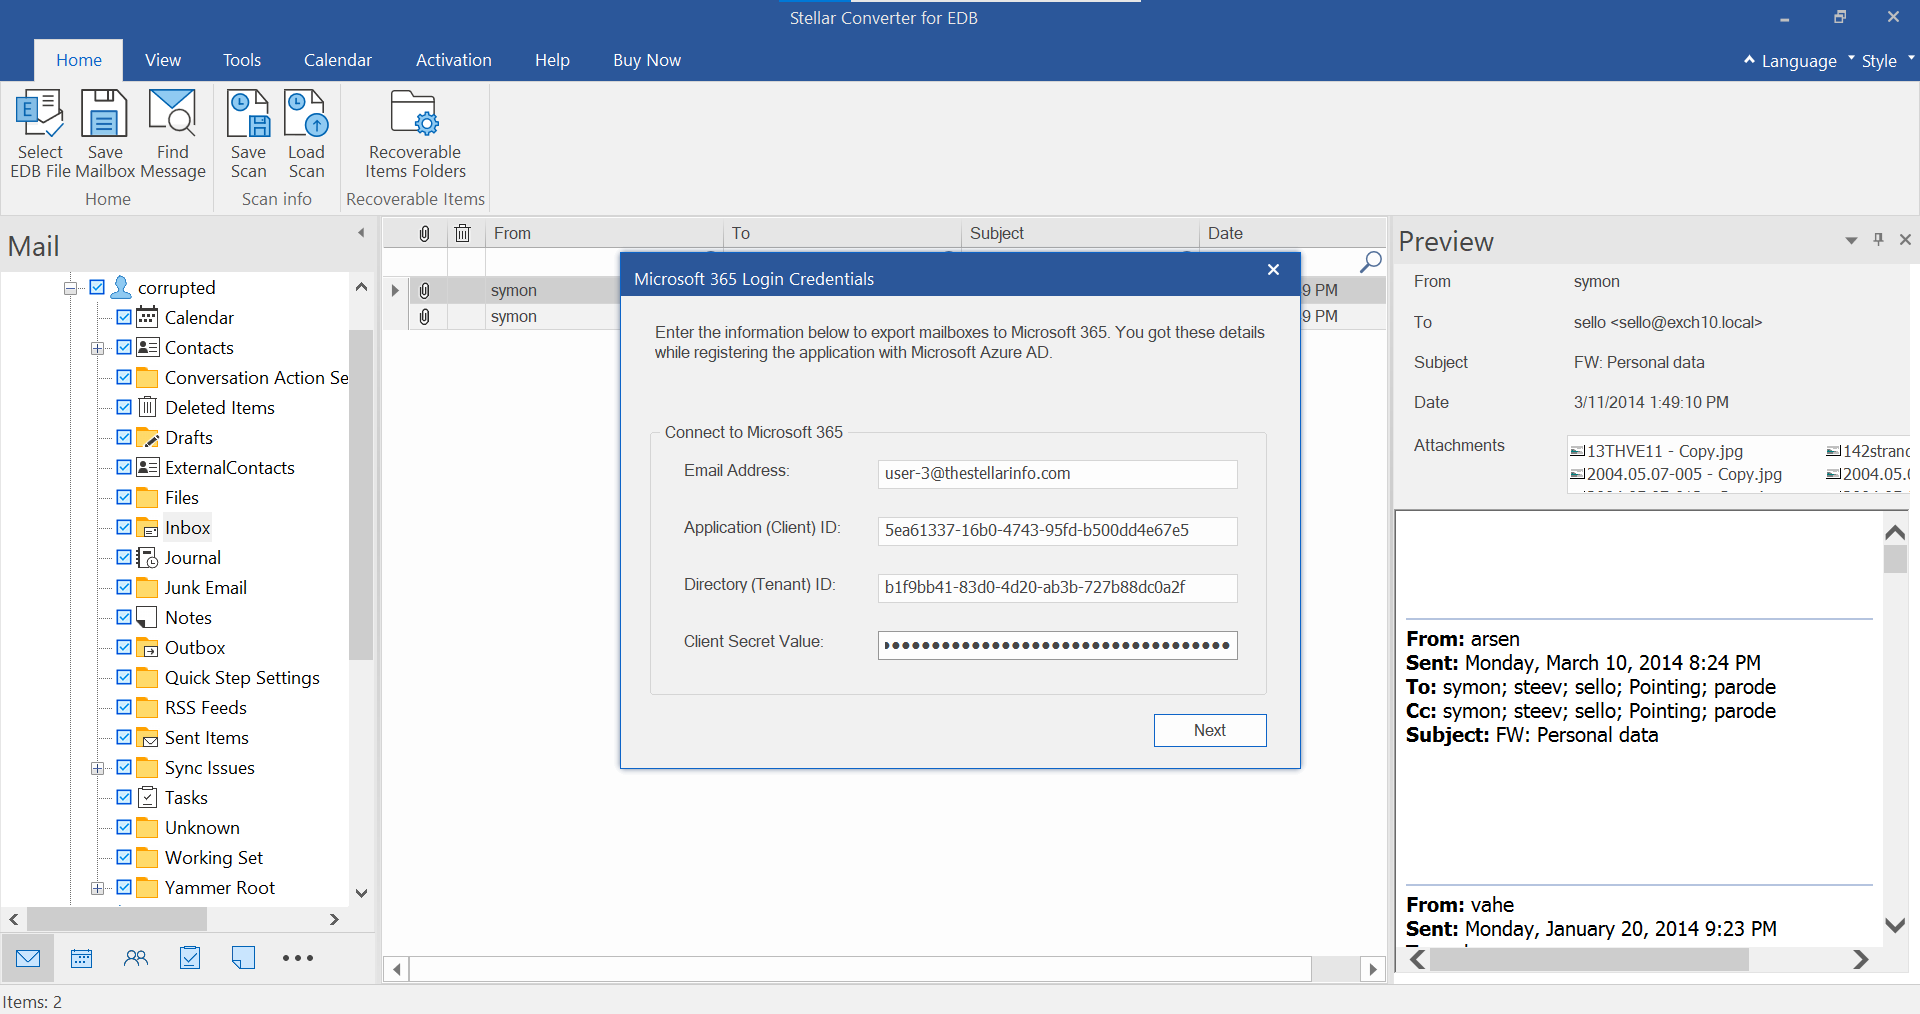
- Microsoft 365 Login Credentials dialog box opens. Enter Email Address, Application (Client) ID, Directory (Tenant) ID and Client Secret Value to export mailboxes to Microsoft 365. Click Next to continue.
- The Load Mailbox List dialog box will appear. Click the Browse button to select the CSV file containing the list of mailbox users. Click OK.
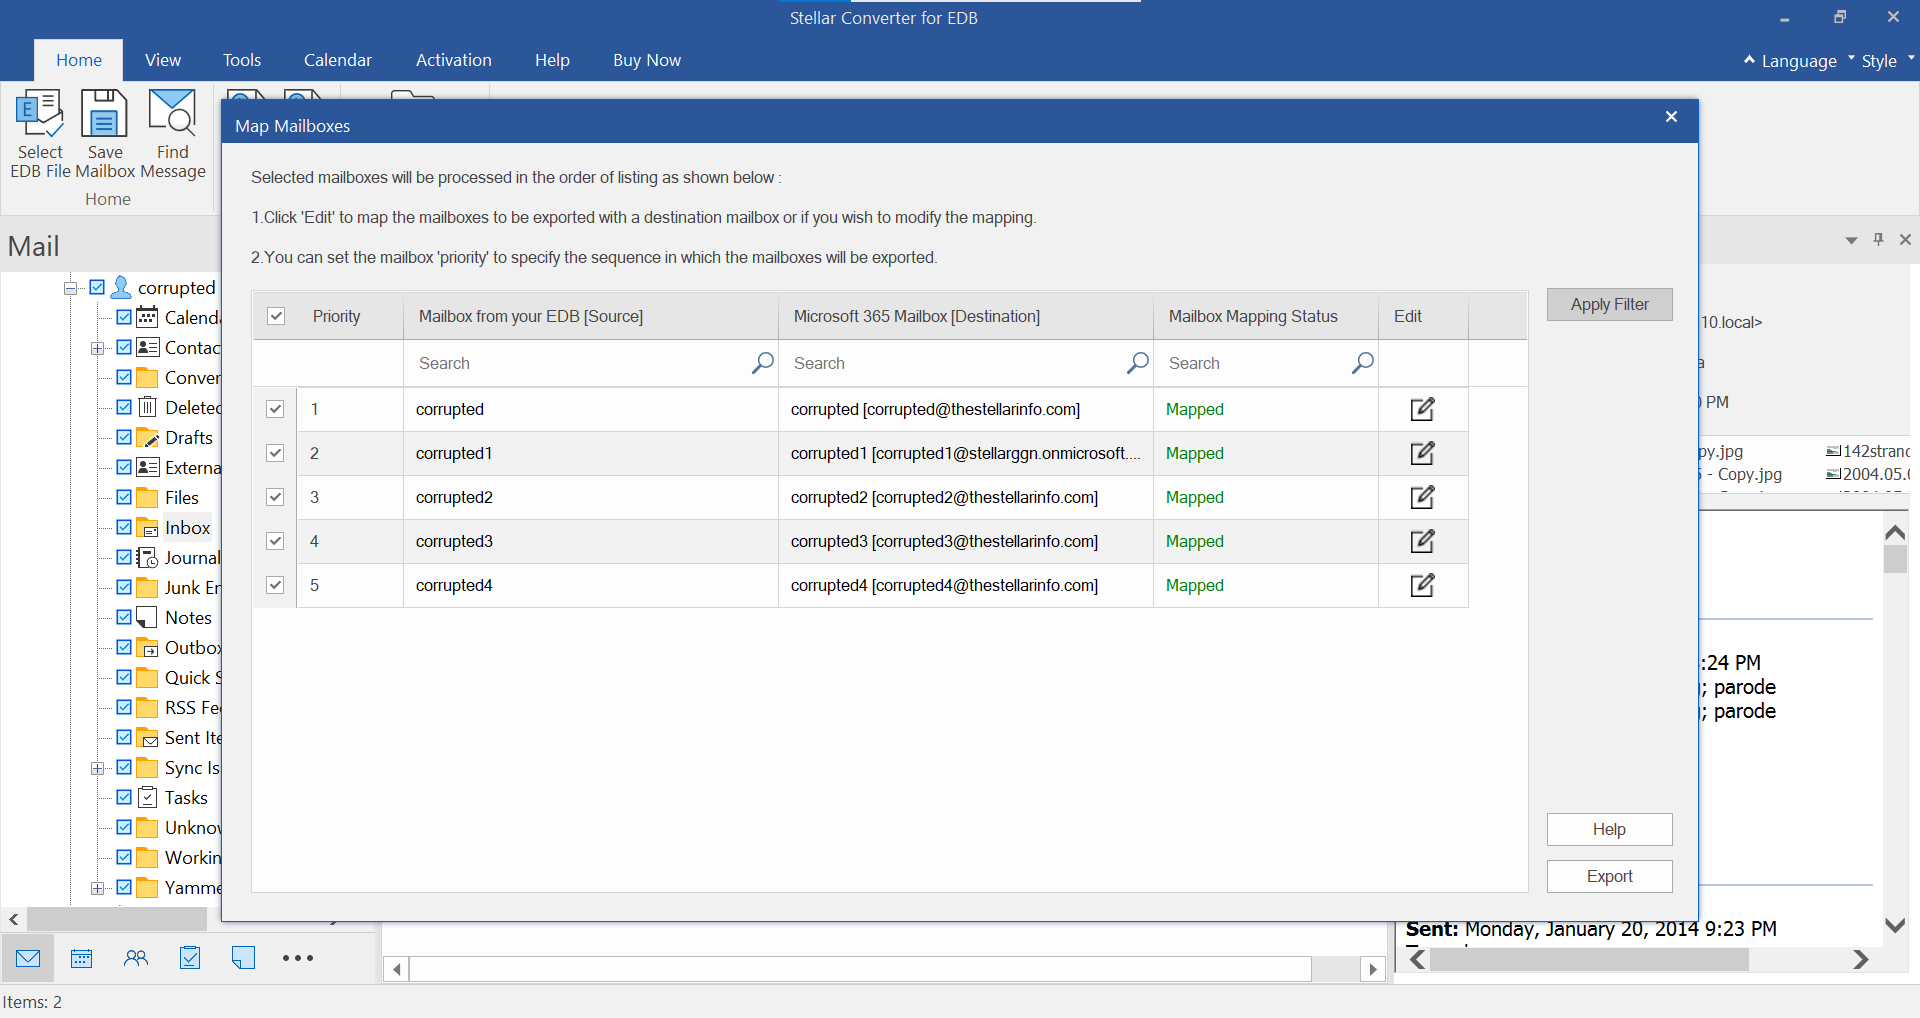
- Map Mailboxes screen appears. This screen can be used for functions such as setting priority to export the mailbox data and mapping source mailboxes to desired destination mailboxes. Then click on Apply Filter
- Apply Filter dialog box opens.
Exclude: This filter allows users to exclude mails from Junk Mail Folder and Deleted Mail Folder.
Date Range: This filter allows the user to specify a starting and ending date for which the user wants to include the mails for saving/ exporting.
Sender IDs to be excluded: This filter allows the user to exclude the mails from a list of specified senders. To exclude the mails, enter the complete E-mail addresses of the sender and click on Add to List. The mentioned E-mail addresses will be listed in the E-mail addresses list box. Click Next.
-
Click Next to apply the filter and export filtered mailbox data to specified Office 365.
Note: You can also use the Apply Filter option to save filtered data in PST, MSG, EML or RTF format.
- Select the checkbox for Office 365