Stellar Repair for MS SQL

4.5. Preview and Save MDF Files
After you complete the repairing process successfully, Stellar Repair for MS SQL shows preview of corrupted database files. The left pane displays list of items (Tables, Views, Synonyms, Defaults, Data Types and more) in a tree like structure, upper right pane displays the contents of the item selected in the tree view and bottom pane shows message log. A sample screen is displayed below:

By default, all the check boxes of the tree view are selected. You can click on the item in the tree view to preview its content.
Note: The software performs a counting of records present in the database after repairing process is completed. The time taken in counting depends on the number of records present in the database. You can stop the counting of records to speed up repair process without affecting the repair results.
To save the repaired file to MS SQL database:
-
After the repairing process gets completed, click Save option from File ribbon.
-
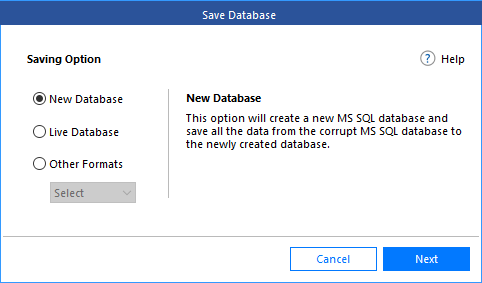
Specify whether you want to save the repaired database in New Database, Live Database or Other formats such as CSV, XLS or HTML format by selecting the appropriate radio button.
To save the repaired database as a completely New database, follow the steps mentioned below:
- Select New Database radio button from Saving option in Save Database dialog box.
-
Click Next. A Connect to Server dialog box appears.
-
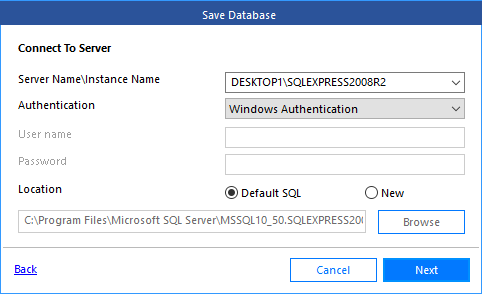
Enter Server Name/Instance Name.
-
Choose the Authentication method from the drop down list to connect the server:
-
If the authentication method selected is Windows Authentication, you need not enter any user name and password:
-
-
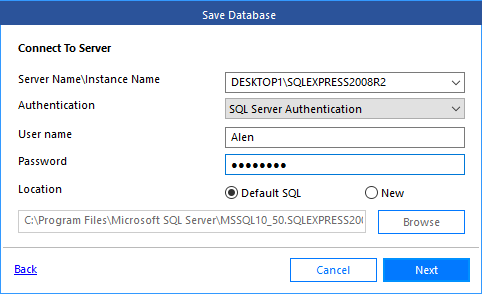
If the selected authentication method is SQL Server Authentication, enter the server user name and password:
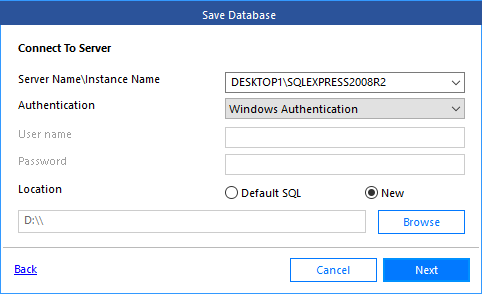
- Select the Location from Default SQL or New for saving the repaired MDF file.
-
If you have selected the Location as New, click Browse to select the folder where you want to save the repaired file.
-
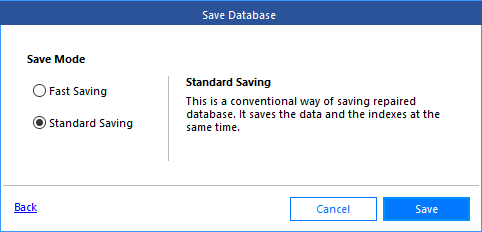
- Click Next. Select the Save Mode option and click Save to continue the process.
-
If you want to save large database, select Fast Saving radio button.
-
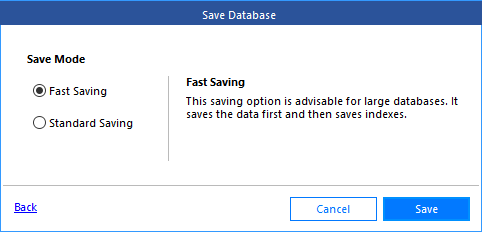
- If you want to save the data and indexes at the same time, select Standard Saving radio button.
-
Click Save button to save the repaired MS SQL Database file.
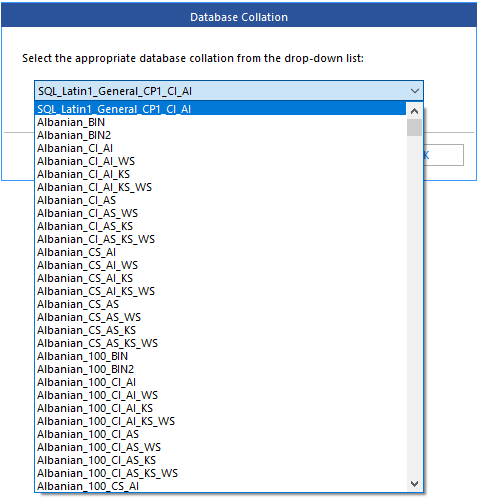
Note: If database file version is selected initially, In this case Database Collation screen appears while saving the repaired database file. Select appropriate database collation from the drop-down list and click OK to continue the further saving process.
-
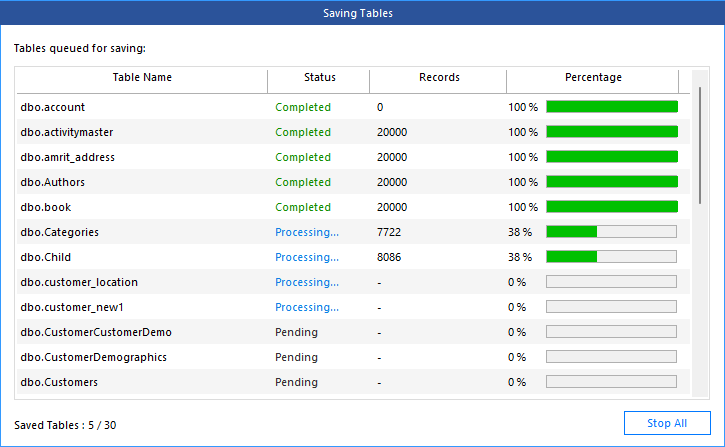
Saving Tables dialog box appears that consists of four columns as follows:
-
Table Name: This column provides a list of Tables from the repaired file that you have sorted from previous screen for export.
-
Status: This column provides information about the table whether the save process is Completed, Processing, Pending, Aborted.
-
Records: This column provides the total number of items processed from the source to the destination Table.
-
Percentage: This column provides information about the progress of the saving process in percentage.
Stellar Repair for MS SQL can process up to four tables at the same time. You can stop the saving process using the steps as follows:
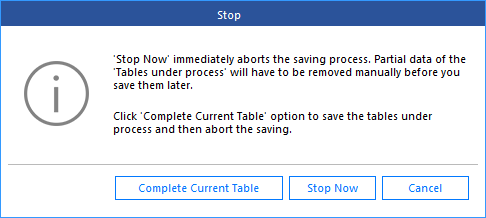
- To stop the saving tables process, click Stop all button. A Stop dialog box appears to confirm your action as given below:
-
If you want to save the tables that are currently being processed and then stop the saving process, click Complete Current Table.
-
If you do not want to complete the saving of tables that are currently being processed and stop the saving process, click Stop Now. If you immediately stop the process, only the partial data of the table that is currently being processed will be saved in the destination table.
-
To go back to the Saving Table screen and continue saving the tables, click Cancel.
-
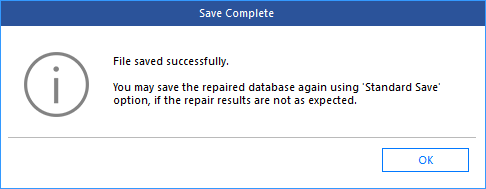
A message is displayed after the process is completed successfully.
Note: After saving the repaired files if you do not find the expected result you can use the "Standard Save" option and resave the repaired files.
To save the repaired database as a completely Live Database, follow the steps mentioned below:
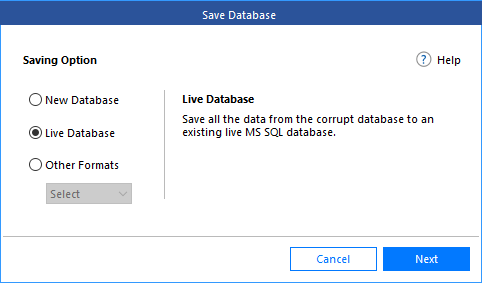
- Select Live Database radio button from Saving option in Save Database dialog box.
-
Click Next. A Connect to Server dialog box appears.
-
Enter Server Name/Instance Name.
-
Choose the Authentication method from the drop down list to connect the server:
-
If the authentication method selected is Windows Authentication, you need not enter any user name and password:
-

-
If the selected authentication method is SQL Server Authentication, enter the server user name and password:

-
Select Existing Database from drop down list.
Note: Click Refresh Button, If any database is not listed in drop down list and is there in the SQL Server.
- Click Next. Select the Save Mode option and click Save to continue the process.

-
If you want to save large database, select Fast Saving radio button.
-
If you want to save the data and indexes at the same time, select Standard Saving radio button.

Note: If database file version is selected initially, In this case Database Collation screen appears while saving the repaired database file. Select appropriate database collation from the drop-down list and click OK to continue the further saving process.

- Saving Tables dialog box appears that consists of four columns as follows:

-
Table Name: This column provides a list of Tables from the repaired file that you have sorted from previous screen for export.
-
Status: This column provides information about the table whether the save process is Completed, Processing, Pending, Aborted.
-
Records: This column provides the total number of items processed from the source to the destination Table.
-
Percentage: This column provides information about the progress of the saving process in percentage.
Stellar Repair for MS SQL can process up to four tables at the same time. You can stop the saving process using the steps as follows:
- To stop the saving tables process, click Stop all button. A Stop dialog box appears to confirm your action as given below:

-
If you want to save the tables that are currently being processed and then stop the saving process, click Complete Current Table.
-
If you do not want to complete the saving of tables that are currently being processed and stop the saving process, click Stop Now. If you immediately stop the process, only the partial data of the table that is currently being processed will be saved in the destination table.
-
To go back to the Saving Table screen and continue saving the tables, click Cancel.

-
A message is displayed after the process is completed successfully.
Note: After saving the repaired files if you do not find the expected result you can use the "Standard Save" option and resave the repaired files.
To save the repaired file in Other Formats:
-
Select Other formats radio button from Saving option in Save Database dialog box and Select the required file format.

-
Click Next. Click Browse to select the desired folder where you want to save the repaired file and click Save button.

Note: By default open destination folder after saving repaired database checkbox is checked. If you do not want to open the folder you can uncheck the checkbox.
Note: If database file version is selected initially, In this case Database Collation screen appears while saving the repaired database file. Select appropriate database collation from the drop-down list and click OK to save repaired database file.

-
The file will be saved in the desired format.
Note: Perform repair process on the copy of database and make sure MS SQL Server is running during repair process.
Related Links:
 3. Getting Started