Stellar Migrator for Outlook

4.3.1. Microsoft 365
Stellar Migrator for Outlook provides a feature to migrate the scanned mailbox to your Microsoft 365 accounts. You can also use apply advance filter option to migrate only specific mailbox to Microsoft 365 account.
Note:
-
To use Migrate to Microsoft365 option, make sure that you have an active internet connection.
-
Before you start the migrating process of scanned files make sure that Microsoft Outlook is closed.
-
You must have a Microsoft 365 user account configured in MS Outlook for migrating data to Microsoft 365 format.
Steps to migrate scanned mailbox to Microsoft 365:
-
Run Stellar Migrator for Outlook.
-
See Select and Scan Mailbox, to know how to select and scan mailbox for migrating.
-
After scanning the mailbox, see Connect to Licensing Account to know how to connect licensing portal.
Note: Only for the first time, you will be prompted to enter user name and password for connecting to the licensing account.
-
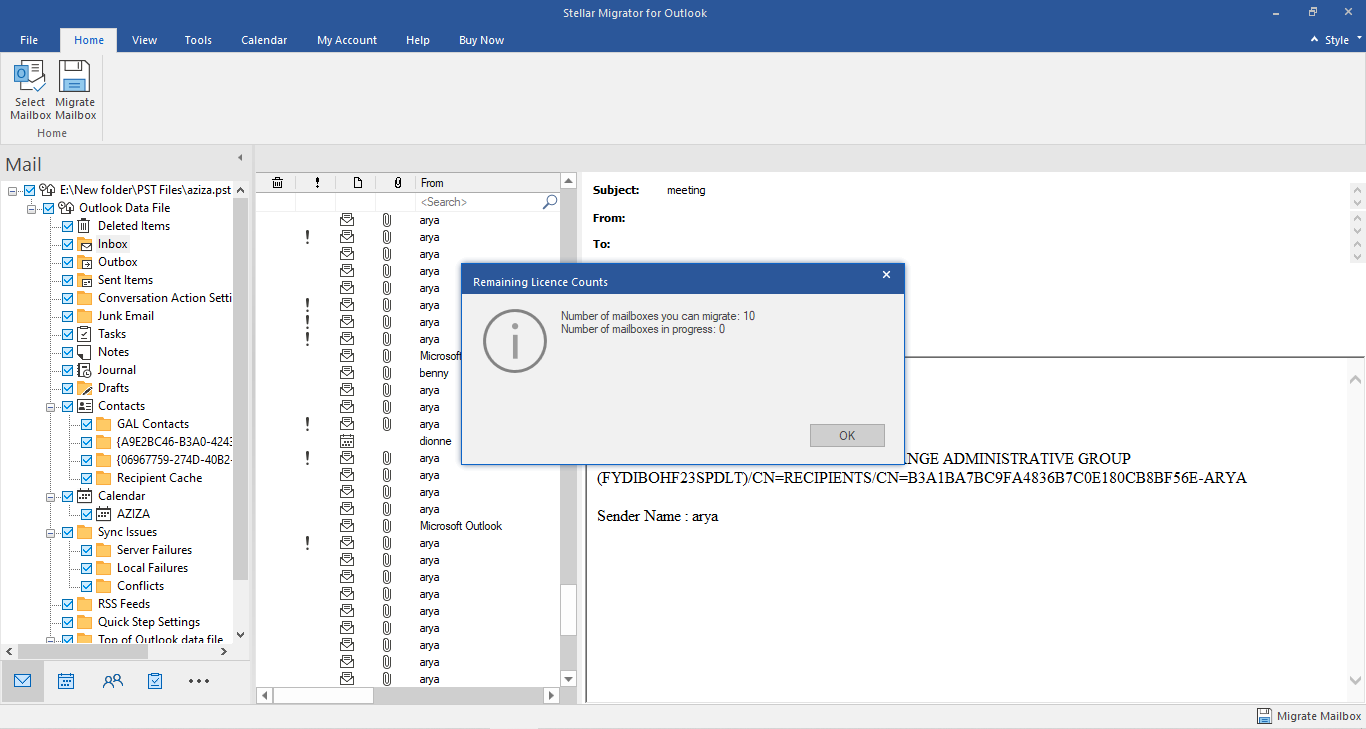
Click Migrate Mailbox from Home ribbon, Remaining Licence Counts screen appears. It shows the number of software licenses remaining and progress license counts.

-
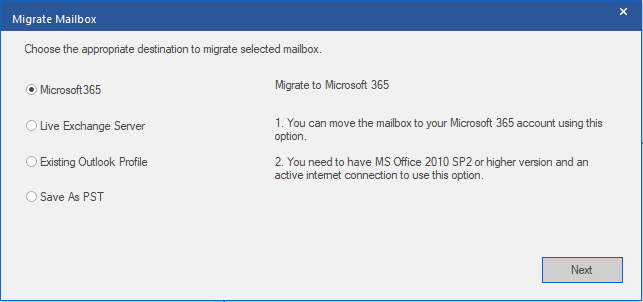
Click OK. Migrate Mailbox screen appears.

-
Choose Microsoft365 and click Next.
-
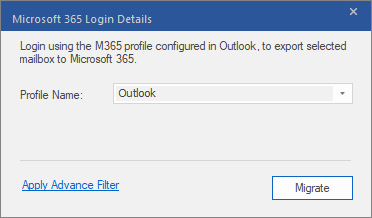
Microsoft 365 Login Details window appears. Choose only Microsoft 365 profile name from the dropdown list.

Note:
-
Recover Deleted Items check box is selected by default, uncheck it if deleted repair items are not required.
-
Click Apply Advance Filter if you want to apply filter on the repaired files.
-
Click Migrate to start the migrating process.
-
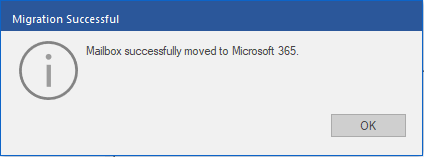
After the migrating process is completed, Migration Successful dialog box appears with message "Mailbox successfully moved to Microsoft 365".

-
Click OK to complete the process.
 3. Getting Started