Stellar Log Analyzer for MS SQL

4.3.1. Save Log Tables Data
If you only want to save the data of the log (LDF) file then Log Tables Data save option should be used.
Steps to save Log Tables Data:
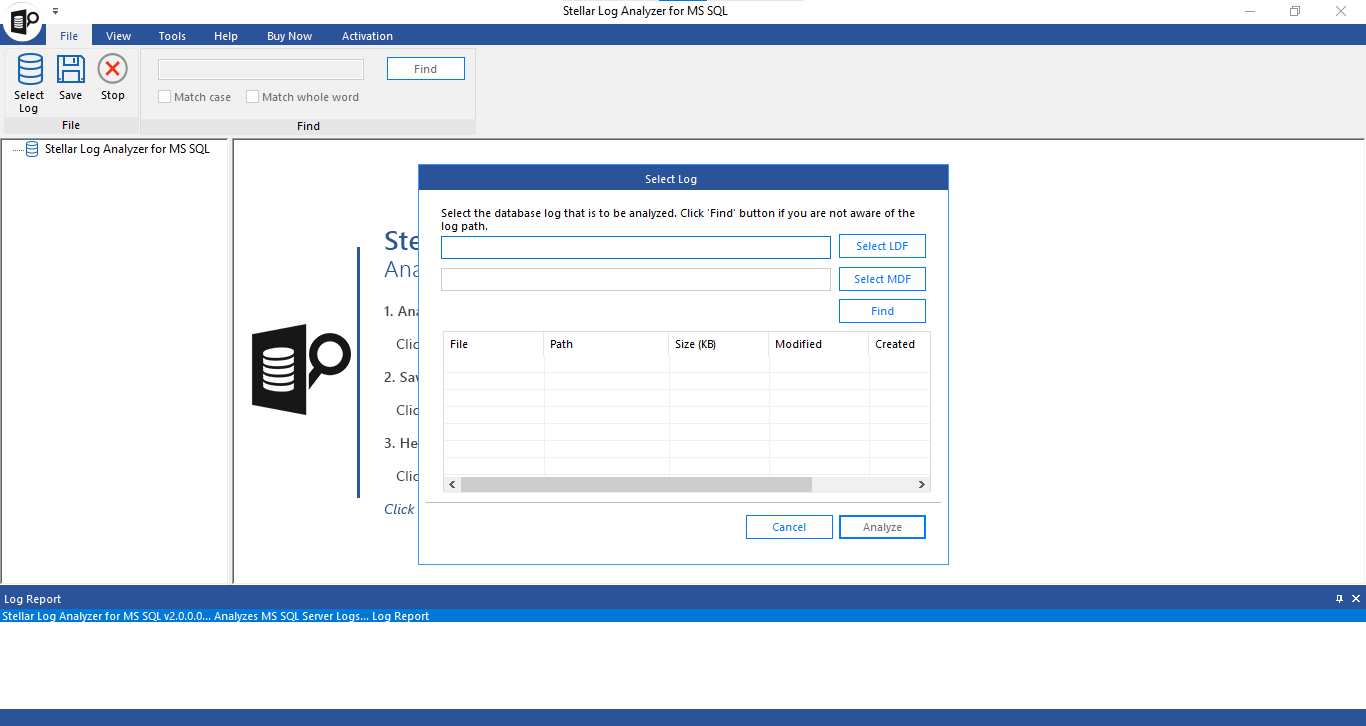
- Run Stellar Log Analyzer for MS SQL.
-
See Select or Find MS SQL Log (LDF) File to know how to select/find the log (LDF) file.
-
See Analyze LDF File to know how to analyze the selected log (LDF) file.
-
Click on Save icon from the File ribbon OR select Save option from the Quick Access toolbar to save the LDF file.
-
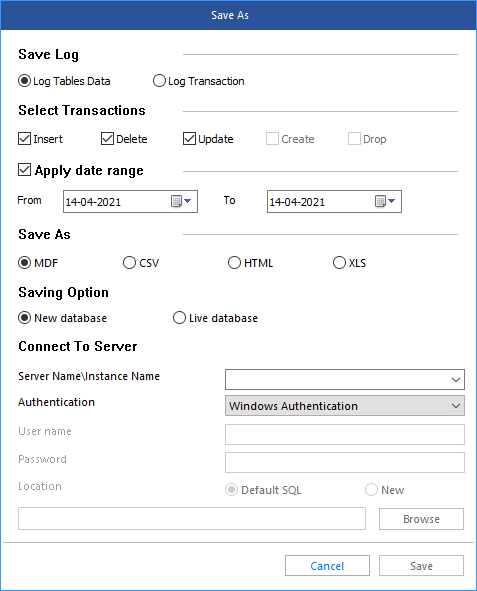
A Save As window appears. Select Log Tables Data from Save Log section.
-
Check against the required checkboxes, under Select Transactions (Insert, Update or Delete) that you want to save in the database.
-
Check against Apply date range checkbox, if you want to apply date filters to save the results from a particular time period. Choose From to To dates between which you want to apply the filter.
-
There are four different file formats to save LDF file. Choose any one of them from Save As section.
-
MDF
-
CSV
-
HTML
-
XLS
-
Steps to save Log Tables Data to MDF file:
- Run Stellar Log Analyzer for MS SQL.

-
See Select or Find MS SQL Log (LDF) File to know how to select/find the log (LDF) file.
-
See Analyze LDF File to know how to analyze the selected log LDF file.
-
Click on Save icon from the File ribbon OR select Save option from the Quick Access toolbar to save the LDF file.
-
A Save As window appears. Select Log Tables Data from Save Log section.

-
Check against the required checkboxes, under Select Transactions (Insert, Update or Delete) that you want to save in the database.
-
Check against Apply date range checkbox, if you want to apply date filters to save the results from a particular time period. Choose From to To dates between which you want to apply the filter.
-
Choose MDF option from Save As section.
-
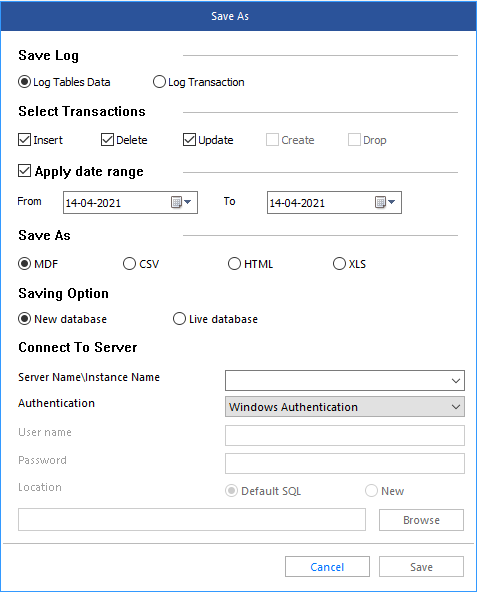
There are two saving options, under Saving Option section:
-
New Database: You can select this option, if you want to save the Log Tables Data in a new database.
-
-
Under Connect to Server fill the following entries:
-
Enter Server Name \ Instance Name
-
Authentication: Choose the Authentication method from the drop-down list for logging into the server:
-
-
If the authentication method selected is Windows Authentication, you need not enter the user name and password.
-
If the selected authentication method is SQL Server Authentication, enter the server Username and Password.
-
Select the location to save the LDF file:
-
Default SQL: Saves the database to the default location.
-
New: You can save the database at your desired location. Click Browse and select the location where you want to save your database.
-
After filling the information, click Save to save the Log Tables Data to MDF file format.
-
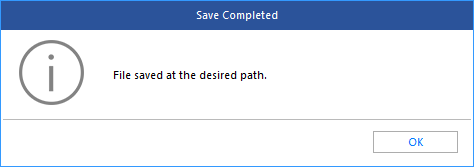
After successful completion, a dialog box appears with the message, "File saved at the desired path".
-
Click OK to finish the process.
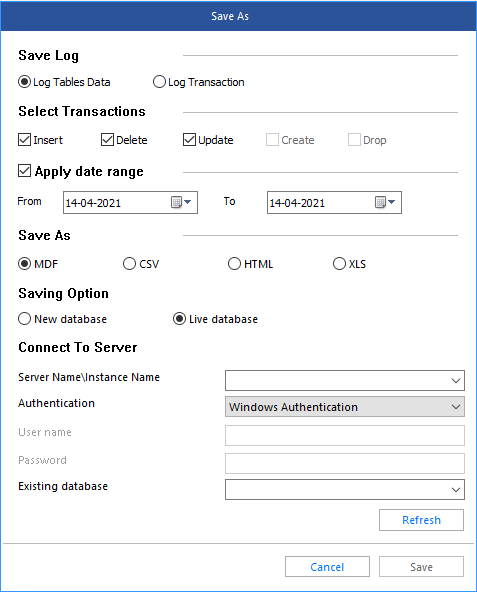
- Live Database: You can select this option if you want to save Log Tables Data in an existing database.
-
Under Connect to Server fill the following entries:
-
Enter Server Name \ Instance Name
-
Authentication: Choose the Authentication method from the drop-down list for logging into the server:
-
If the authentication method selected is Windows Authentication, you need not enter the user name and password.
-
If the selected authentication method is SQL Server Authentication, enter the server Username and Password.
-
Existing database: From the drop-down list, select the database in which you want to save the LDF file after analysis.
-
Click Save to save the Log Tables Data to MDF file format.
-
After successful completion, a dialog box appears with a message, "File saved at the desired path".

- Click OK to finish the process.
Note: If you want to refresh the Existing database list, click on Refresh.
Steps to save Log Tables Data to CSV, HTML or XLS file format:
- Run Stellar Log Analyzer for MS SQL.

-
See Select or Find MS SQL Log (LDF) File to know how to select/find the log (LDF) file.
-
See Analyze LDF File to know how to analyze the selected log LDF file.
-
Click on Save icon from the File ribbon OR select Save option from the Quick Access toolbar to save the LDF file.
-
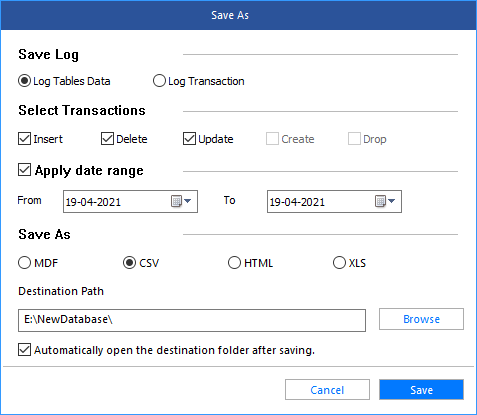
A Save As window appears. Select Log Tables Data from Save Log section.
-
Check against the required checkboxes, under Select Transactions (Insert, Update or Delete) that you want to save in the database.
-
Check against Apply date range checkbox, if you want to apply date filters to save the results from a particular time period. Choose From to To dates between which you want to apply the filter.
-
Choose the desired format (CSV, HTML or XLS) from Save As section.
-
Click Browse to save the LDF file to a destination path.
Note: Check against Automatically open the destination folder after saving checkbox if you want to immediately open the saved LDF file folder.
-
Click Save to save the Log Tables Data to (CSV, HTML or XLS) file format.
-
After successful completion, a dialog box appears with a message, "File saved at the desired path".

-
Click OK to finish the process.
 3. Getting Started