Stellar Data Recovery
- 1. About Stellar Data Recovery
- 2. About this Guide
 3. Getting Started
 4. How to
- 4.1. Assign Full Disk Access
- 4.2. Recover Data from System Disk with High Sierra and Above
- 4.3. Recover Data from Existing Volume
- 4.4. Recover Data from Lost Drive/Unallocated Partition
- 4.5. Recover Data from CD/DVD
- 4.6. Recover a Lost Partition
- 4.7. Recover Data from a Non-Booting Mac/Crashed Computer
 4.8. Work with Disk Images
- 4.9. Preview the Scan Results
 4.10. Perform a Deep Scan
- 4.11. Save and Resume Scan Information
- 4.12. Save the Recovered Files
 4.13. Change Preferences
 4.14. Other Options
- 4.15. Access Data View Options
- 5. Supported File Types
- 6. Frequently Asked Questions (FAQs)
- 7. About Stellar

4.10.1. Enable Kernel Extension (KEXT)
Stellar Data Recovery provides recovery of data from mac models with a T2 security chip. If you have T2 security chip system, then you need to allow the software for Kernel Extension (KEXT). KEXT is digitally signed by Stellar® and verified by Apple®. Thus, your system and its privacy is protected.
Note: While performing a deep scan of any volume, Stellar Data Recovery software is required to enable Kernel Extension (KEXT). This process only needs to be set when starting a deep scanning process for the first time.
Steps to Allow Kernel Extension (KEXT):
- Run Stellar Data Recovery.
- From What to Recover screen, select the desired type of data, i.e., Documents, Emails, Videos, Audio or Photos you wish to recover. Everything is selected by default. You can also customize your scan by selecting among the available types of data.

-
Click Next.
-
From Recover From screen, select the volume from which you want to recover the data.
.png)
- Select Deep Scan
 directly from here, if you want to perform a comprehensive scan of the selected volume. Then click on Scan.
Note: If you don't want to select Deep Scan from Recover From screen, then skip Step 6 and directly click on Scan button for quick volume scanning.
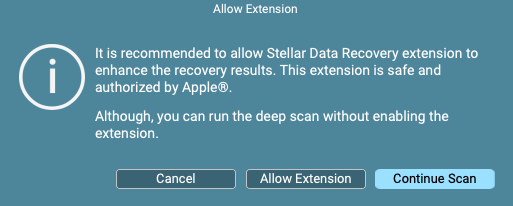
- The Allow Extension dialog box is displayed. Click Allow Extension to proceed. You can also select Continue Scan if you wish to continue the deep scan without allowing extension.

Note: For further instructions on how to Allow Extension, follow the steps mentioned from Step 11.
-
Click Stop
 button, if anytime you need to abort the scanning process.

-
Once the scan process completes, details of the files and folder found would be displayed in a dialog box as shown below:

-
Click OK to finish the process.
-
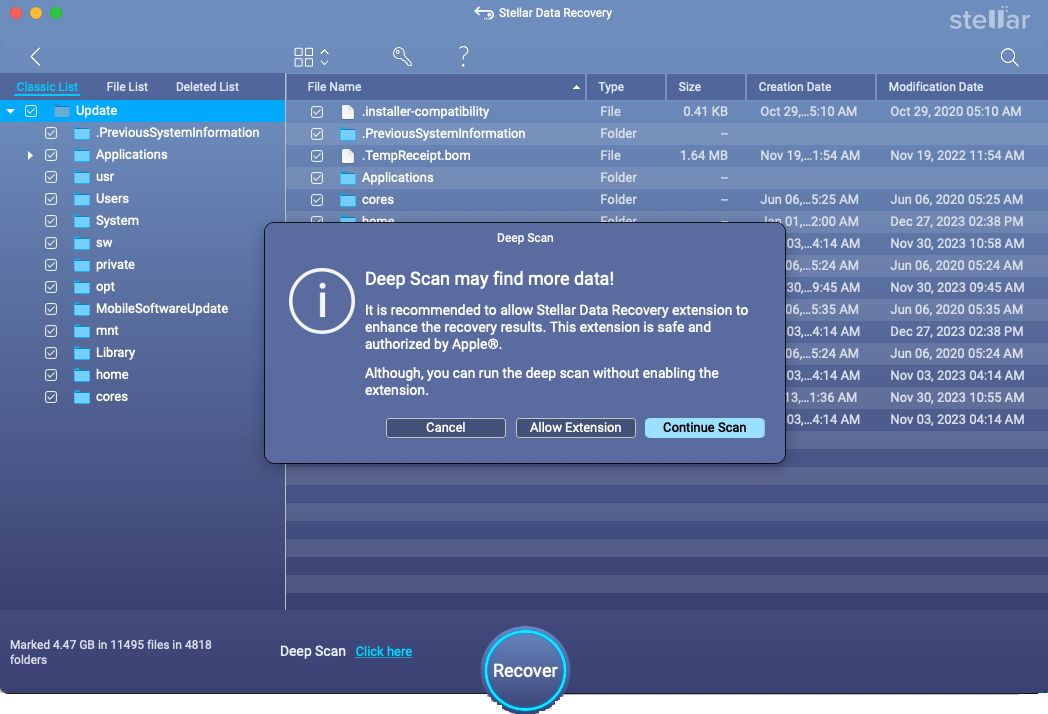
If you have done a quick scan from Recover From screen and your expected data is not recovered then click on click here link from preview window to perform deep scanning. Deep Scan dialog box is displayed prompting to allow Kernel Extension (KEXT) for performing a deep scan.

Note: You can also select Continue Scan if you wish to continue the deep scan without allowing extension.
- Click Allow Extension button, a window appears showing a short procedure to allow the extension. Click Next.

- System Extension Blocked window is displayed with the application name that requires Kernel Extension (KEXT).

Note: There are two cases when System Extension Blocked window is displayed:
-
Case 1: When your system has a single application that requires Kernel Extension.
-
Case 2: When your system has multiple applications that require Kernel Extension.
For Case 1, follow the instructions given from Step 13 to Step 18.
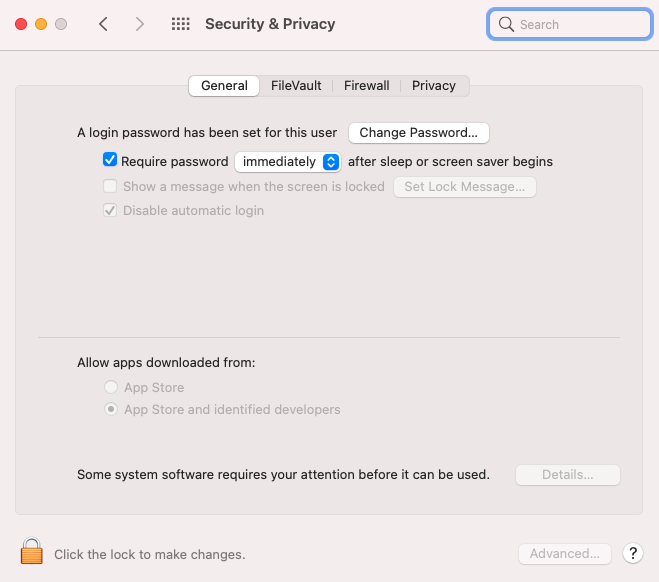
- Click Open Security Preferences and wait for the system to open the Security & Privacy settings.
Note: In some cases, if you click OK on the System Extension Blocked dialog box instead of Open Security Preferences, the Stellar Data Recovery might not give you the option to open the Security & Privacy settings when you run scan the next time. In that case, you need to manually open the Security & Privacy settings using the procedure given in manually open the Security & Privacy settings in macOS.

-
On the bottom left corner of the window, click the lock
 icon.
icon. -
Use your Touch ID (if available) or enter your system administrator credentials and click Unlock. This enables the Allow button on the Security & Privacy window.
-
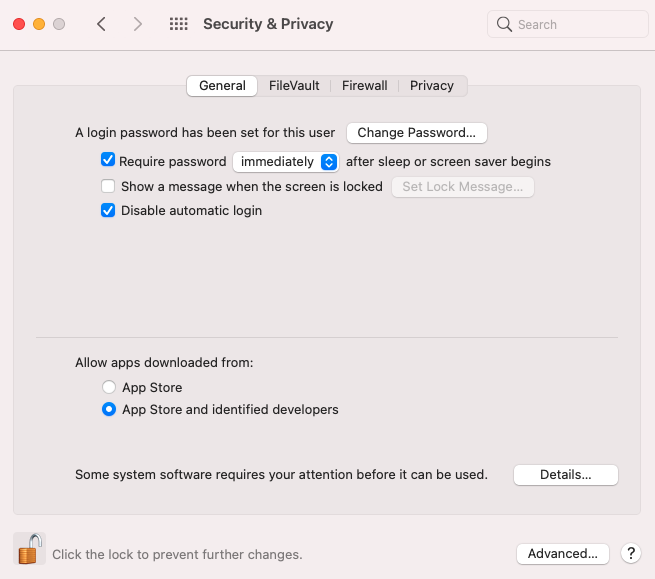
Click Allow, it allows macOS to load the extension signed by “Stellar Data Recovery”.

-
Close Security & Privacy window to go back to Stellar Data Recovery.
-
Click Continue on the Allow Extension window to resume your scan of the System Disk.

For Case 2, follow the instructions given from Step 19 to 25:
- On Allow Extension window, click Next button. If your system has multiple applications that support Kernel Extension then System Extension Blocked window is displayed multiple times with all the available application names.
- Click Open Security Preferences and wait for the system to open the Security & Privacy settings.

Note: In some cases, if you click OK on the System Extension Blocked dialog box instead of Open Security Preferences, the Stellar Data Recovery might not give you the option to open the Security & Privacy settings when you run scan the next time. In that case, you need to manually open the Security & Privacy settings using the procedure given in manually open the Security & Privacy settings in macOS.
- On the bottom left corner of the window, click the lock
 icon.
icon.
- Use your Touch ID (if available) or enter your system administrator credentials and click Unlock. This enables the Details button on the Security & Privacy window.

-
Click Details button.
-
A window appears listing the available application names along with a checkbox. Select Stellar Data Recovery Inc. checkbox and click OK button.

-
A window is displayed with a message, ‘A restart is required before new system extensions can be used’. Click on Restart button.
