MS Outlook benefits its users in many ways and one of them is storage of mailbox data on the local hard drive of user’s computer in the form of Outlook PST file. Outlook’s Personal Storage Table file or Outlook PST file contains user’s email messages, contacts, calendar entries, etc. For successful working of Outlook, it is required to keep PST safe and secure. Therefore, some people keep their PST password-protected.
However, password-protection does not ensure that your PST file never gets corrupt or encounters any other PST damage issues; instead, a password-protected PST file as well encounters corruption problems. There are many reasons that are responsible for the corruption of PST file, which may vary from virus infection to closing Outlook improperly to oversized PST.
In such situations, tools like ‘Inbox Repair Tool’ can do the needful. The ‘Inbox Repair Tool’ is an inbuilt utility of Outlook that repairs corrupt PST file and restores data without damaging or altering it. However, it can only handle the PST corruption issues that are related to PST header and some other smaller issues; but if PST file is severely damaged, then this tool may not help you.
For such cases, use of professional PST repair software like Stellar Repair for Outlook is recommended. The software can repair corrupt or damaged Outlook PST file without causing data loss. Moreover, you need not panic for your PST file is password-protected, as this efficient utility can repair even the password-protected file. Mentioned below are the steps to >repair a corrupt PST file that is password-protected:
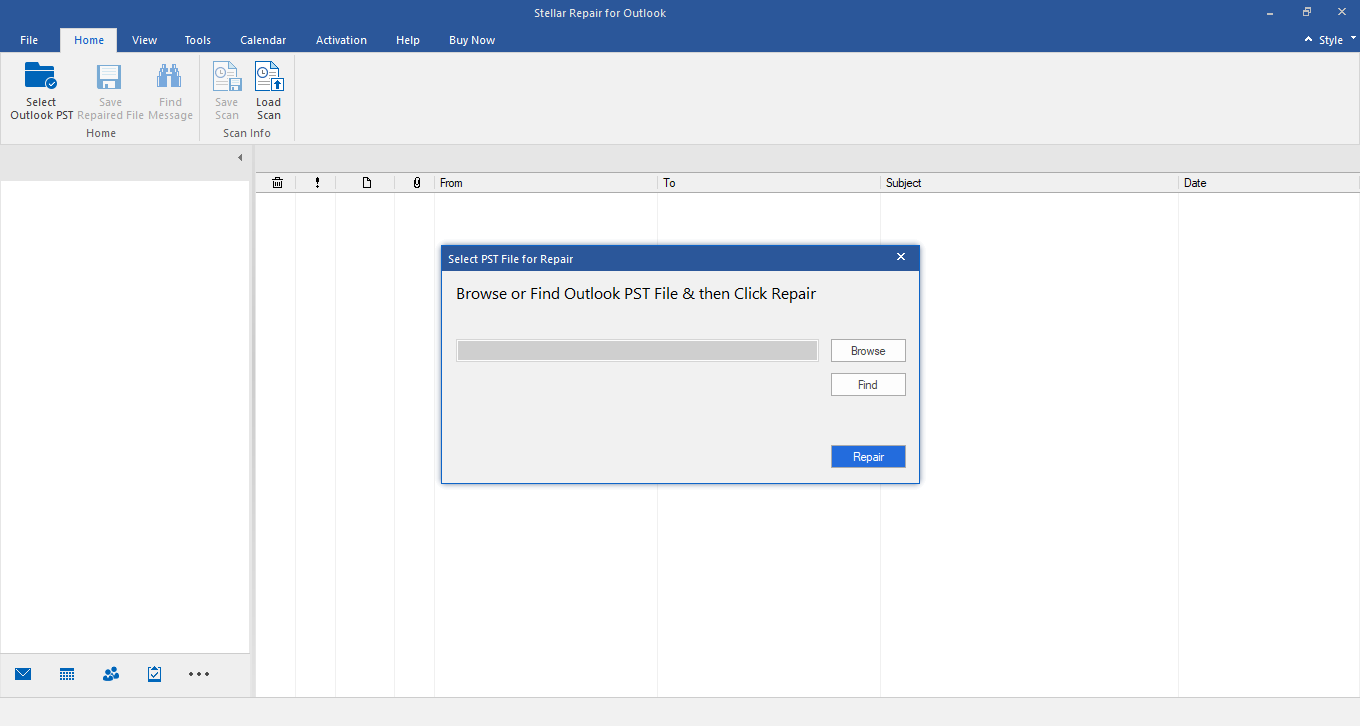
- Open ‘Stellar Repair for Outlook’ software. On this main screen, if you know the location of your PST file, then click ‘Browse’ option to select Outlook file. However, if its location is unknown, then click ‘Find’ button to search your PST file in drives and folders. After that, select your required PST file. Click the ‘Repair’ button to start the scanning of this selected PST file.

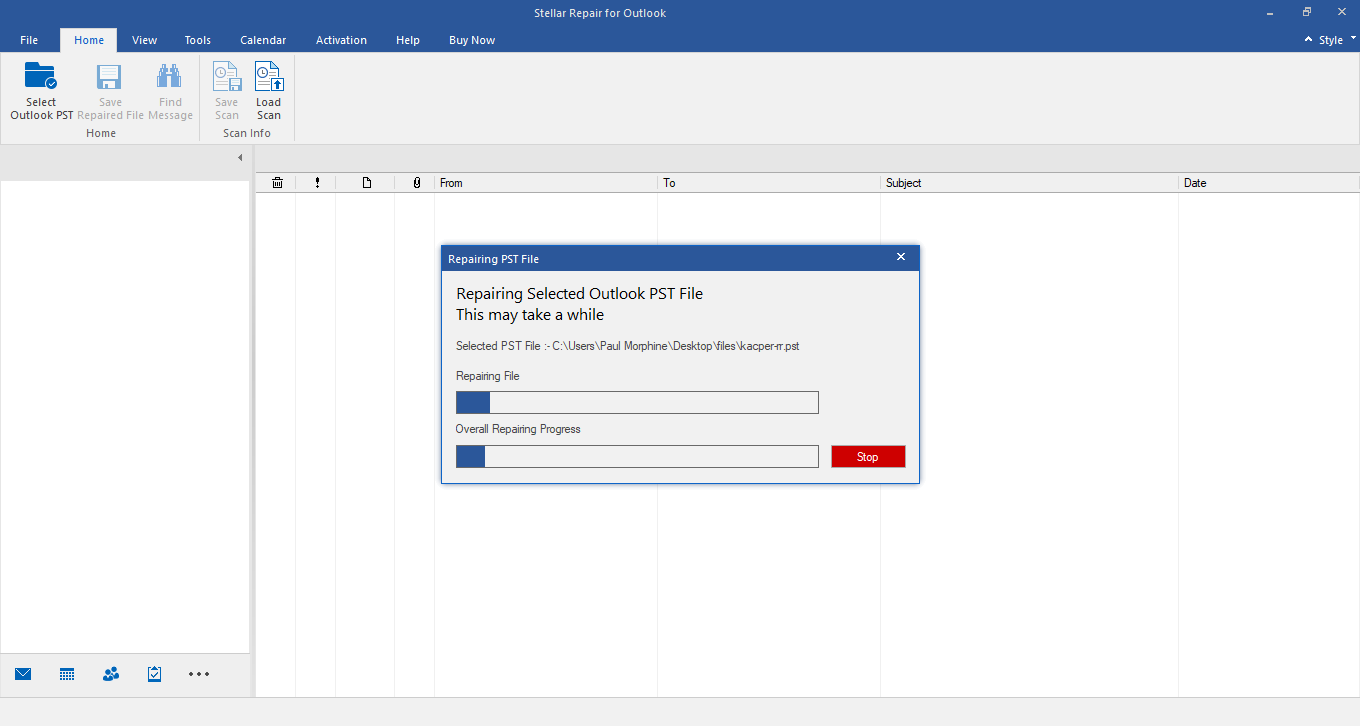
- The scanning process may take a few minutes to some hours in scanning your selected password-protected PST file, which entirely depends on the size of your PST file. You can anytime stop the scanning process by clicking the ‘Stop’ button that comes as soon as you click the ‘Start’ button.

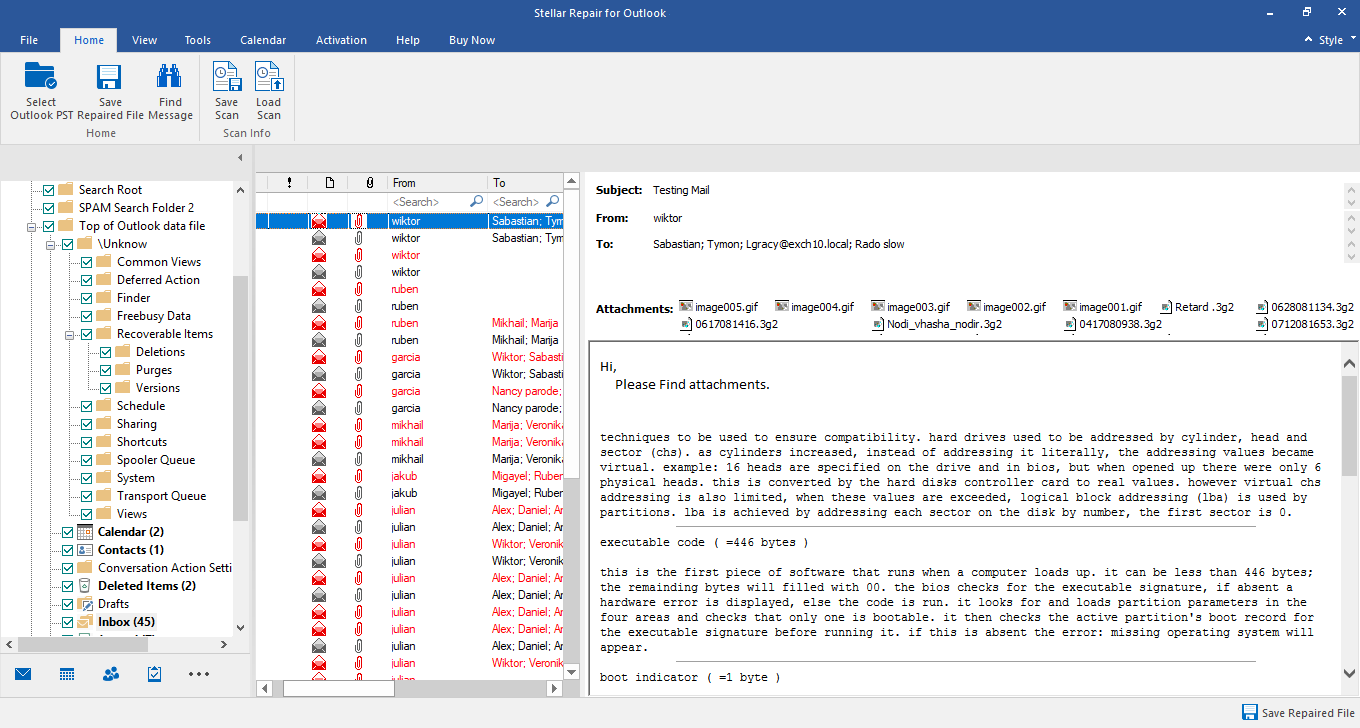
- All the recovered folders with the number of files in them are shown in the left pane inside the root node soon after the successful completion of the scanning process. To view the contents of a folder, click on it. You can click on an email message to read it.

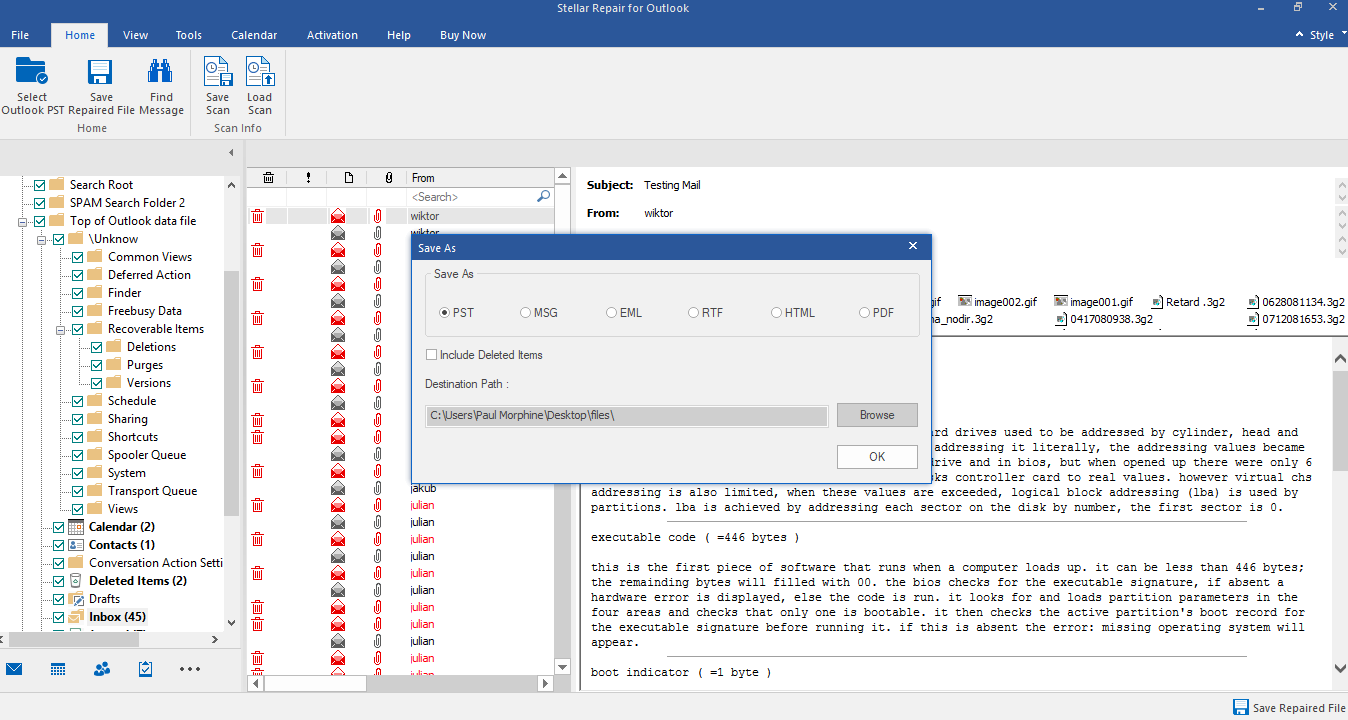
- On the above-mentioned interface, you can select or unselect the folders for recovery. After making your decision for selecting the specific folder for saving, click ‘Save Repaired File’ icon. Then click ‘Browse’ button to locate and select the location where you want to save your PST file. Click ‘OK’ twice.

This process does not ask for the password of your PST file, despite it is password-protected. However, the final PST file that you have saved at your desired location is not a password-protected one, and you can import the recovered PST file into MS Outlook for using it.


