Outlook PST is default file format to store Outlook mailbox data. Such files are stored on the user's local system and contain user mailboxes including messages, contacts, calendar entries, etc. However, such PST files need to be safe and free from any sort of errors. In order to maintain safety and security, most of us apply password to such PST files. Using a password is a safe practise; however, it does not guarantee any safety from corruption, virus attack, or other similar situations. A PST even gets corrupt if it gets oversized. A severe corruption can lead to deletion of important emails and other data from the user mailboxes.
To overcome such situations, you can make use of the ‘Inbox Repair Tool’ of the Outlook. It is an inbuilt utility to repair corrupt PST file and restores user mailboxes including messages, attachments, notes, tasks, etc. in its original format. However, the tool might not be helpful in case of severely damaged data. In such cases, it is always better to use a professional repair software like Stellar Repair for Outlook. The software easily recovers deleted mail items from the encrypted PST files. In addition, it can also recover data from PST files that are not password protected, without causing any further damage to the data.
You need to follow the below-mentioned steps to repair a password-protected corrupt PST file.
- Launch ‘Stellar Repair for Outlook’ software.
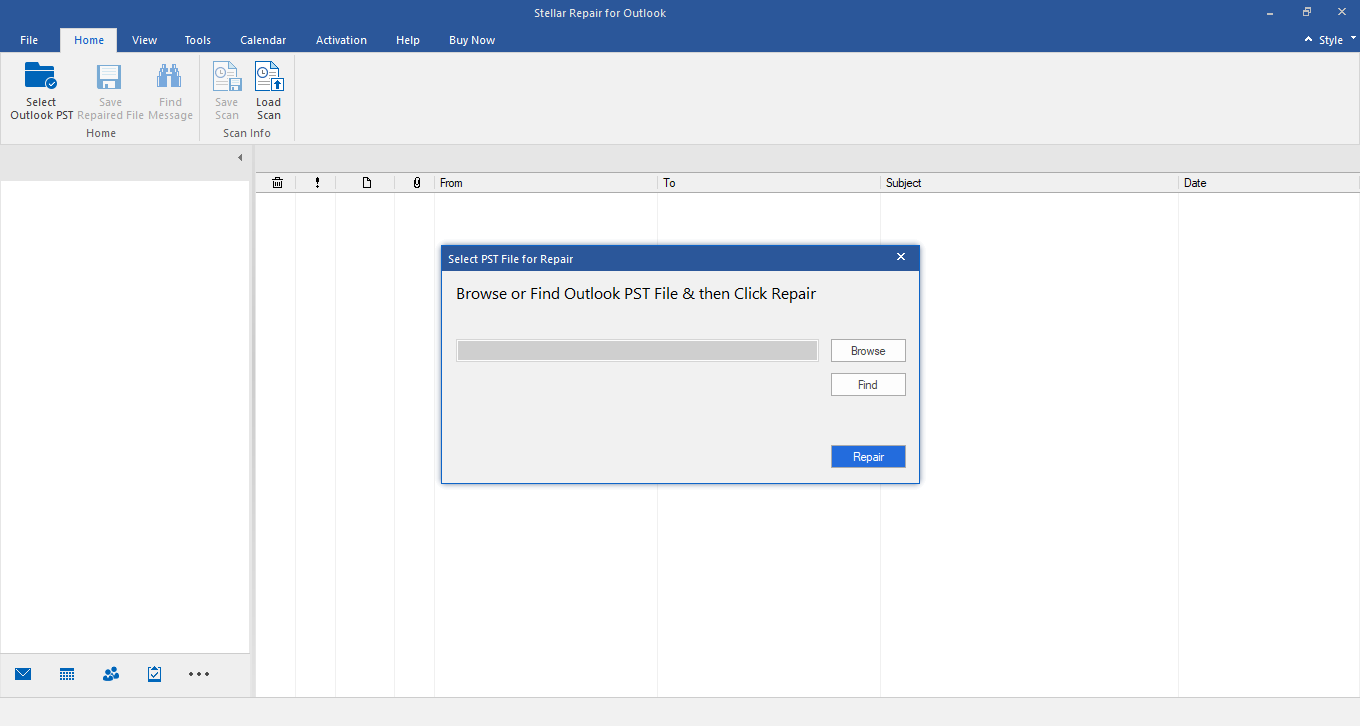
- A 'Select PST file for Repair' dialog box appears.
- Click ‘Browse’ option to select PST file, if you know the location of the PST file.
- In case the location is unknown, click ‘Find’ button to search your PST file. Browse to the drive/folder to select the PST file.
- Click the ‘Repair’ button to start the scanning of this selected PST file as shown below.

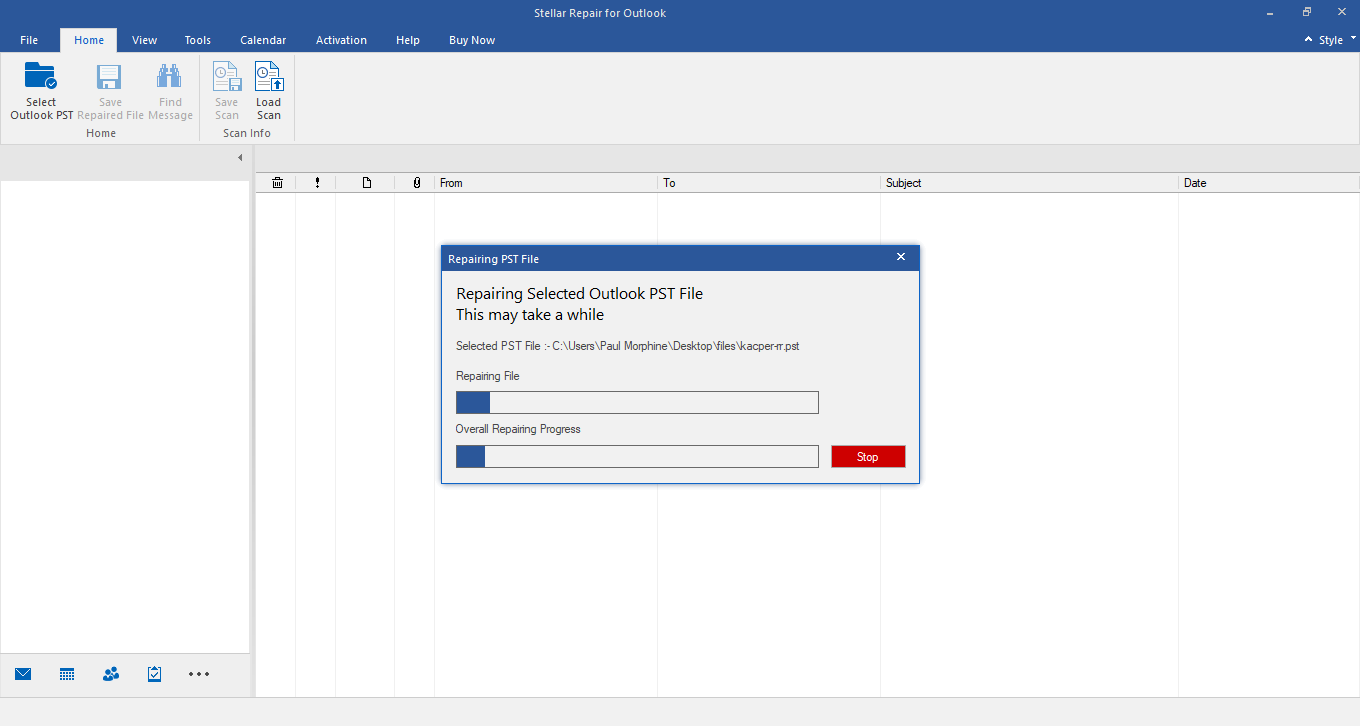
- The scanning process is shown in the status bar. The time taken to complete the scanning process completely depends upon the size of the PST file. Depending on the situation, it might take a few minutes to some hours.
- You can stop the scanning process anytime in between by clicking the stop button as shown below.

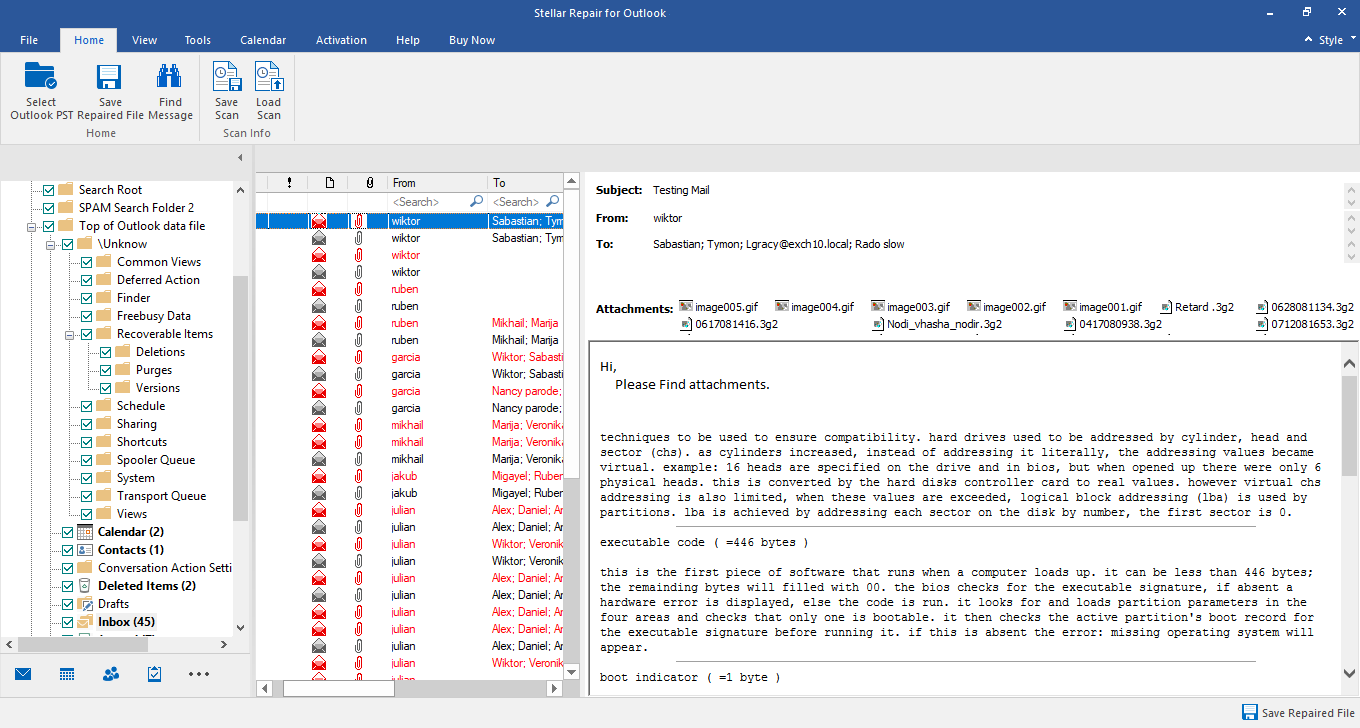
- Once the scanning is complete, the interface displays all the recovered files along with their folders in the left pane.
- You can click on any folder or file to view the content within it as shown below.

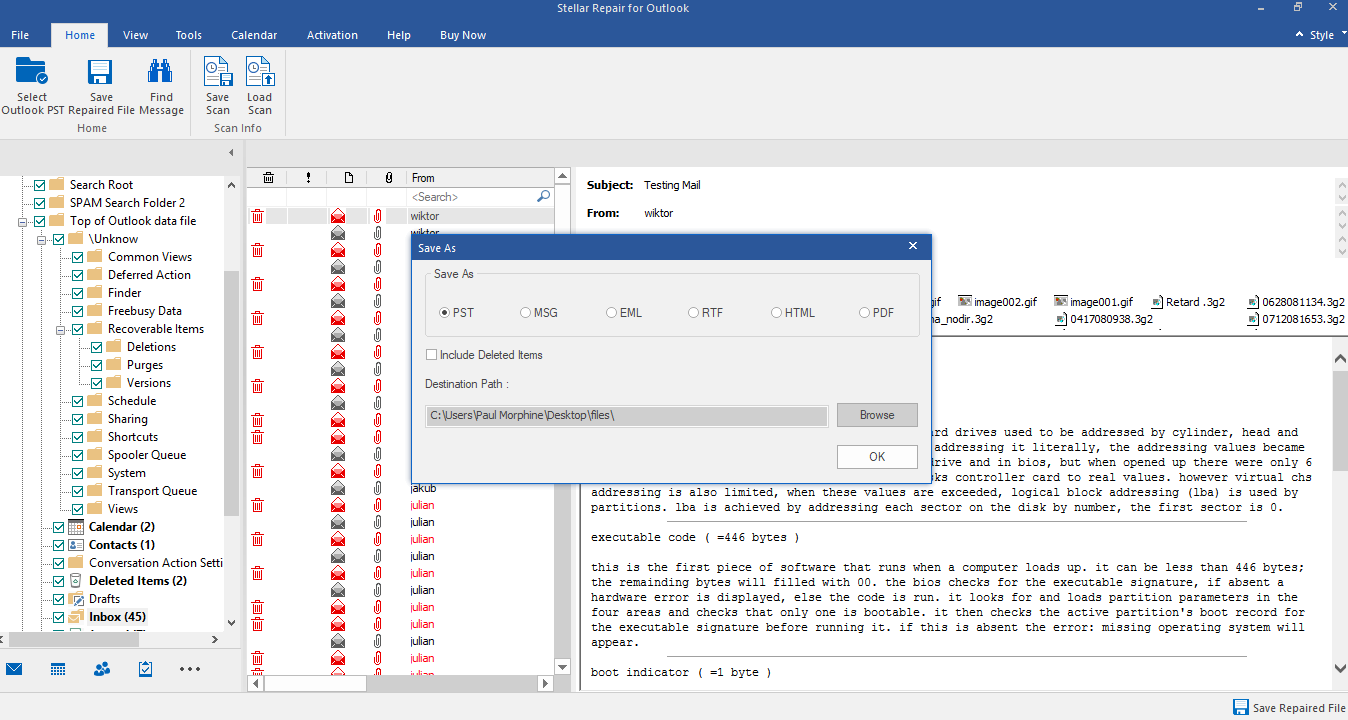
- Once you have verified the content, you can select the desired folders/files for recovery. Once selected, click ‘Save Repaired File’ icon on the menu bar.
- Click ‘Browse’ button to navigate to the location where you want to save your PST file as shown below.

- Click ‘OK’ twice.
Note: The process does not ask the password for the PST file in case it is protected, because of the fact of the tool supporting both protected and unprotected files. In fact, the newly saved PST file is also not a password protected and can be easily imported into MS Outlook.


