Almost all of the Mac based systems come with an unpartitioned single volume. However, most of us wish to have more than one partition on the system to organize our data. Even if you have purchased a new hard drive, you might wish to partition it into separate volumes to store different kinds of data. In addition, there could be a situation where you might need to further partition on an already partitioned drive or delete an already created partition.
For any of the above-mentioned situation, you can use the inbuilt utility of your Mac. It comes with a useful utility for data and partition management. The tool by the name Disk Utility allows the user to perform various management operations on data and partitions including resizing of the volume. Resizing includes decreasing and increasing the size of the partitions, if there is sufficient free space available. All these operations can be performed by minimizing the chance of any data loss to much extent. However, there are certain limitations while using the inbuilt utility.
While using Disk Utility to increase the size of a volume, you need to delete the partition below the volume. This results in severe data loss if the backup is not taken. In order to overcome all the limitations and challenges faced while using the Disk Utility, it is always recommended to use a professional tool. Using such software will not affect any other volumes than the one you are modifying. An efficient tool would consider all the free space on the hard drive and manages them accordingly; thus, making the entire process very safe and reliable. However, if you have made any accidental changes, you can revert without proceeding further. In addition, you can hide/unhide any partition or volume whenever you want.
Stellar Partition Manager is one of the professional tools, which offers all the above-mentioned features. It allows easy and efficient management of Mac partitions and volumes. In addition, the tool offers four basic operation modes; Add Partitions, Format Partitions, Delete Partitions, and Resize Partitions.
The working of the tool is very simple, and can be summarised in a few easy steps as mentioned below.
1. Launch the software. The introduction page of the software appears as shown below.
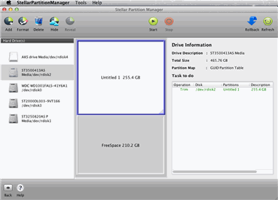
2. After the introduction page, the main interface of the Stellar Partition Manager appears as shown below.
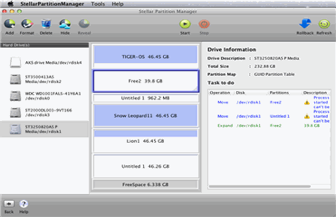
3. In case you select the boot volume, the software gives you a warning message.
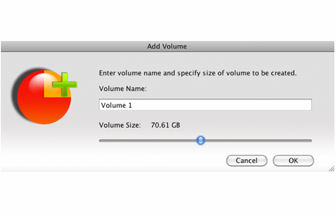
4. While creating a new volume, you need to specify the desired volume name and size for the new partition to be created as shown below.
Add Partition
In order to add a new partition to the existing list of partitions, you need to follow the below mentioned steps.
1. Launch Stellar Partition Manager. Click Continue button.
2. Select the Hard Drive from the left pane to create a new partition.
3. Click Add button on the toolbar. An ‘Add New Volume’ dialog box is displayed.
4. Type a name for the new partition in the Volume Name box.
5. Specify the size of the partition by moving the slider. As you move the slider, the selected size is displayed in Volume Size box.
6. Click OK button
7. A new task to add the "new partition" is added in the Task to do list
8. Click button to start the listed tasks.
9. A warning message is displayed asking you to take the backup. Continue only if you are confirmed about the backup as might lose the data.
10. A newly added partition is shown in the middle pane along with other partitions as shown below.
Format a Partition
You can format an existing partition by following the below mentioned steps.
1. Launch Stellar Partition Manager. Click Continue button. 2. Select the Hard Drive from the left pane that contains the partition to be formatted.
3. Select the required partition from the middle pane. 4. Click Format on the toolbar.
5. A new task is added along with other added tasks.
6. Click Start button to start the listed task.
7. A warning message is displayed to ensure that data is backed up.
8. Click Continue
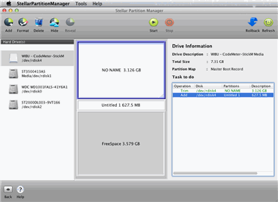
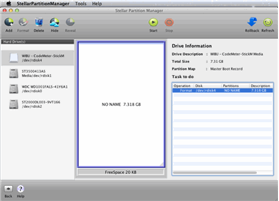
9. Once the process is complete, the content of the partition is erased as shown below.
Delete a Partition
You can easily delete a partition to increase the space size for some other usage. You need to follow the below mentioned steps for that.
1. Launch Stellar Partition Manager. Click Continue button.
2. Select the Hard Drive that contains the partition to be deleted.
3. Select the required partition in the middle pane.
4. Click Delete on the toolbar.
5. This task is added to the ‘to do’ list along with other added tasks.
6. Click button to start the listed tasks.
7. A warning message is displayed related to data backup. If you already created a backup, you can continue
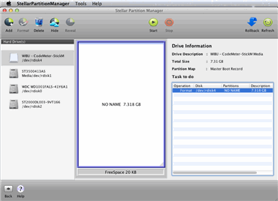
8. Once the partition is deleted, the deleted partition is removed from the list of partitions and the deleted space is added to free space as shown below.
Resize Partiton
However, in order to resize a Mac partition, you need to follow the below mentioned steps.
1. Launch the Stellar Partition Manager utility.
2. The interface displays the list of hard drives in the Mac system.
3. Select a particular hard drive to resize
4. Drag the partition edge upward, in case you want to decrease the partition size. In case you need to increase the size of the partition, drag the partition edge downward.
Note: Increasing the size will reduce the amount of available free space, whereas if you decrease the size of the partition, it will increase the total available size.
5. Once the size is defined, the resizing task gets added to the Tasks to do list.
6. Click the Start icon to execute the added task.
7. A warning message is displayed asking you to take the data backup before going ahead with the resizing operation.
8. Click the Continue button.
9. Once done, you will be able to see the newly resized partition with its modified size, in the main interface as shown below.
