While you are saving mailboxes directly to Live Exchange using Stellar Repair for Exchange or Stellar Converter for EDB, you may face crashing issue. In that case, the reason is that your mailboxes size is set default to 2 GB and software is not getting permission to recover data over 2 GB. In that case, you need to increase the size limit using ECP or PowerShell command.
You can follow the below steps to complete this task:
Increase size of Single User Mailbox
Using ECP
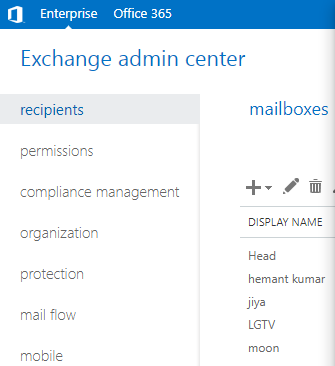
Step 1 – Login to ECP
Step 2 - Under Recipients, Select the User Mailbox and click on Edit to Increase the Size.
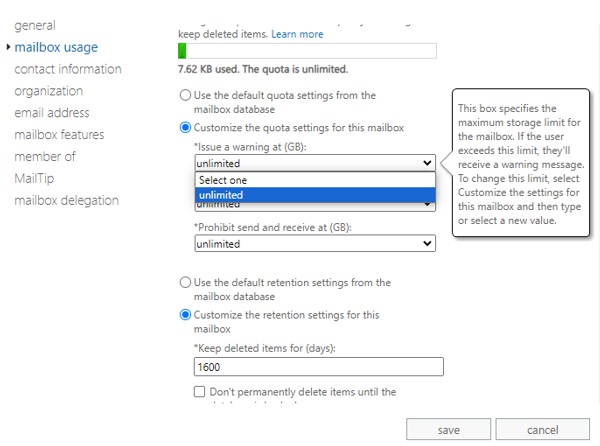
Step 3 - Select Mailbox Usage and click on More Options. Now you can see the option to set Mailbox Limit (Customize the Quota setting for this mailbox).
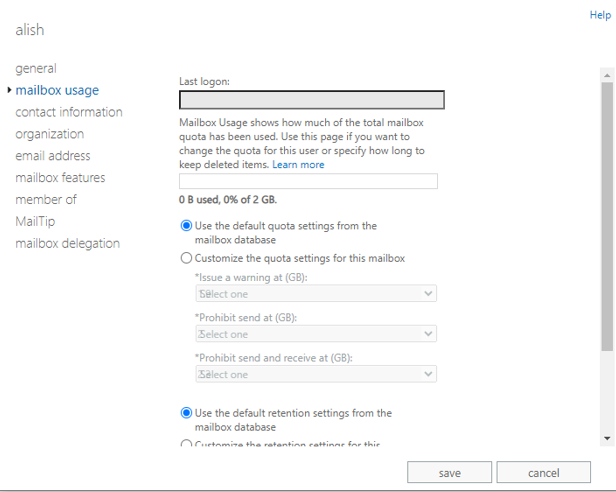
Step 4 - Select Customize the Quota setting for this mailbox option. Here, you can change the size of your Mailbox. You can enter any specific size or make it unlimited.
Step 5 – Now Click on Save.
Using PowerShell
To perform this task with PowerShell, You need to run below command.
Set-Mailbox -Identity "Mailbox Name" -IssueWarningQuota unlimited - ProhibitSendQuota unlimited -ProhibitSendReceiveQuota unlimited - UseDatabaseQuotaDefaults $false
Increase size of Exchange Database
Using ECP
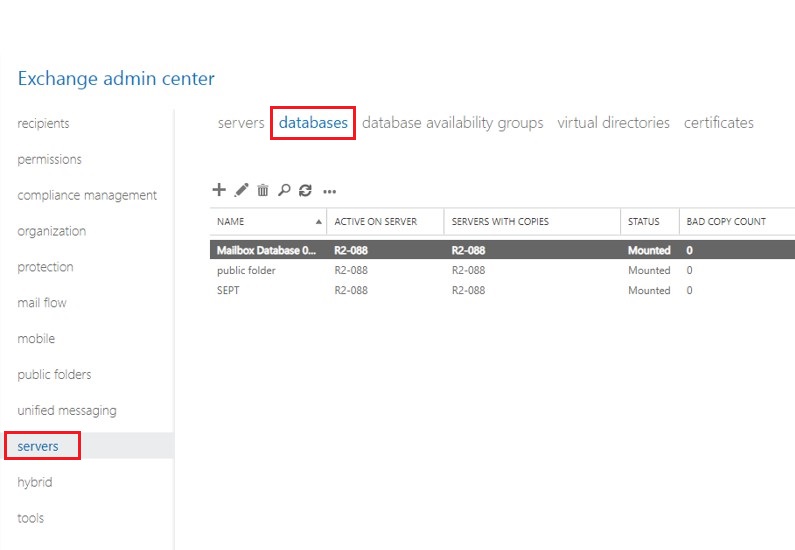
Step 1 – Login to ECP
Step 2 - Under Server, Go to Database to modify quota size and click on Edit.
Step 3 – Now click on Limits and increase the size of the Database. You can enter any specific size or make it unlimited.

Step 4 – Now Click on Save.
Using PowerShell
To perform this task with PowerShell, You need to run below command.
Set-MailboxDatabase "Database Name" - ProhibitSendReceiveQuota 2.3GB -ProhibitSendQuota 2GB - IssueWarningQuota 1.9GB
While migrating public folders or public folder mailboxes from one Exchange server to another, there may be an error due to the size of the mailbox or folder. This is because the target server may have a default size limit of 2 GB for the mailboxes and folders. If you are migrating data that is over 2 GB in size, the process will fail. To resolve this, you can exceed the size limit of the target mailboxes and folders.
Increase the Size of a Public Folder Mailbox on Exchange Server
Increase the size of a public folder mailbox Using Exchange Admin Center (EAC)
Step 1 – Login to EAC. Under Public folders, Select the Public folder mailboxes

Step 2 – Double click on the Public folder mailbox whose size you want to increase.


Step 5 – Now Click on Save.
Increase size of Public Folder Mailbox Using PowerShell cmdlets
Note: This method is applicable for Exchange server and Microsoft 365.
To perform this task with PowerShell You need to run below command.
Note: For Microsoft 365 connect to Exchange Online PowerShell and the run the command
Set-Mailbox -Identity "Mailbox Name" -IssueWarningQuota unlimited - ProhibitSendQuota unlimited -ProhibitSendReceiveQuota unlimited - UseDatabaseQuotaDefaults $false
To increase the size of all the mailboxes use the following cmdlet:
Get-Mailbox | Set-Mailbox -ProhibitSendQuota
Increase size of a Public folder on Exchange server
Increase size of a Public folder using EAC.
Step 1 – Login to EAC
Step 2 – Click on Public Folder Tab.

Step 3 – Click on folder and then click on edit option or double click on folder

Step 4 – Click on limits tab and uncheck Use the organization quota defaults checkbox. Then set the size limit it any desired value (in MB) or unlimited and click on Save
 or unlimited and click on Save.png)
Step 5 – Click on close button after the saving process completed successfully.
Increase size of a Public folder on Microsoft 365
Step 1 – Open Exchange admin center.
Step 2 – Select Public Folder Tab.

Step 3 – Select the folders whose size limit you want to increase.

Step 4 – Click on Limits Tab
Step 5 – Click on Manage storage quotas option to increase the limits

Step 6 – Set the limit to any desired value (in MB).
..png)
Step 7 – You can set the size limit of public folder, here we have set the limit to 50 MB.

Step 8 – Click on Save changes button.