Stellar Repair for Outlook provides you an effective and simple way to >repair a corrupt/damaged Outlook PST file. The task just necessitates you to follow the on-screen prompts that will end up with a repaired PST. However, this is not the only thing that you want to achieve. Once the repair process is done and you have received the PST, next step includes importing the file into MS Outlook so that you can access the data in application and continue working with it. Below section provides you the necessary steps to import PST into different versions of Microsoft Outlook, please continue.
Microsoft Outlook 2016: To import the repaired .pst file into MS Outlook 2016, perform the following steps:
- Start MS Outlook
- Switch to the 'File' tab and click Open & Export then click Import/Export
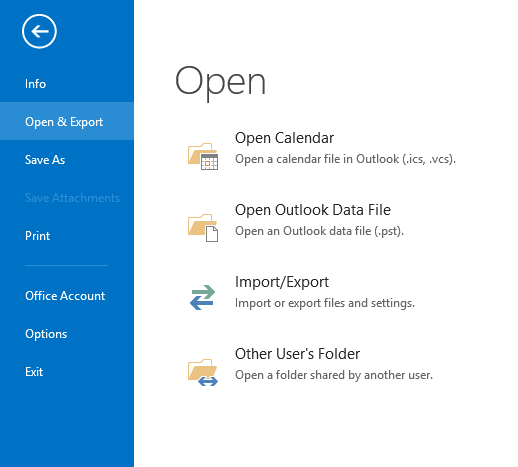
- Click ‘Import from another program or file’. Click Next.
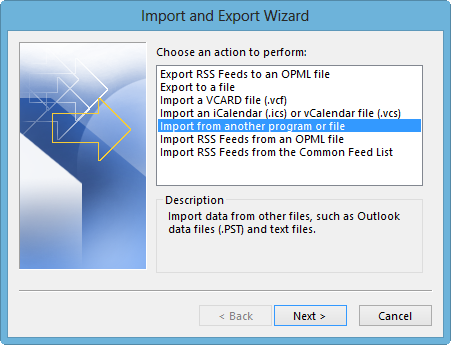
- Click ‘Outlook Data File (PST) and then click ‘Next’.
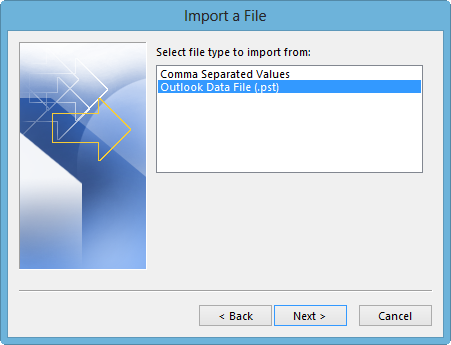
- Click Browse to choose the PST file that you want to import. Click Next.
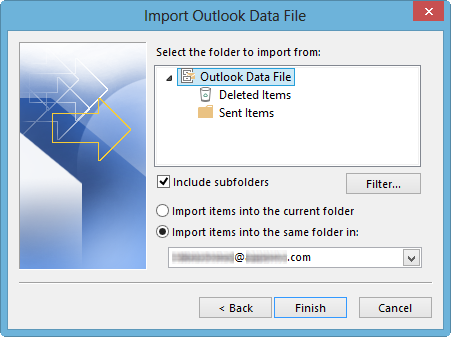
- Set the options for importing items and Click on ‘finish’.
Microsoft Outlook 2010: To import the repaired .pst file into MS Outlook 2010, perform the following steps:
- Start MS Outlook
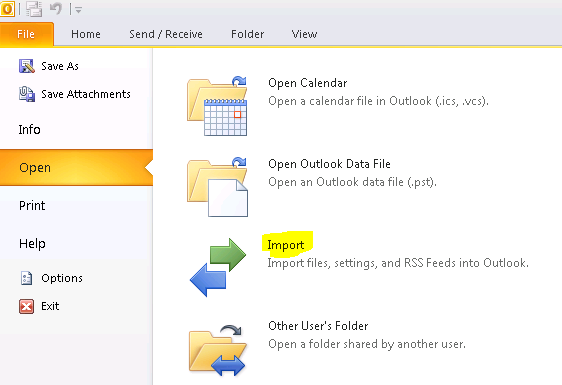
- Switch to the 'File' tab.
- Click on 'Import' in the 'Open' category.
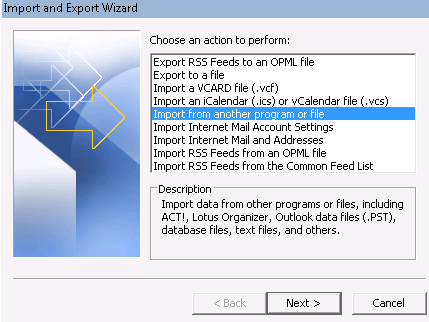
- An 'Import and Export Wizard' will open; click 'Import from another program or file' here and click 'Next' button.
- Click 'Outlook Data File (.pst)' and click 'Next'.
- Specify the name and path of the PST that has to be imported. Alternatively, you can click 'Browse' to select the repaired PST. If you do not want to import the items that are already there in Outlook, click 'Do not import duplicates'.
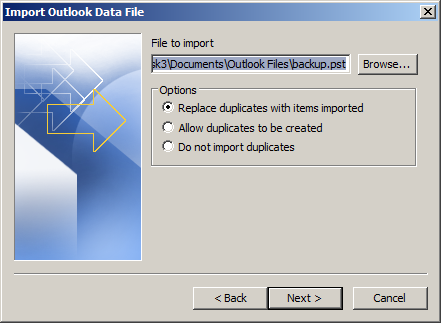
- Click 'Next'
- Select the folder that has to be imported. If you want to import all items, select the top of the list. There are some folders selected by default, all the subfolders under selected folders will be imported.
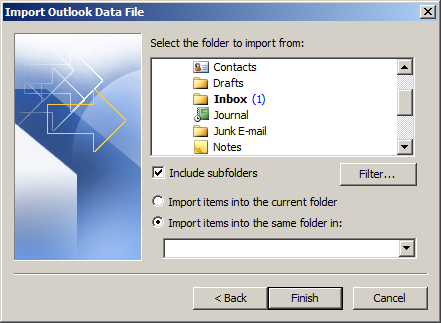
- Click 'Finish'
Earlier Outlook Versions: In older Outlook versions, do the following:
- If you have stored PST file on a floppy disk, CD-ROM, portable hard disk, or any other removable media, connect the device to your computer and copy the file to the hard drive of your computer. However, make sure that 'Read-Only' is not selected; if it is, the following error will crop up:
“The specified device, file, or path could not be accessed. It may have been deleted, it may be in use, you may be experiencing network problems, or you may not have sufficient permission to access it. Close any application using this file and try again.”
In case of this error, unselect the option and then copy the file again.
- Start Outlook
- In the menu, click 'File', and then click 'Import And Export'.

Click ‘Import from another program or file’ and hit ‘Next’.

- Click 'Personal Folder File (.pst)' and click 'Next'.

- Specify the name and path of the PST file that has to be imported and click 'Next'.

- Select the folder that you need to import or select the top of the list if all the folders have to be imported.

- Click 'Finish'

You are now all set to use PST data in MS Outlook.


