Stellar Repair for Exchange
- 1. About Stellar Repair for Exchange
- 2. About the Guide
 3. Getting Started
 4. Working with the Software
- 4.1. Select and Scan EDB Files
- 4.2. Preview Scanned Files
- 4.3. Save and Load Scan Info
 4.4. Save Scanned Files
- 4.5. Search and Save Scanned Files
- 4.6. View Log Report
- 4.7. Apply Filter
- 4.8. Importing PST file in MS Outlook
- 4.9. Performing Dial Tone Recovery
- 4.10. Folder limits recommended by Microsoft
- 4.11. Changing the Software Language
- 5. Frequently Asked Questions (FAQ)
- 6. About Stellar

4.4.1.1.2. How to Create Mailbox
1. Click Create Mailbox from the Map Mailboxes dialog box, to create a new mailbox for mapping.
Note: To know how to open Map Mailboxes dialog box, refer Export Mailbox to Live Exchange Server Steps 1 to 6.
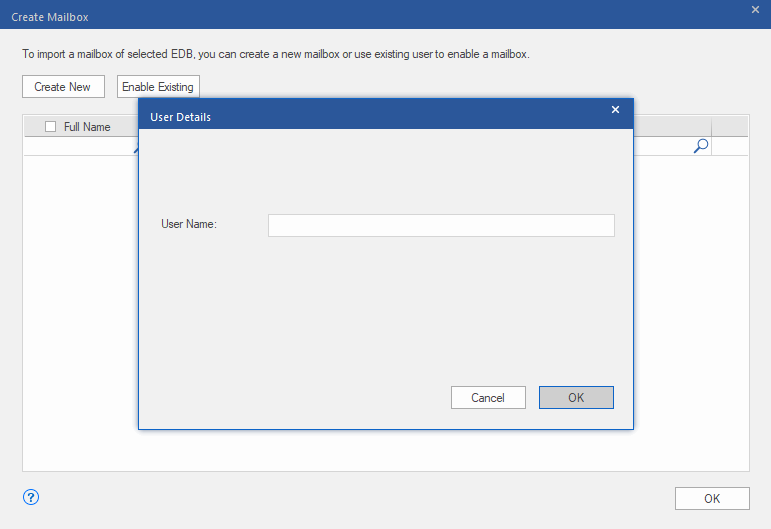
2. Click Create New. Enter the User Name to be created. Click OK.
3. Select the desired users to be created. Click OK.
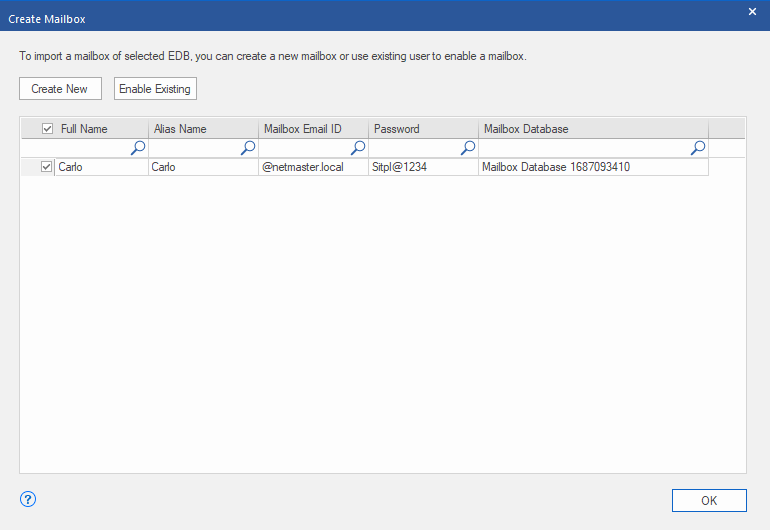
Note: In order to export data, the user should have the full data access rights.
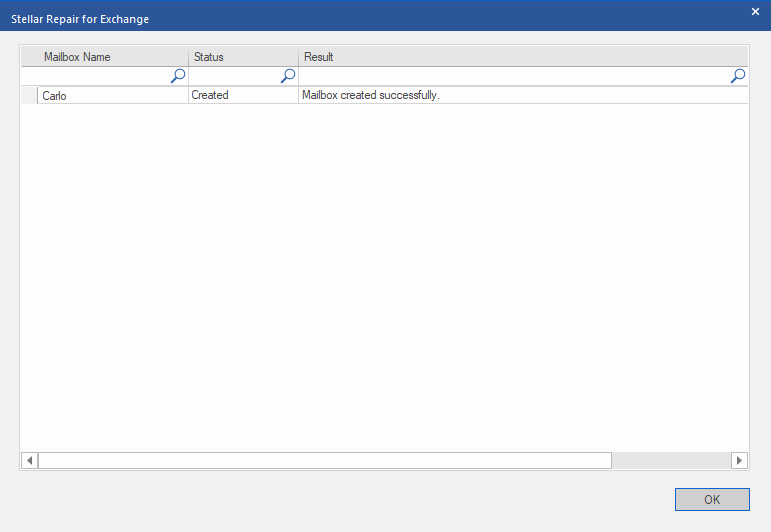
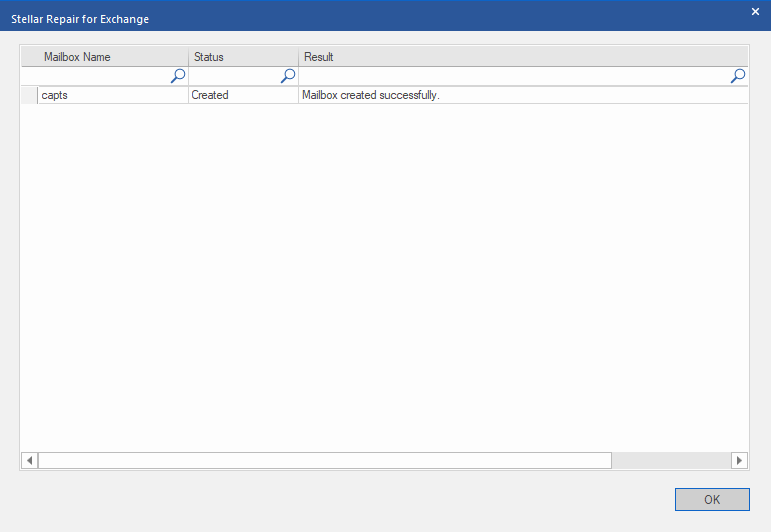
4. The user's mailbox will be created successfully. Click OK.
Note:
-
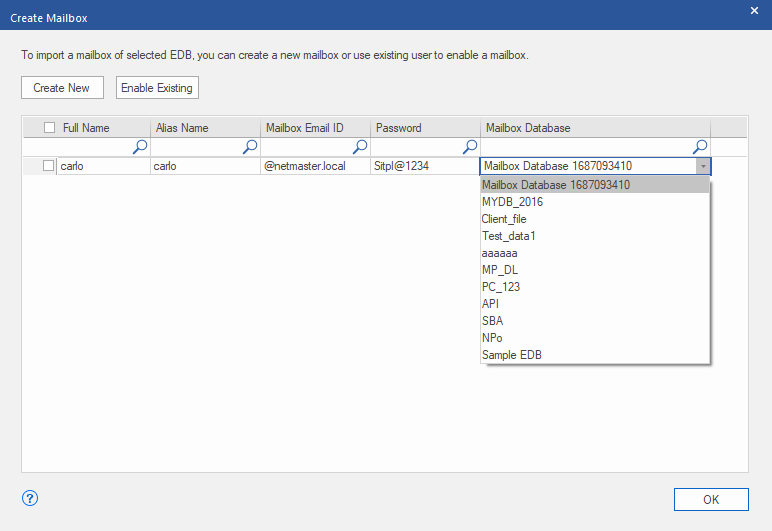
The fields that can be edited are : Full Name, Alias Name, Password, and Mailbox Database.
-
The fields that can not be edited are : Mailbox Domain.
5. In order to enable the user's mailbox, click Enable Existing. Disabled users will be listed.
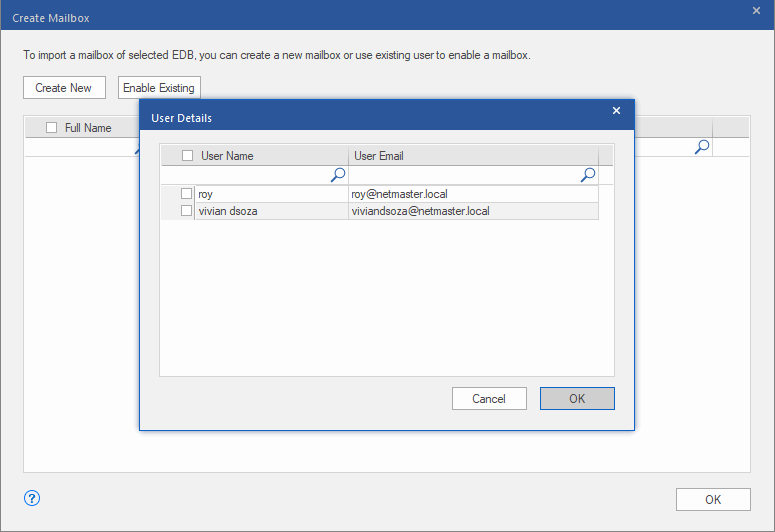
6. Check the users you want to enable again. Click OK.
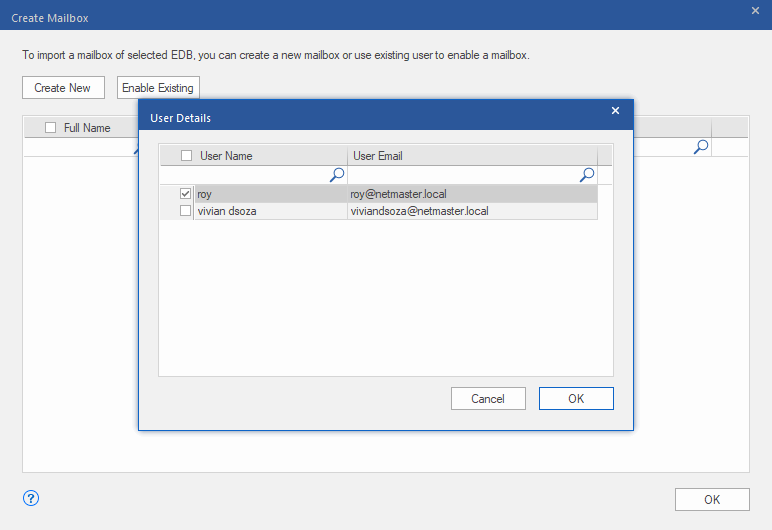
7. Confirm the checked users and click OK. The selected users mailbox will be enabled successfully. Click OK.
Note:
-
Enable Existing is to be used when a specific user has been disabled before.
-
In case of enabling an Existing mailbox only the Mailbox Database field can be changed (you can change the destination Mailbox Database) of the mailbox.