Stellar Data Recovery for iPhone

4.1. Recover Data from iOS Device
You can use the Recover from iPhone option to scan your iOS device and recover data (like contacts, messages, reminders, calendars, notes) from it. This option scans the iOS device directly to find data that was recently deleted or lost.
Note: Install iTunes before you use Stellar Data Recovery for iPhone software. iTunes services should be running while you are scanning/analyzing an iOS device.
To use the Scan Device option of the software, follow the steps given below:
1. Run Stellar Data Recovery for iPhone.
2. On the Stellar Data Recovery for iPhone main screen, Select the Recover from iPhone option.
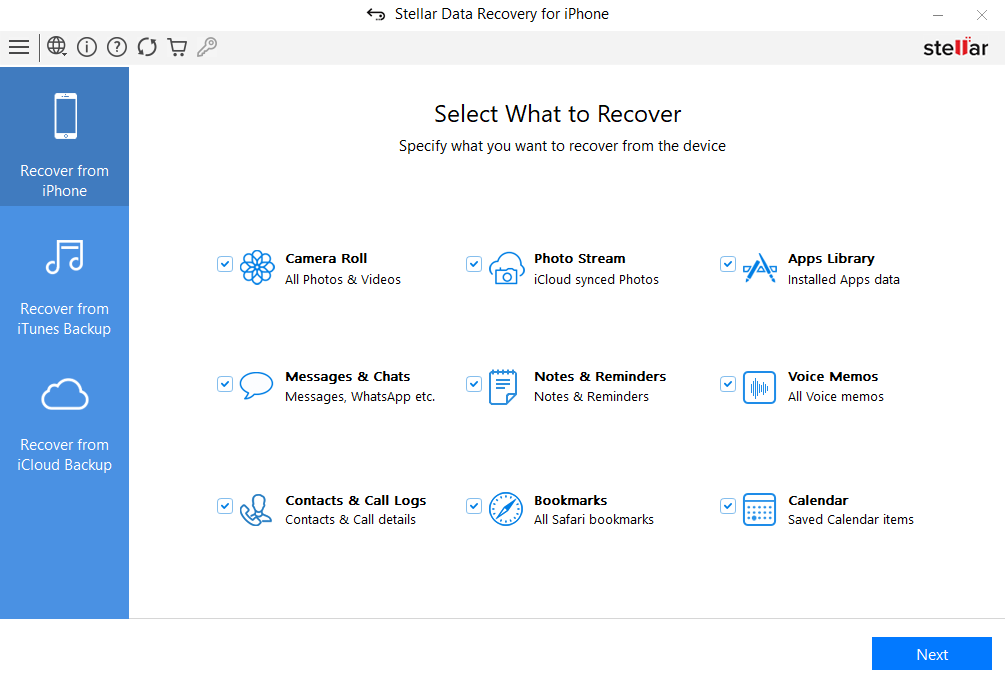
3. Select the type of data such as Camera Roll, Photos Stream, Apps Library, Messages & Chats, Notes & Reminders, Voice Memos, Contacts & Call Logs, Bookmarks, Calender that you want to recover and click Next.
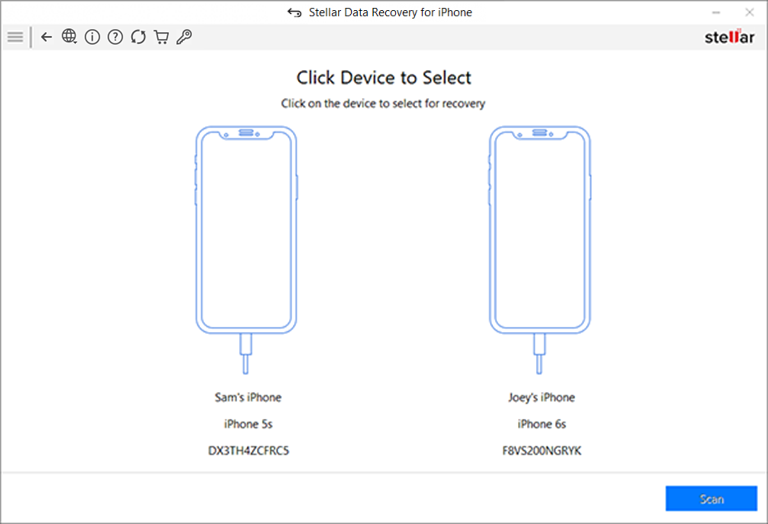
4. Plug your iOS device into your computer and select that device to proceed further.
.png)
Note: In case you have connected multiple devices, the application lists all connected devices. Select the desired device.
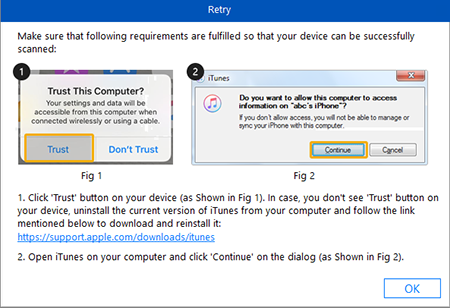
Note: After you connect the device, a Trust/Untrust dialog prompts on your device. You need to Trust a computer to enable sync and data transfer between the iPhone/iPad and the computer. If you tap on "Don’t Trust”, iTunes is not able to recognize your device at all.
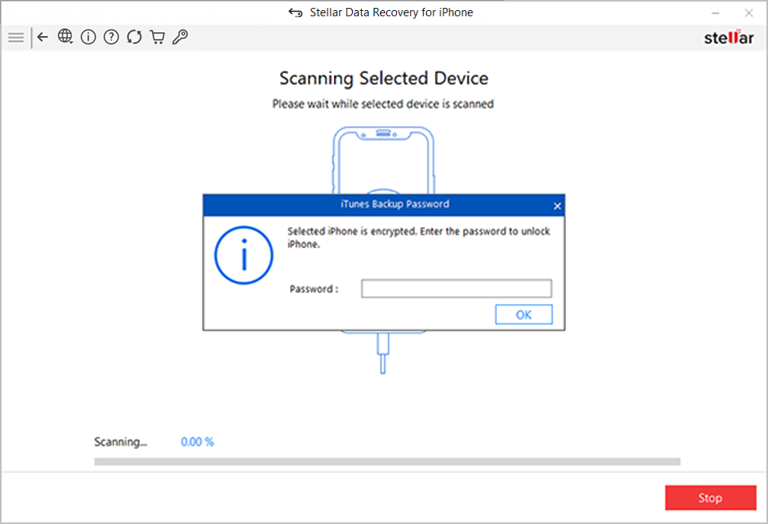
5. If your iPhone is encrypted, a dialog box will open prompting you to enter the password. Enter the password and click OK.
6. After successful analyzing and scanning, you can now preview and save data. Following file types are supported: Camera Roll, Photo Stream, Apps Library, Contacts, Messages, Message Attachments, Call history, Calendar, Notes, Notes Attachments, Voice Memo, Reminder, Safari Bookmarks, WhatsApp, WhatsApp Attachments, Viber, Tango, WeChat, Line, Kik and Apps Library. From the left-hand side tree view, click the supported file type under the listed iOS device and all items under the selected supporting type head are listed.
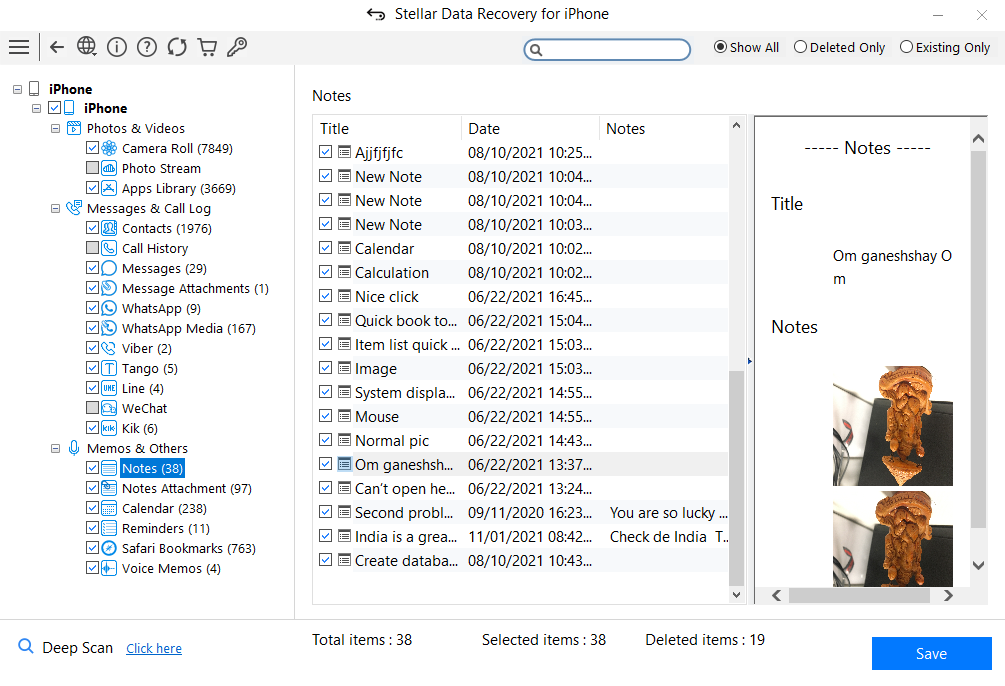
Note: All deleted items are listed in red whereas all others are black.
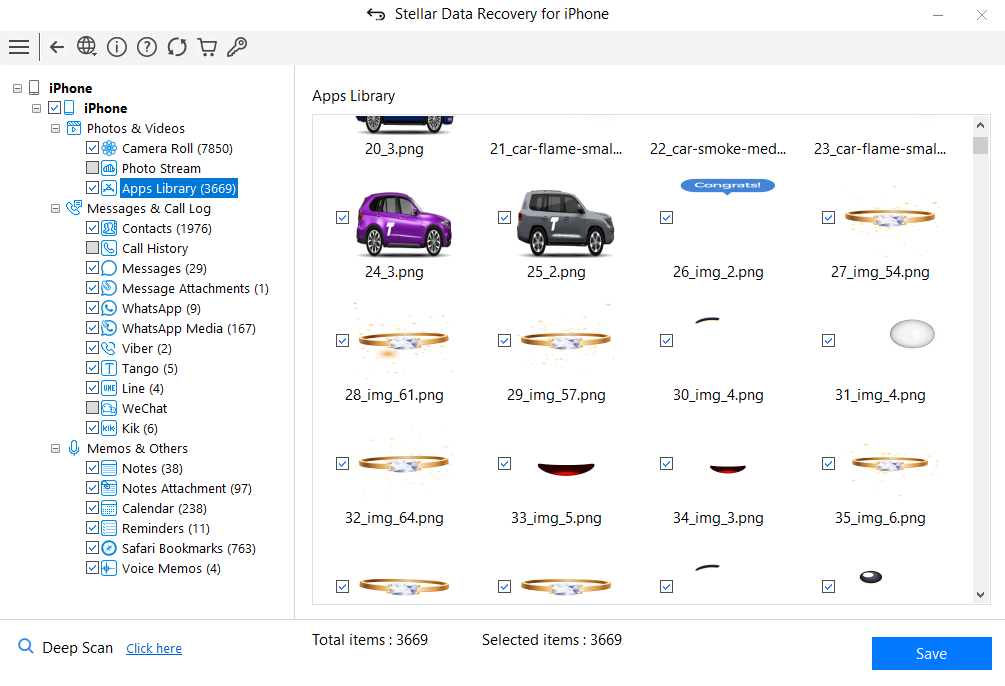
7. You can either select all or a few items (by selecting the checkboxes in front of them).
Note:
-
You can preview the existing and deleted items, and you can also search for a specific item by typing a keyword in the search box.
-
You cannot recover deleted items from Camera Rolls, Photo Streams, Apps Library, Attachments and Voice Memos.
- Click Deep Scan if your desired data is not included in the list.
8. Click Save to confirm your selection. Save Files dialog appears as shown below.
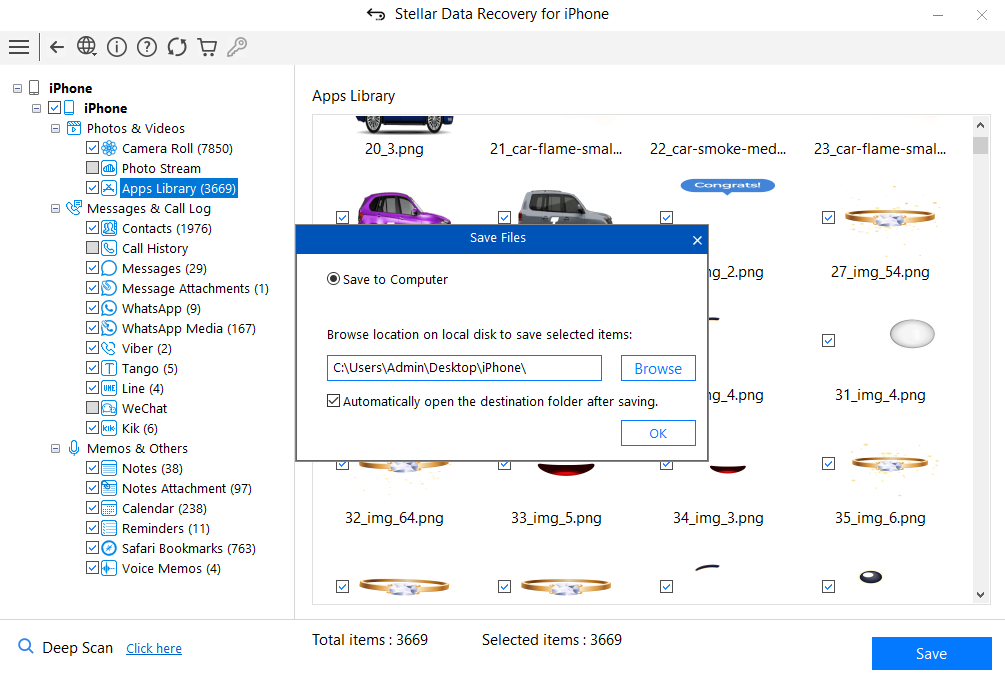
9. Select the Save to Computer option if you want to save the recovered files to your computer. Click Browse and select a destination for saving the recovered files and click OK.
 3. Getting Started