Stellar Data Recovery
- 1. About Stellar Data Recovery
- 2. Basics of Data Recovery and Common Scenarios
- 3. About the Guide
 4. Getting Started
 5. Working with the Software
- 5.1. Recovering Data from Existing Volume
- 5.2. Recovering Data from Lost Drive/Unallocated Partition
- 5.3. Recovering Data from CD/DVD
- 5.4. Recovering a Lost Partition
- 5.5. Recovering Data from Crashed Computer
 5.6. Working with Disk Images
 5.7. Previewing Scan Results
 5.8. Saving the Recovered Files
- 5.9. Performing a Deep Scan
- 5.10. Saving the Scan Information
 5.11. Configuring Advanced Settings
- 6. Frequently Asked Questions (FAQs)
- 7. About Stellar

5.1. Recovering Data from Existing Volume
With Stellar Data Recovery you can recover your deleted or lost data from the hard drive or external storage media connected to the system. Almost all data of the volume can be found by performing recovery on selected volume or removable media. NTFS, FAT, FAT16, FAT32 and exFAT file systems are supported by the application.
To Scan Existing Volume:
1. Run Stellar Data Recovery.
2. From Select What to Recover screen, select the type of data i.e. Everything, Documents, Folders & Emails or Multimedia Files, you want to recover.
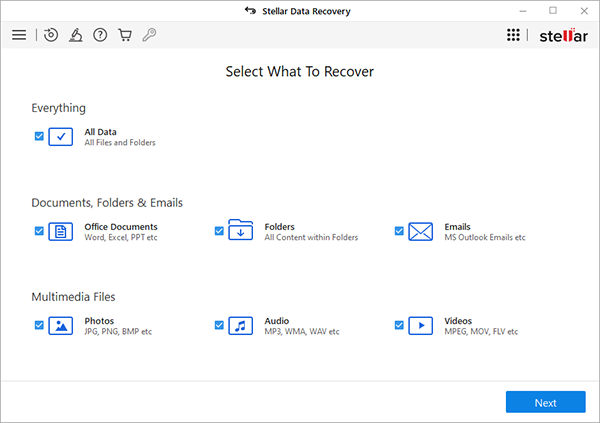
3. Click Next.
4. From Recover From screen, select a location from Common Locations or any of the Connected Drives. In case you want to scan a specific folder, from Common Locations select Choose Location. Browse to any desired location, select a folder you want to scan and click Select Folder.
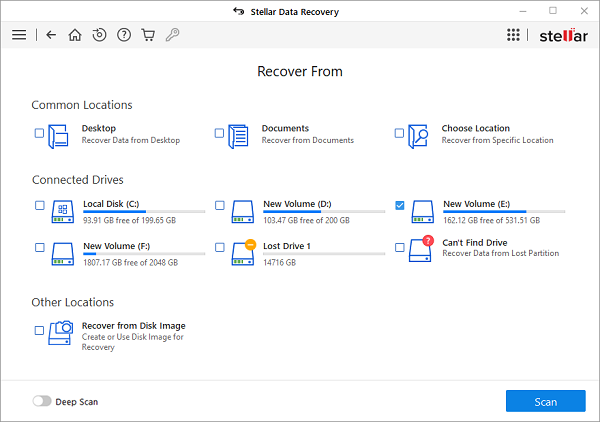
Tip: Stellar Data Recovery shows you the temperature and health details of connected drives. To view these, take the mouse cursor to the particular drive in Recover From screen. The Temperature and Health details are displayed inside a tooltip as shown below:

5. Click Scan. A screen showing the scanning process is displayed. Click Stop to stop the scan at any point.
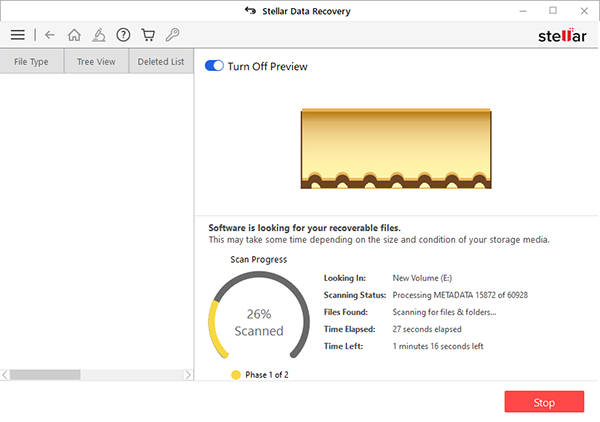
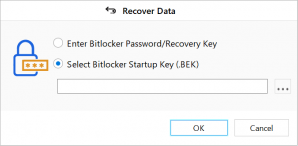
Note: If you are scanning a drive that is encrypted using BitLocker, you will be prompted to either enter the Bitlocker password/Recovery Key or Select a Bitlocker Startup Key (.BEK file). Use any one of the following steps, to initiate the scan process:
- Enter the Bitlocker password/Recovery Key in the text box given and click OK.
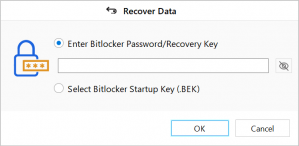
- Alternatively, choose Select Bitlocker Startup Key (.BEK) radio button. Click
to browse and select the .BEK file and click OK.
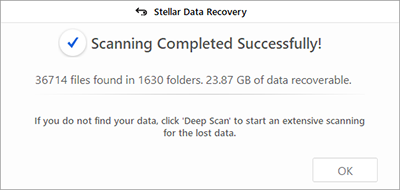
6. Once the scanning process is completed, details of the files and folder found are displayed in a dialog box as shown below:
7. For information on how to preview and recover the scanned data, see Previewing Scan Results and Saving the Recovered Files.
Note: If you wish to save the scanned information and resume the recovery process at a later stage, see Saving the Scan Information.
Deep Scan an Existing Volume:
Running a deep scan enables you to scan the selected volume thoroughly when you are unable to locate data that you want to recover.
1. Run Stellar Data Recovery .
2. From Select What to Recover screen, select the type of data i.e. Everything, Documents, Folders & Emails or Multimedia Files, you want to recover.

3. Click Next.
4. From Recover From screen, select a drive from Connected Drives.

5. Enable Deep Scan toggle button which is on the bottom left of your screen.
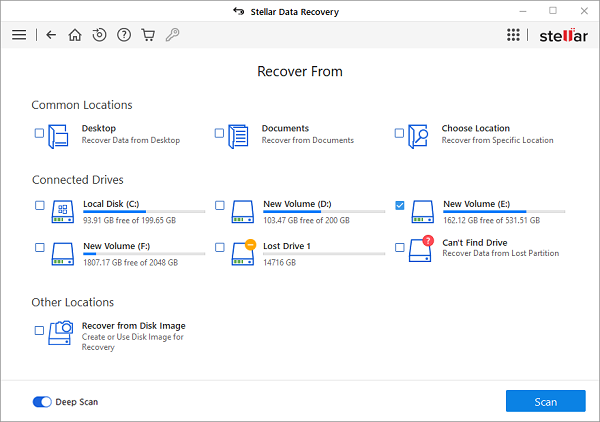
6. Click Scan. A screen showing the scanning process is displayed.

Note: If you are scanning a drive that is encrypted using BitLocker, you will be prompted to either enter the Bitlocker password/Recovery Key or Select a Bitlocker Startup Key (.BEK file). Use any one of the following steps, to initiate the scan process:
- Enter the Bitlocker password/Recovery Key in the text box given and click OK.

- Alternatively, choose Select Bitlocker Startup Key (.BEK) radio button. Click
to browse and select the .BEK file and click OK.

7. Once the scanning process is completed, details of the files and folder found are displayed in a dialog box.
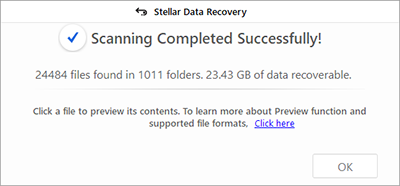
8. For information on how to preview and recover the scanned data, see Previewing Scan Results and Saving the Recovered Files.
Note: If you wish to save the scanned information and resume the recovery process at a later stage, see Saving the Scan Information.
Note: You can select only one volume at a time for recovery. Deep scan is applicable only for connected drive. You can disable deep scan if you want to perform Quick scan.