BitRaser Mobile Eraser & Diagnostics

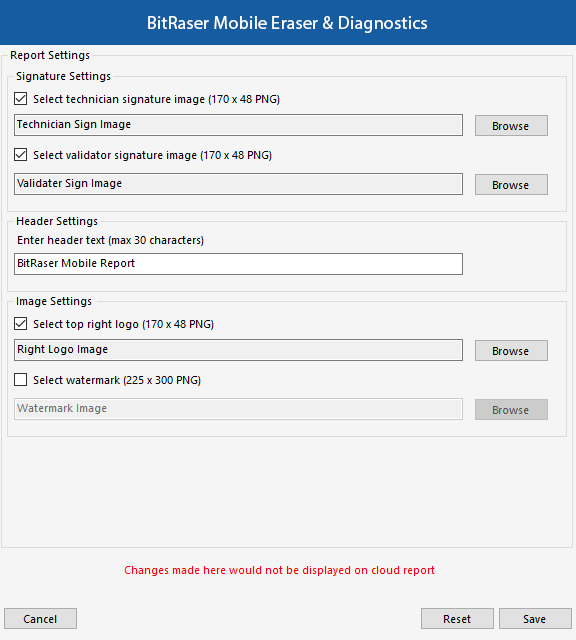
4.5.4. Change Report Settings
To customize the report, select the Report Settings button located at the bottom left of the screen.

1. In the Report Settings dialog box, you can edit the following fields:
|
Field Name |
Description |
|
Report Settings |
This section allows you to customize Reports like signature settings, header settings, top-right logo, and watermark. |
|
Signature Settings |
This section allows you to add a signature image of the technician and validator. |
|
Select technician signature image (170 x 48 PNG) Select validator signature image (170 x 48 PNG) |
You can change the technician's signature image here.
You can change the validator’s signature image here. |
| Header Settings |
You can either enter Header information like header text or header image here. |
| Enter header text (max 30 characters) |
Enter the header text. |
| Image Settings |
This section allows you to add the top-right logo and watermark image. |
|
Select top right logo (170 x 48 PNG) Select watermark (225 x 300 PNG) |
You can change the top-right logo image of the report here. You can change the watermark image of the report here. |
Note: You can reset Report Settings fields using the Reset button located at the bottom right of the Report Settings dialog box.
Note: Signature images, Logo, and Watermark image size needs to be the same as specified in Report Settings. BitRaser Mobile Eraser & Diagnostics will accept images with a specified size only. In the case of a size mismatch, BitRaser Mobile Eraser & Diagnostics will continue to use the previously selected images.
2. After making the required changes to Report Settings, click Save to update settings.
Note: Changes made to reports settings in BitRaser Mobile Eraser & Diagnostics application will not be updated on the BitRaser Cloud report.
 3. Getting Started