When to Use Stellar Reporter & Auditor for Exchange Server?

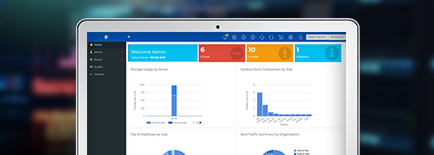
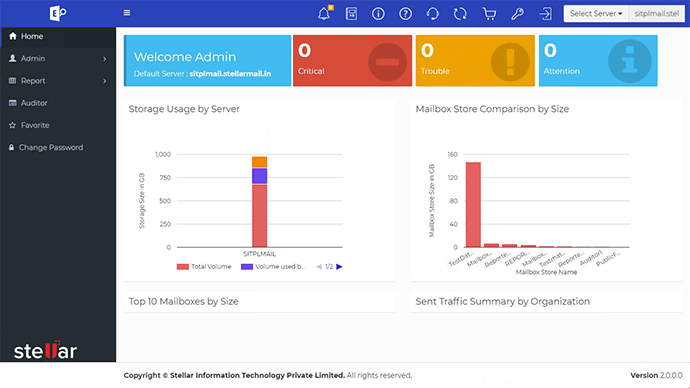
Administrators have to use Exchange Management Shell (EMS) to perform Exchange audits. With Stellar Reporter & Auditor for Exchange Server, they can get precise and actionable audit reports in real-time without using the EMS. The advanced Exchange Server reporting software provides all key insights into the Exchange Server & AD network on the Welcome Admin Page.

Stellar Reporter & Auditor for Exchange Server helps you to stay on top of all events that take place in the Exchange Server. The Exchange reporter generates easy-to-read reports that can be customized as per your requirements. You can also schedule automatic delivery of specific reports via emails on a daily, weekly, or monthly basis.

You can use Stellar Reporter & Auditor for Exchange Server to maintain optimal security without difficulty. The Exchange auditing tool provides real-time alerts whenever a critical event (Exchange store dismounted, mailbox permissions changed, etc.) takes place in the Exchange Server. The tool also allows you to categorize these alerts based on threat levels - critical, trouble, & attention.
Automates Exchange Server Analysis & Reporting
Stellar Reporter & Auditor for Exchange Server automates analysis and reporting of Exchange Server to minimize administrative efforts. The software generates 142 different (graphical) reports grouped in distinct categories. It can schedule scanning and reporting tasks, and allows configuration of automatic Exchange Server email alerts.
Quick Exchange Insights
The main UI of the software has a Welcome Admin Page which provides quick insights into your Exchange Server. These insights include Number of Alerts, Storage Usage of Server, graphical representation of server by storage size and volume occupancy, mailbox store comparison by size, top 10 mailboxes by mailbox size and name, sent traffic summary by organization, internal & external mails sent, etc.
Actionable Exchange Server Reports
Stellar Reporter & Auditor for Exchange Server can generate a wide range of Exchange Server reports. These reports are neatly organized into broad categories for ease of access. These categories are Mailbox, OWA & ActiveSync, Email Traffic, Storage, Distribution List, Public Folders, and Organization. All reports can be easily generated from the Navigation Pane in a few clicks.
Comprehensive Admin Navigation Menu
The Exchange reporter software comes with a dedicated Admin Navigation menu with a host of ready-to-use functions for Server, Scheduler, Alert Management, User Management, and Settings. The Server module allows you to add, edit, and scan server, and Scheduler can be used to schedule scan, send reports, view task history, and edit existing tasks. The remaining modules offer similar functions.
Remote Access to Exchange Server Reports
Stellar Exchange Auditor is a web-based application that can be accessed from anywhere, including smartphones and other handheld devices. This ‘mobility of experience’, along with real-time reporting, helps collaboration among geographically distributed teams, resource optimization, spam fighting, and overall server management.
Real-Time Surveillance and Investigation
The Auditing feature in Stellar Reporter & Auditor for Exchange Server enables real-time surveillance of activities in the Exchange Stores and Mailboxes. Administrators can easily audit changes such as Exchange mailbox permissions, non-owner mailbox access, storage quota changes, and more. They can also generate Exchange Auditor reports that include Mailbox Logon Reports, User Logon Activity, Non-owner Mailbox Logon, Server Based Logon Report, Mounted/Dismounted Exchange Stores Report, etc.
Smart Access Control
The Exchange Reporter software allows restricting access to the application by defining logins for user roles - Administrator and Operator. It allows creating Admin and Operator roles to split the responsibilities and tasks. For instance, an Admin can access everything, make changes, and also decide the extent of access to be allocated to Operator. An operator can monitor reports, alerts, and other activities on the server to assist the administrator.
Customized Reports in Multiple Formats
Stellar Reporter & Auditor for Exchange Server can export reports in PDF, CSV, XLSX, or HTML format. Administrators can search for specific information such as mailboxes of specific departments in the reports, and also customize (simplify) the reports in terms of the number of columns displayed.
Steps to Use Stellar Reporter & Auditor for Exchange Server Works
Step 1: Launch the tool and review server activities on the main dashboard.

Technical Specifications
About Product
Stellar Reporter & Auditor for Exchange Server
| Version: | 2.0.0.0 |
| License: | Multiple Users |
| Edition: | Technician |
| Language Supported: | English |
| Release Date: | June, 2021 |
System Requirement
| Processor: | Intel compatible (x64-based processor) |
| Memory: | 4 GB minimum (8 GB recommended) |
| Hard Disk: | Min. 500 MB for installation | 10–20 GB for running the application |
| Operating System: (64 Bit only) |
Windows 11, 10, 8 & Windows Server 2012, 2000 |
Documents
Product Related Articles

Start Using Stellar Reporter & Auditor for Exchange Server Today.
- Trusted by Millions of Users
- Awarded by Top Tech Media
- 100% Safe & Secure to Use
FAQ
The software’s web page may fail to load because the port you’d entered during installation may’ve been blocked or already being used by another software. Also, ensure that the Apache service is running. For this, go to ‘Services’ (open Run window (Press Windows + R) and execute ‘services.msc’). Right click on ‘Apache2.4’ service and click ‘Start’.
The application UI is optimized for viewing in Google Chrome. Adjust the Zoom setting of your browser as per your screen to view the application UI properly.
To add a Global Catalog Server properly, ensure that the server and host machine -on which the software is installed- are on the same network and can communicate with each other. So, before adding a server, use command prompt to ping it from the host machine to confirm that they are on the same network. Server can be added only if the ping is successful. If using the server name fails, you can also try using its IP address.
Ensure that the user name and password provided during the installation are correct. The Apache service requires sufficient log on rights to function properly. For this, follow these steps:
- Go to ‘Services’ and execute ‘services.msc’.
- Right click on ‘Apache2.4’ service and click on ‘Properties’.
- In the ‘Properties’ dialog, select ‘Logon On’ tab.
- Change the ‘Log on as’ option to ‘This account’.
- Enter the credentials of the current logged in user and restart the Apache2.4 service.
To generate Mailbox Size reports, the server needs to be scanned so as to gather the essential data. Make sure the Exchange server’s Administrator profile is configured and connected on the machine where the software is installed. Add this profile under 'Administrator Outlook Profile Details' while adding the server. For the configured MS Outlook profile, uncheck the ‘Use Cached Exchange Mode’ option.
This is because only Administrator has the rights to fetch information of any mailbox. Administrativev rights can be assigned to a user by using Exchange Management Shell command:
Add-MailboxPermission -Identity
This is because the server needs to be scanned for ‘Events for Audit’ to retrieve Auditor reports. Before scanning the server make sure that you apply the Exchange Server Configuration Settings.
The application shows the information as per the date when the particular section was last scanned. So, to fetch the latest up-to-date reports, first scan the relevant section. The software allows to schedule the scanning and report generation tasks to ensure fetching latest reports based on the specified intervals.
To generate Public Folder Size and Content reports, the server (Public Folder Content) needs to be scanned so as to gather the essential data. Make sure the Exchange server’s Administrator profile is configured and connected to the machine where the software is installed. Also, ensure that the Public folders are listed in the configured Administrator Outlook profile on the host machine.
This is because the relevant modules on the server need to be scanned for generating the reports. So, ensure that you have scanned the server before checking the reports. For the configured MS Outlook profile, check the ‘Use Cached Exchange Mode’ option and scan the Mailbox Content and Public Folder Content modules.
Make sure the Exchange logs paths entered while adding the server are correct and contains relevant log files. Also the path mentioned should be accessible from the host machine.For OWA & ActiveSync, scan the log files from all folders within the Log Files folder.
Make sure that you have selected the ‘Send Email' option while setting the Report schedule and Alert profile. In some machines, an issue might occur while sending e-mail due to conflict in Microsoft .NET Framework. For this, press the Windows key on your keyboard, type 'Windows Features', and press Enter. The Turn Windows features on or off dialog box appears. Select the .NET Framework 3.5 (includes .NET 2.0 and 3.0) check box, select OK, and reboot your computer if prompted.
WHY STELLAR® IS GLOBAL LEADER
Why Choose Stellar?
-
0M+
Customers
-
0+
Years of Excellence
-
0+
R&D Engineers
-
0+
Countries
-
0+
Partners
-
0+
Awards Received


