You can encounter the ‘Your mailbox has been temporarily moved on Microsoft Exchange server’ error message while accessing your Office 365 account using Microsoft Outlook client.
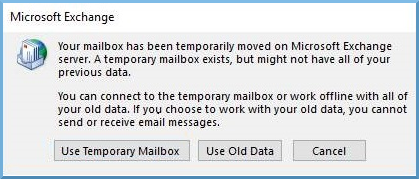
In the options listed in the pop-up (see the above image), if you select ‘Use Temporary Mailbox,’ you can lose your old emails and mailbox items. Alternatively, if you select ‘Use Old Data,’ it will allow you to access your offline cached contents and work offline but won’t let you send emails. Lastly, if you hit ‘Cancel,’ the error message will close the Outlook application. It is critical that you resolve this error because you can’t update your mailbox or send emails.
In this guide, we will take a quick look at the reasons that may lead to such errors in Outlook and help you fix the issues, restore mailbox connectivity, and recover all your mailbox items.
Reasons for ‘Your mailbox has been temporarily moved on Microsoft Exchange server’ Error
There could be various reasons that may cause the ‘Outlook Exchange mailbox has been temporarily moved’ error. Some of them are:
- Corrupt Outlook profile.
- Duplicate Profile on the Exchange Server.
- Issues with Autodiscover service.
- Incompatible or faulty add-ins.
- Damaged Outlook data file (OST).
Solutions to Resolve Outlook Exchange mailbox has been temporarily moved Issue
Following are a few possible solutions and workarounds that can help you to resolve the ‘Your mailbox has been temporarily moved on Microsoft Exchange server’ error.
Solution 1: Ensure that the Cached Exchange Mode is Enabled
To check an enable the Cached Exchange Mode, follow these steps:
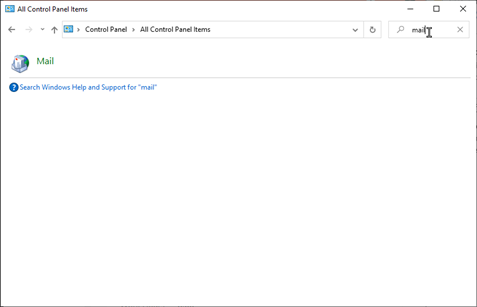
- Close Outlook, open Control Panel, and search Mail.
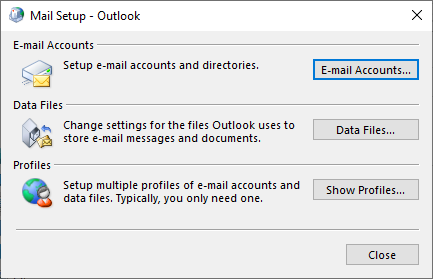
- Double-click on the Mail option to open the Mail Setup window.
- Click on the Email Accounts button.
- Then, select the email profile and click Change or double-click on the profile to open Server Settings.
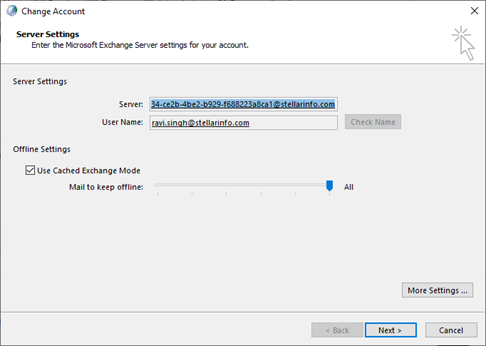
- Click the Cached Exchange Mode checkbox and then click Next > Finish to enable the Cached Exchange Mode.
Note: If Cached Exchange Mode is already enabled, then disable it first and re-enable it.
Now open Outlook and check if it works and resolves the error.
Solution 2: Delete All Outlook Profiles except Primary
If you are using your Outlook with multiple profiles, try deleting them except the primary one. The steps are as follows:
- Close MS Outlook and then open Control Panel.
- Search Mail and then double-click on Mail to open it.
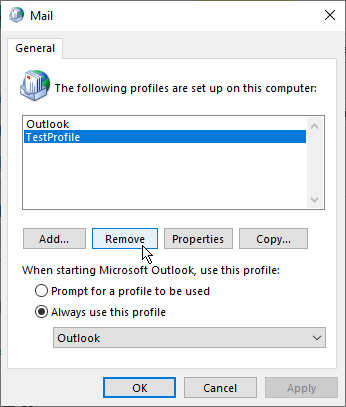
- In the Mail Setup window, click Show Profiles.

- In the Mail window, choose the profile you want to remove and then click on the Remove button.
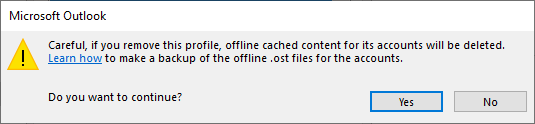
- Click Yes to continue if you have a backup of the Outlook data file.
- Similarly, select other profiles and remove them, except the primary profile.
- After removing all profiles except primary, click OK to close the Mail window.
- Now start Outlook and check.
If this resolves the error, you can add the other mail profiles again.
Solution 3: Check and Reconfigure Autodiscover Service
The Autodiscover service in Outlook helps it to identify the location of the mailbox on the server. However, if it is blocked by firewall, has DNS issue, or is misconfigured, Outlook can return the ‘temporary moved’ error. If you are a system administrator, follow these steps to resolve the issues:
- Login to Outlook Web App and check the Autodiscover service using the following link: https://mail.company.com/autodiscover/autodiscover.xml
- If the page returns with the ErrorCode 600, it shows that the Autodiscover service is running. If the page doesn’t load or shows XML, your Firewall might be blocking it, therefore you’ll have to make an exception for it.
To enable this service, you have to make exceptions for these Exchange virtual directories: /owa/*, /rpc/*, /mapi/*, /oab/*, /ews/*, /Microsoft-Server-ActiveSync/*, and /Autodiscover/*. In Windows Firewall, you can allow all HTTPS traffic by allowing traffic on TCP port 443. To do this,
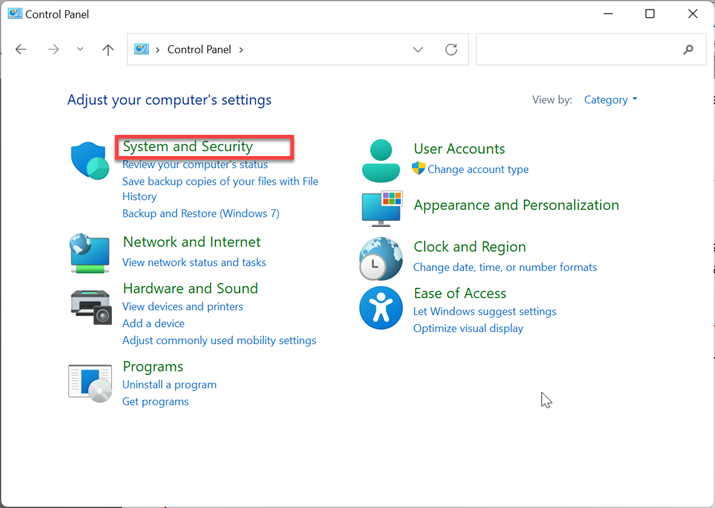
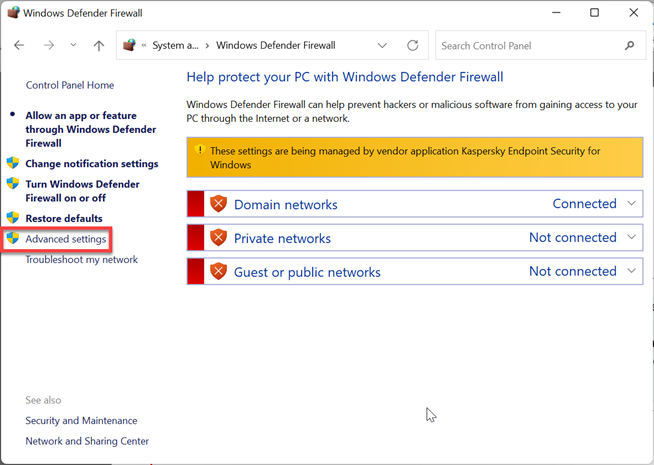
- Go to Control Panel and select System and Security after setting the View by option to Categories.
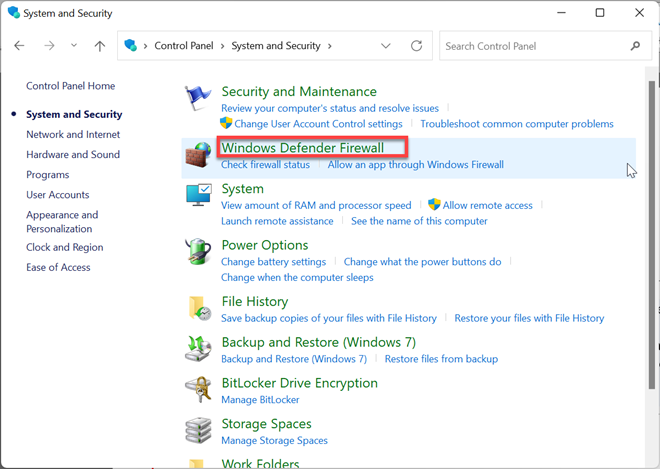
- Select Windows Defender Firewall from the window that opens.
- Now, click Advanced Settings from this window.
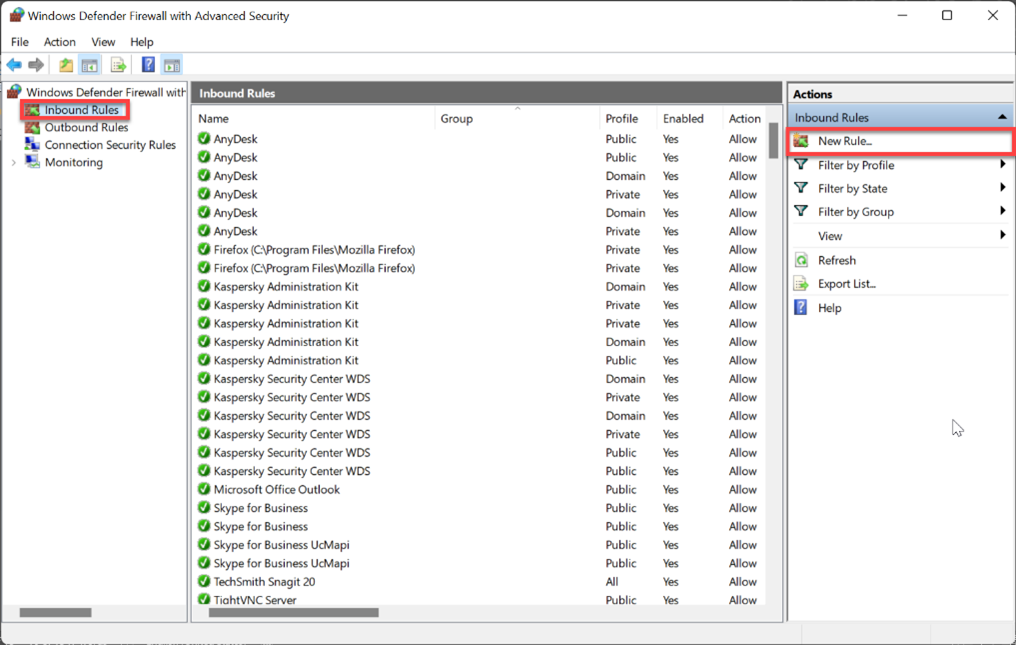
- In the Windows Defender with Advanced Security window, choose Inbound Rules and then click New Rule.
- Here, select Port and then click Next.

- Now, select TCP and type 443 in the Specific local ports option.
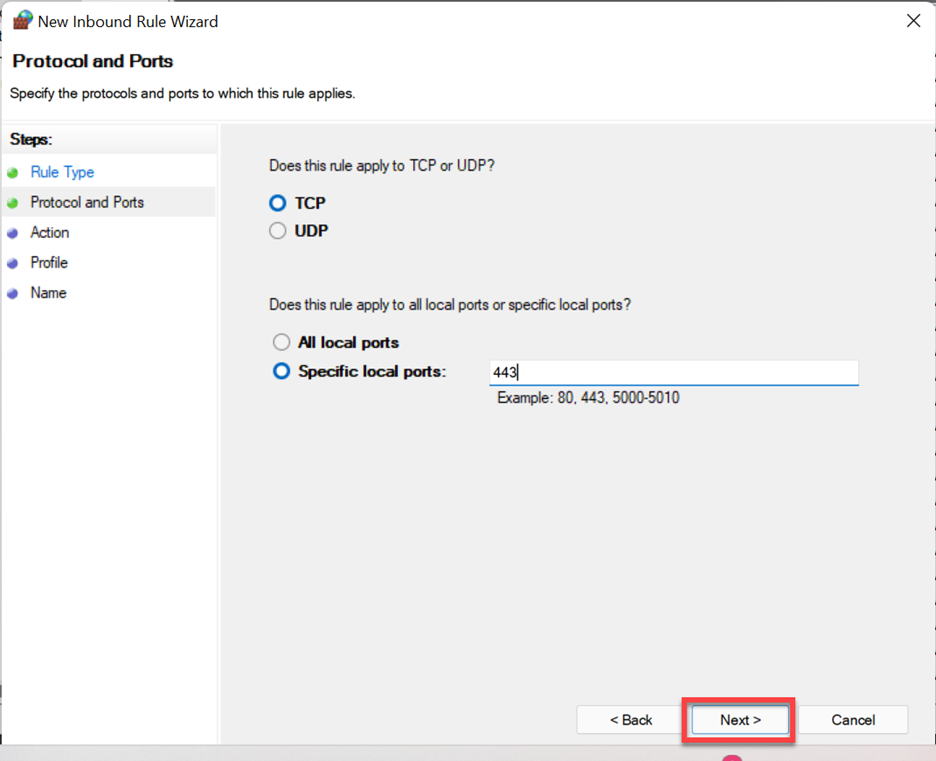
- Now, select Allow the connection if it is secure option and click Next.

- Follow the prompts to create the rule. This should allow the connections.
Note: If you are using a third-party firewall, you can contact the provider to add these Exchange Virtual Directories.
Once you have added these directories, you have to make the Autodiscover service available by adding a CNAME record to your external DNS. To do this, you can contact your ISP, who is hosting your external domain name, with the following details:
- Name: autodiscover
- TTL: 3600
- RR Type: CNAME
- Value: mail.company.com
After adding the CNAME record, your Autodiscover service should start running. You can use the Microsoft Remote Connectivity Analyzer and check if Outlook is able to use the Autodiscover service.

Solution 4: Create a New Outlook Profile
A corrupt Outlook profile can also be the reason behind this error. If this is the case, you will have to create a new profile to resolve the error. After creating a new Outlook profile, you should be able to access your mailbox data and send emails again.
Solution 5: Disable Faulty and Unnecessary Add-ins
A faulty or incompatible add-in may also cause such errors in MS Outlook. To find and remove faulty add-in, you can run Outlook in Safe Mode and identify the add-in causing the error by deactivating them one-by-one.
Solution 6: Recreate the OST File
An inconsistent Outlook data file (OST) can also result in the ‘Your mailbox has been temporarily moved on Microsoft Exchange server’ error. In such a scenario, you can rebuild the OST file by deleting it after taking its backup. When you launch Outlook after deleting the Outlook data file, it creates a new file and downloads your mailbox data from the server. This removes all the inconsistencies and the data gets stored in the recreated OST file.
However, you might find some of your items missing from your Outlook mailbox. This happens when Outlook, while experiencing the issue, failed to sync some of your items to the mail server. You can recover the missing items from the backup OST file using the Stellar Converter for OST. This powerful OST to PST converter tool extracts and saves all mailbox data, such as emails, attachments, contacts, notes, etc., in PST format with absolute precision and accuracy. This PST file can then be imported into Outlook using the Import and Export Wizard. You may also choose to save the extracted data in other formats or export it to a live Exchange Server or Office 365 account.
Conclusion
The ‘Your mailbox has been temporarily moved on Microsoft Exchange server’ in Outlook can prevent you from accessing your mailbox data and perform any send/receive operations. In this guide, we’ve discussed several methods and workarounds, such as enabling cached mode, activating the Autodiscover service, creating new profile, and deleting Outlook profiles other than the primary one. If an inconsistent OST file is causing the error, you can take its backup and rebuild it. Further, if you find missing mailbox items in new OST file, you can use Stellar Converter for OST to extract them from the backup OST and save them in a PST file.
Was this article helpful?