All IT Professionals now need to be careful while accessing Microsoft Server Manager. A new issue with this server management console has arisen, due to which, one may end up losing important data permanently.
Microsoft Server Manager is a management console in Windows Server that helps enable Remote Desktop Protocol (rdP) connections to each server. This helps thousands of IT professionals to manage and provision both remote and local Windows-based servers from their systems.
Over the years, Microsoft has been updating this console to let IT professionals manage multi-server environments remotely and to increase the number of servers managed by a single Server Management console. For example, a single Server Manager (in Windows Server 2016, 2012 R2, and 2012) can manage up to 100 servers. However, it depends on the data amount requested from managed servers and the hardware and network resources available to the PCs running on that console.
What’s the issue with the Server Manager?
Recently, a major big issue came into existence. Whenever an admin tries to clear or reset the virtual disk using the Community Virtual driver, the wrong disk might get reset mistakenly, causing complete data loss. Further, you may encounter an error message on resetting the wrong disk stating – “Found multiple disks with the same ID. Please update your storage driver and then try again.” Microsoft released an official notification confirming the problem with the Server Manager.
What Causes the Server Manager to Reset the Wrong Disk?
The Community Virtual Driver consists of multiple virtual disks that might be having same Unique ID. And when you initiate the reset operation, Server Manager will reset the first disk it finds instead of the one you want to reset, causing accidental data loss. The Windows systems running on Windows Server 2019, Windows Server 2023, and all editions of Windows 11 version 22H2 are facing this issue.
How to Avoid Server Manager to Reset Wrong Disk?
Though the issue may sound catastrophic, an authenticated workaround/resolution is available. Microsoft suggests using the PowerShell utility with the following commands to help avoid the risk of wrong disk getting reset and losing data. You can retrieve and clear the virtual disk with the following steps:
- Go to Search and type Powershell; click Open to access Windows PowerShell.
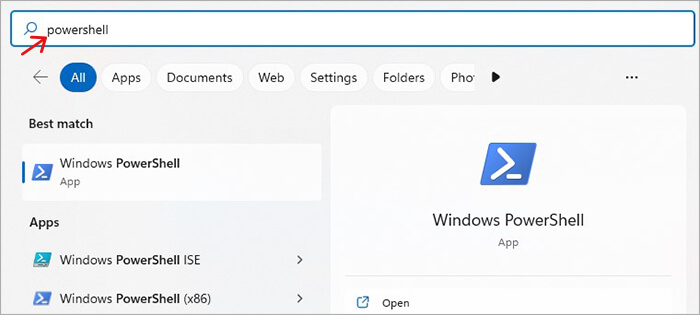
In the open window, type Get-PhysicalDisk | Select-Object -Property FriendlyName, DeviceID, UniqueId, and hit Enter.

- Now, confirm the details about the disk you wish to clear.
- Next, type Clear-Disk [-Number] <UInt32[]>, use the disk’s DeviceID as the number in the command, and hit Enter.
- Once the process is done, you’ll only clear the virtual disk you want.
But, what about my data?
Coming to the data loss situation, if you have lost data due to this Server Manager issue, don’t pull out your hair yet. There is a powerful solution available that can help you get back your access to the lost/deleted disk data: Stellar Toolkit for Data Recovery. It is a high-tech data recovery software that supports recovery from Windows, Mac, and Linux systems, supported storage drives, RAID, and Virtual drives. So whether you’ve lost data due to deletion, drive formatting, disk resetting, unexpected system shutdown, hypervisor malfunction, or system crash, you can easily get back access to your data. Follow the steps to recover data from the virtual disk after resetting:
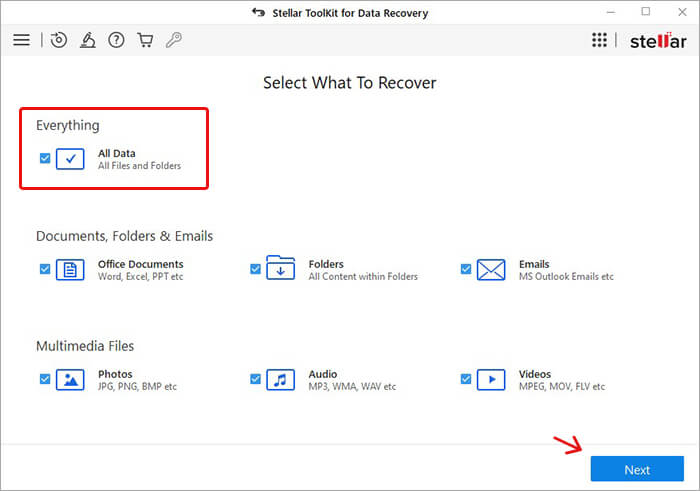
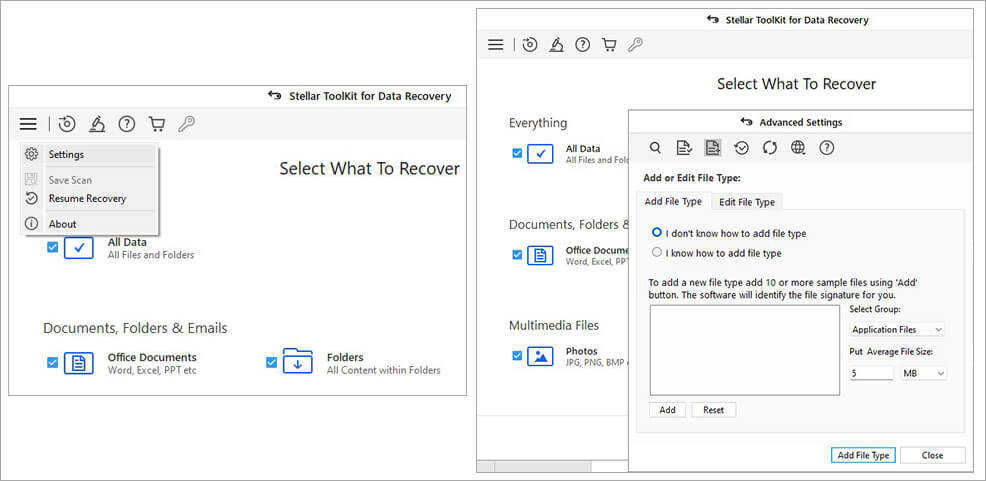
Tip: If there is a custom file type that you wish to recover, go to Settings > Add File Type and follow the software instructions.
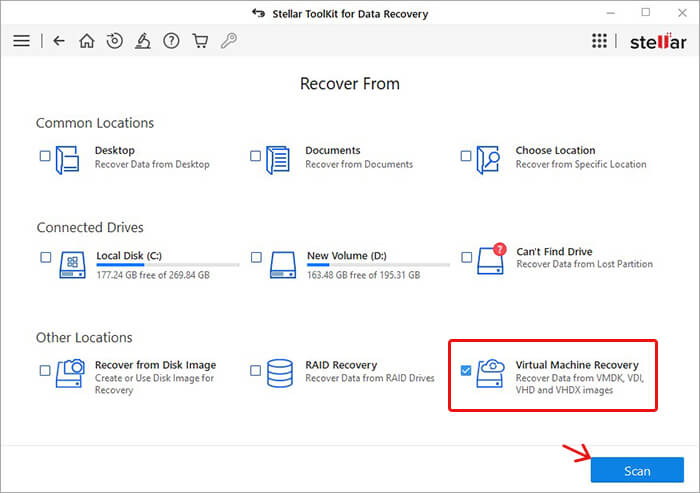
- On the next prompt, select Virtual Machine Recovery > Scan.
- Click ‘Add Image’ to browse and select the virtual disk image file. You may also use the ‘Find Image’ option to locate the hidden/lost virtual drive. Once added, click Scan.
- After adding the image, click Mount.
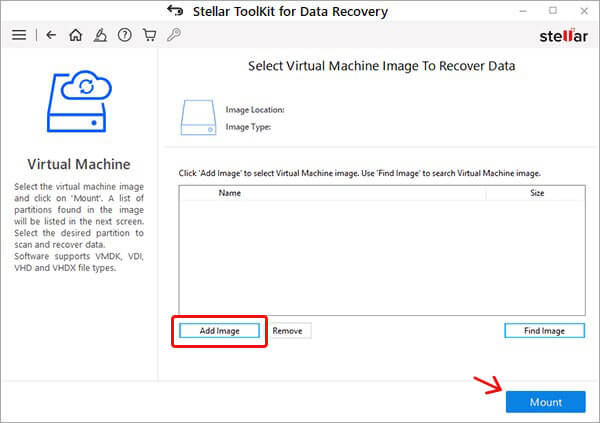
- The software will mount the virtual disk image and display the partitions.
- Select the partition that contains the required data and scan it.
- Select the files you want to retrieve from the scan results and click Recover.
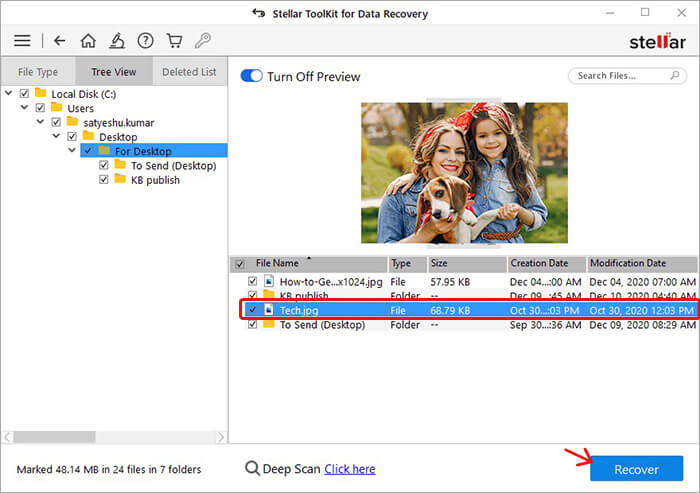
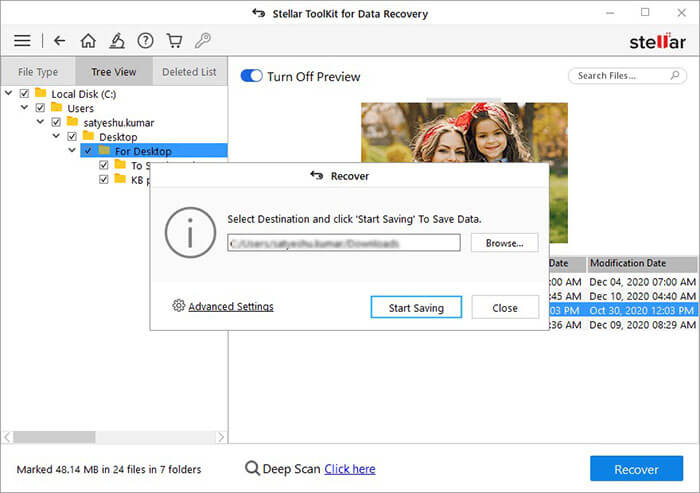
- Browse the destination where you want to save the recovered file. (Always store the recovered data on an external drive or another drive partition.)
- Finally, click Start-Saving to save the recovered data.
Hopefully, you should be able to recover virtual disk data now. Regarding the server manager issue, you should be able to avoid the wrong disk being reset and accidental data loss. Let us know your queries or suggestions in the comment section below.
FAQs
1. What is a Server Reboot?
When you reboot a Server, it shuts down all the processes and restarts the server. Rebooting the server takes a long time and is usually used when restarting the server doesn’t solve whatever problem you’re facing.
2. How can I access Server Manager on my system?
You can press Windows + R to open the Run dialog box. In the Run dialog box, type ServerManager and click OK. Then, you’ll be able to access the Server Manager. You can also locate Server Manager from the taskbar or Start menu.
3. How do I restore my Server Manager?
You can restore the Server system in different ways, including using Backup, Resetting the server to factory default settings, restoring or repairing the system drive, repairing the server using installation media, etc. In addition, you can read this Microsoft page to repair or restore a server running Windows Server Essentials.
Was this article helpful?