My camera suddenly stopped working. It only displays a black screen, and if I try to capture a photo, it will give me the error code 0xA00F4292 ‘PhotoCaptureStartTimeout.’ Can someone tell me what to do?"
Windows user
Windows camera error code 0xA00F4292 ‘PhotoCaptureStartTimeout’ is a commonly reported error users encounter when using the built-in webcam. This error code is accompanied by the message “Something went wrong. Try restarting your device’.
Camera error code 0xA00F4292 usually occurs due to an outdated camera driver, antivirus interference, incorrect registry entries, corrupt files, etc. The error may also arise when your system doesn’t have full access to the Camera app.
Read this blog to learn various methods to fix 0xA00F4292 PhotoCaptureStartTimeout Camera Error.
Methods to fix Windows Camera Error Code 0xa00f4292
You can try various solutions to fix camera error code 0xa00f4229 ‘PhotoCaptureStartTimeout,’ such as updating the camera driver, resetting or reinstalling the camera app, closing background apps, running the hardware and devices troubleshooter, etc. Let’s check these fixes one by one.
1. Check the Camera Access Settings
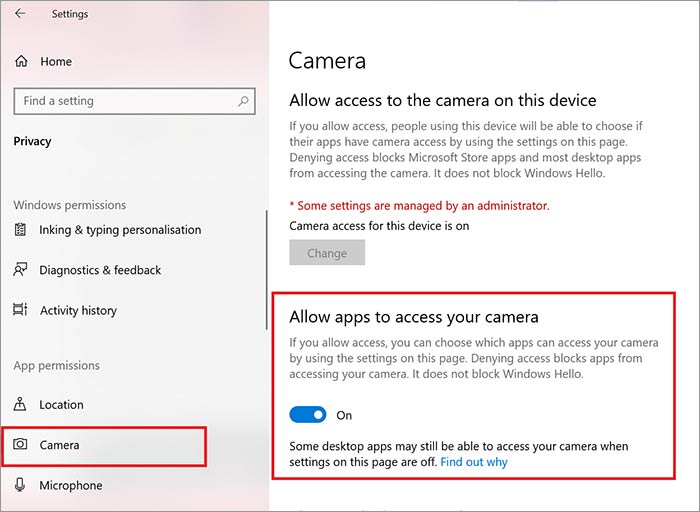
If you have prevented your computer from accessing the camera or haven’t allowed your PC to access the Camera, enable the Camera Access settings. Here’s how to do it:
- Press and hold Windows + I key together to open the Settings app.
- Go to Privacy and scroll down and select the Camera option.
- Turn on the slider of the ‘Allow apps to access your camera’ option if it’s disabled.
2. Run Hardware and Devices Troubleshooter
Windows Camera Error Code 0xa00f4292 can also be related to hardware, so run the Hardware and Devices Troubleshooter to resolve it. Here’s how to do it:
- Type cmd in the Windows Search bar, and click Run as Administrator to launch the Command Prompt.
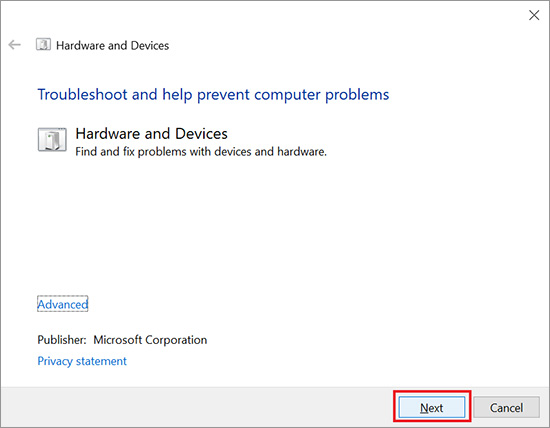
- Next, type msdt.exe -id DeviceDiagnostic to open Hardware and Devices troubleshooter.

- Click the Next button to start the troubleshooting process.
- Click Apply this fix when the troubleshooter finds a fix for you.
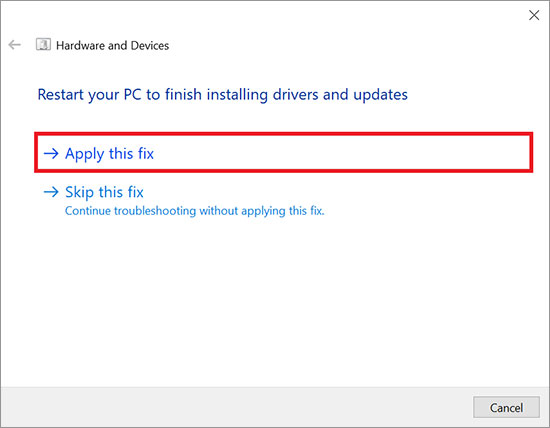
- You may need to restart your Windows PC for the changes to take effect.
3. Close Background Apps That Could be Utilizing the Camera
If other apps utilize the webcam simultaneously, this conflict between apps to access the same resources can cause error code 0xa00f4292. So, close the background apps that could be utilizing the camera, and here’s how to do it:
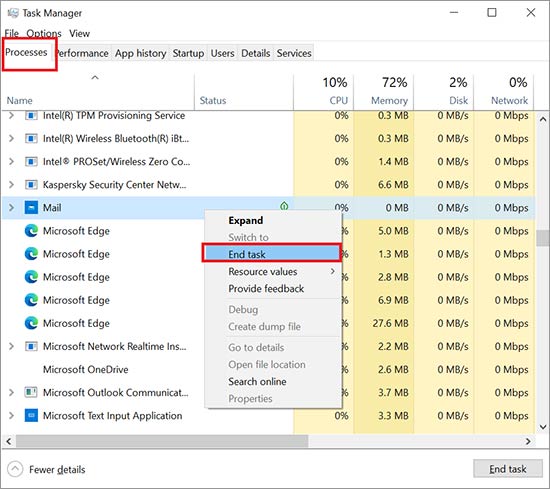
- Press Ctrl + Shift + Esc keys to access Task Manager and click on the More Details option at the bottom.
- Navigate to the Processes tab and find other apps that could utilize the camera.
- Right-click on the app and select the End task option.
- Next, open the Camera to see if the error code 0xa00f4292 persists.
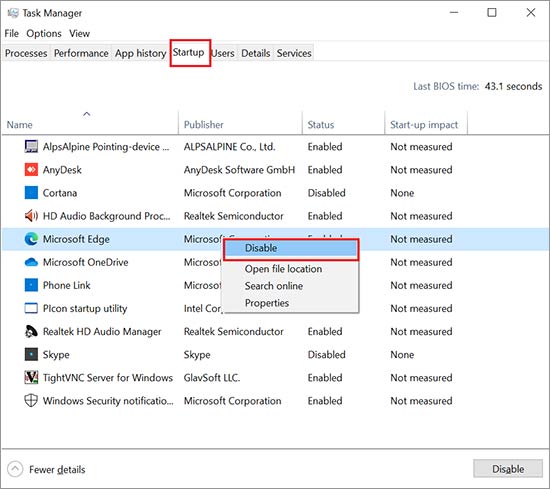
The abovementioned steps will temporarily turn off the conflicting apps as they will automatically start with Windows. If you don’t want the conflicting apps to start with Windows, disable them in the Startup tab of the Task Manager.
4. Update the Camera Driver
Windows Camera Error Code 0xa00f4292 can often be caused due to outdated or corrupted camera driver. Try to update the camera driver to fix this problem.
- Press Windows + R key to open the Run box, type devmgmt.msc, and hit Enter key to launch it.
- Expand the Camera in the Device Manager window, right-click on Integrated Webcam, and choose the Update Driver option.
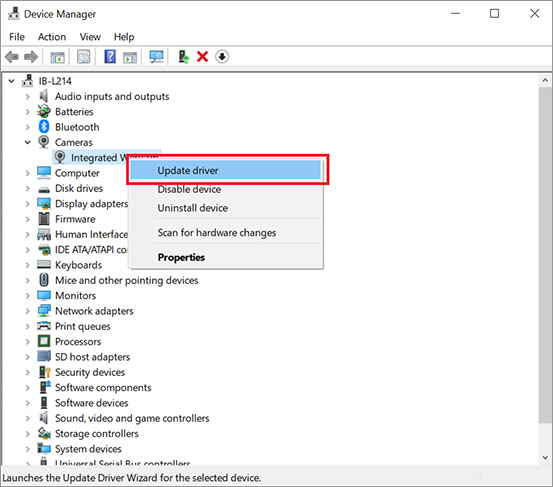
- Next, select the option of Search automatically for driver and follow the on-screen instruction to install the available driver.
5. Reinstall the Camera App
If the corrupted Camera app installation is the reason behind error code 0xa00f4292, you need to reinstall the app again. There is no Uninstall option for the Camera app in Settings , but you can use PowerShell to remove the app.
- Press Windows and X keys together and click on Windows PowerShell (Admin) to launch it.
- Type the command Get-AppxPackage *windowscamera* | Remove-AppxPackage and hit Enter key.

- Once the command finishes, exit PowerShell.
- Go to Microsoft Store app on your Windows and look for Windows Camera.
- Click the Get in Store app option and click Open Microsoft Store when the prompt appears.
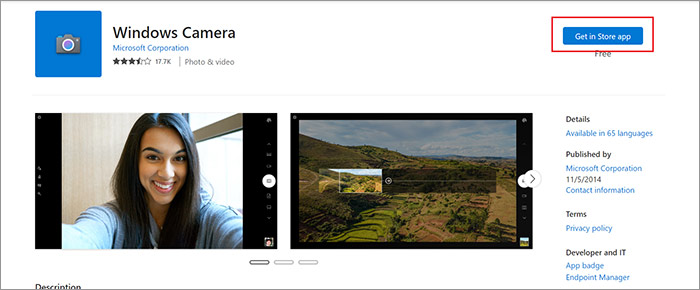
- Next, click Install to reinstall the Windows Camera.
6. Allow your Camera App Through Windows Defender Firewall
Often, Windows Firewall blocks may interfere with the Camera app leading to error code 0xa00f4292, so allow an exception to the app to resolve the issue.
- Press Windows + R keys together to launch the Run window.
- Type control firewall.cpl and hit Enter key.
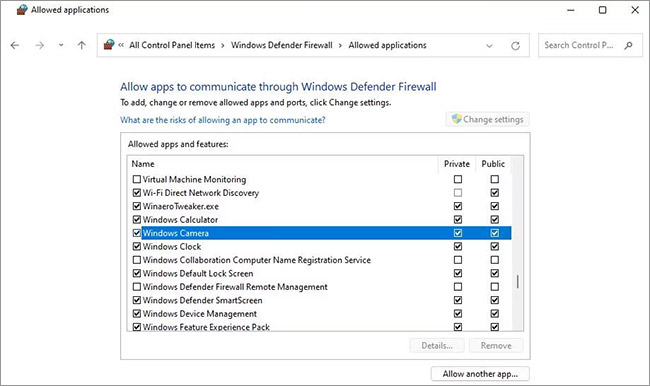
- Now, click on Allow an app or feature through Windows Defender Firewall.
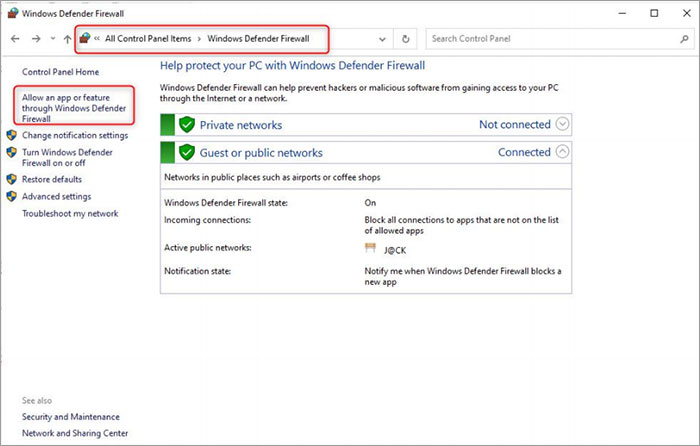
- Select Change Settings in the Allow Apps window and ensure the Private and Public columns next to Windows Camera are checked.
7. Clear the Camera Roll Folder
The camera roll is the default location to store the photos captured using the webcam. If this folder is corrupted or virus infected, it may lead to 0xA00F4292 PhotoCaptureStartTimeout Camera Error. You can try deleting the content of the Camera Roll folder to fix this issue.
- Press Windows + E keys together to launch File Explorer.
- Go to This PC > Pictures > Camera Roll.
- Now, select all the pictures in the folder and click Shift + Delete key to remove these photos permanently.
- Restart your computer to see if the error persists.
Note: What if you accidentally deleted any important images from Camera Roll folder? In such scenario, use a professional photo recovery software like Stellar Photo Recovery to recover deleted images from your Windows Camera Roll folder. This tool can easily recover lost or deleted photos, videos, audios of any file type from HDD, SDD, memory cards, and any other storage media.
8. Reset the Camera
Changes or problems in the Camera app often result in a ‘camera error code 0xa00f4292’. Reset the camera app to its original settings. Here’s how to reset the camera app:
- Press Windows + X, select Settings, and click Apps.

- In the left pane, select Apps & Features, and click on the Camera app in the right pane.
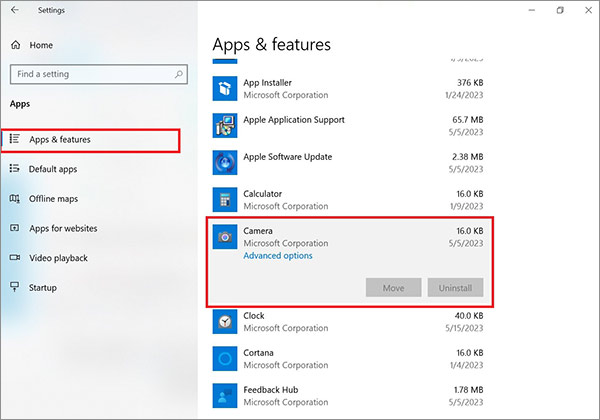
- Click Advanced options.
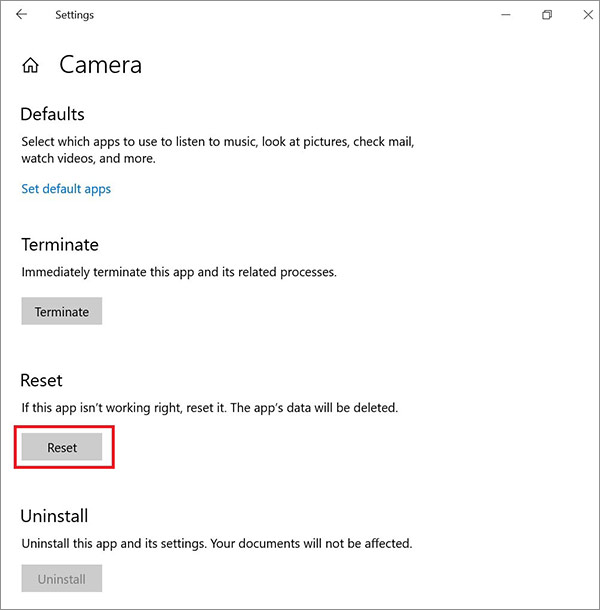
- Scroll down and click the Reset button to reset your Camera app.
- Click Reset to confirm your choice.
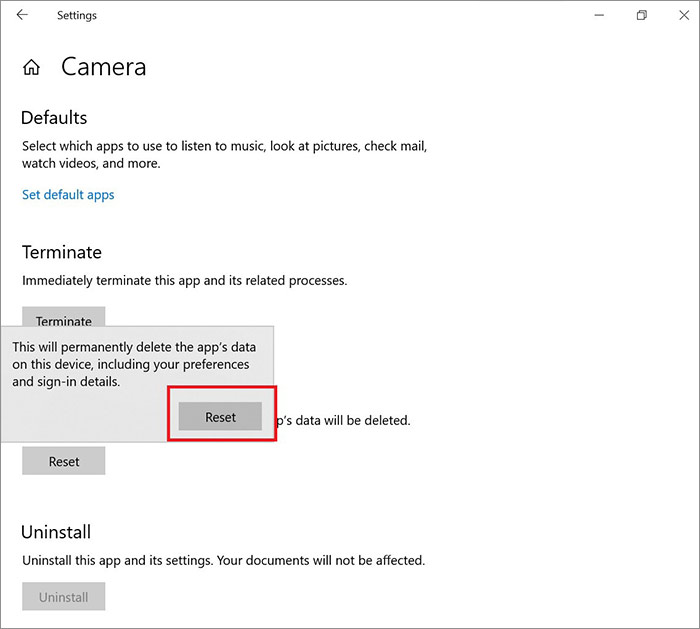
Wait for the reset process to complete and check if the camera error code 0xa00f4292 is fixed.
If no solution works for you, try to edit System’s registry key to solve the camera error code 0xa00f4292.
Note: Edit the System Registry Key with caution; if not done properly, your system/data may get corrupted.
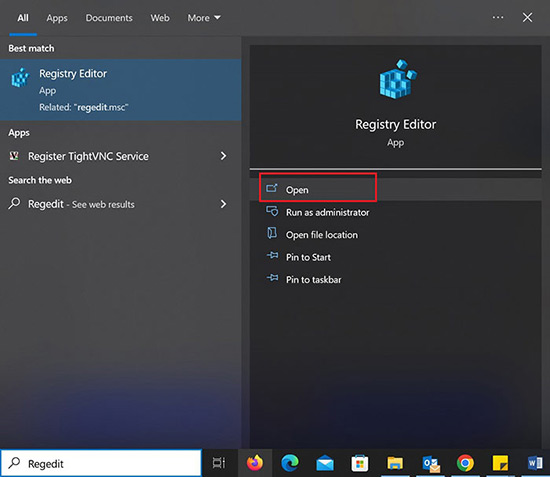
- Type Regedit in the Windows search and click Run as Administrator to launch Registry Editor.

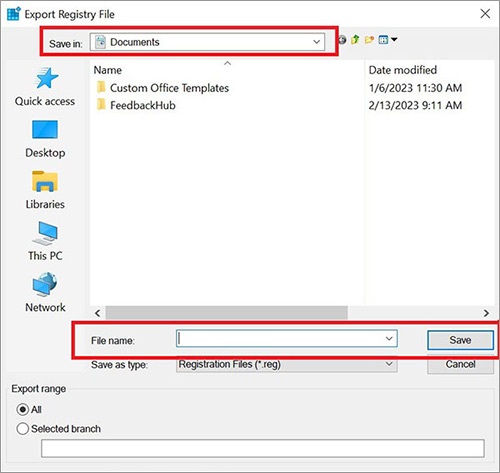
- Now, back up your registry and choose a location on your system to save this backup. This is done as a precaution; if anything goes wrong, use the backup to restore the previous registry. Click Save.
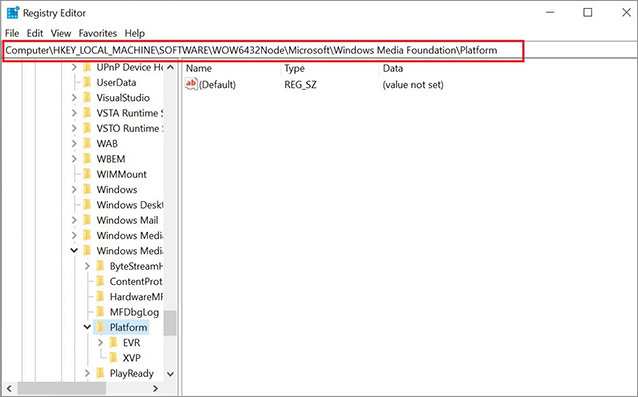
- Now, copy and paste the following command in the Menu bar and click Enter.
For 32-bit System
Computer\HKEY_LOCAL_MACHINE\SOFTWARE\Microsoft\Windows Media Foundation\Platform
For 64-bit System
Computer\HKEY_LOCAL_MACHINE\SOFTWARE\WOW6432Node\Microsoft\Windows Media Foundation\Platform
- Right-click on the right window, click New and select DWORD (32-BIT) Value.
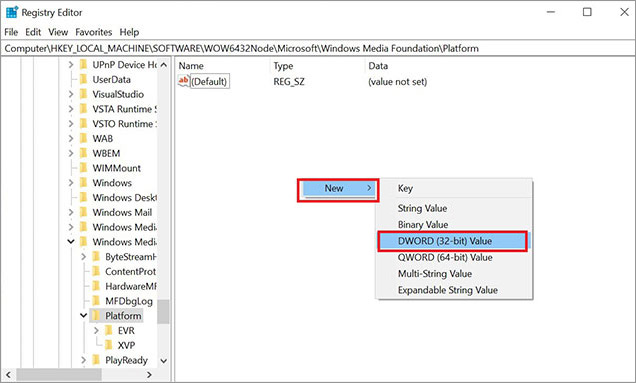
- Now name this value as EnableFrameServerMode.
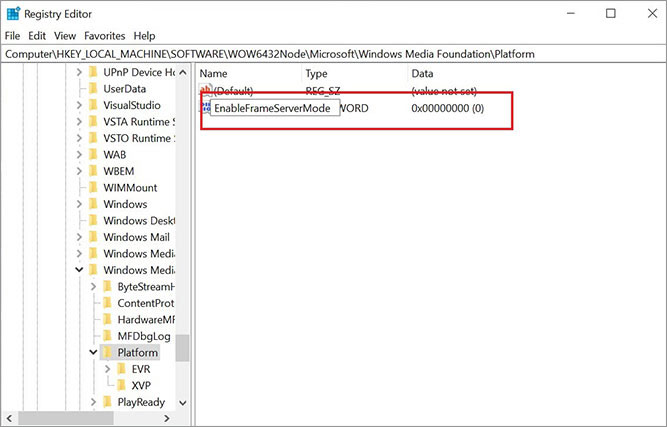
- Right-click on this registry value, select Modify, set its value to 0, and click OK to save the changes.

- Restart your system and check if the Windows Camera Error Code 0xa00f4292 is fixed.
Conclusion
Windows Camera error code 0xa00f4229 ‘PhotoCaptureStartTimeout’ can be annoying when you need to use your camera. However, you can easily resolve this issue by updating the camera drivers, checking camera permission, and running the Hardware and device troubleshooter. You can even try to tweak the platform registry key, reset or reinstall the Camera app and clear the camera roll folder to get your camera to function properly again.
FAQ
Was this article helpful?