What Does the Error Code 100006 Mean?
The error code 100006 on a Mac means an issue occurred with some Mac feature, apps, or operations in general. This error will keep appearing on your screen unless you fix it.
What Causes Error Code 100006?
Error code 100006 is usually a result of the following:
- Inappropriate processes on the system, application, or service.
- Damaged system files.
- Malware or spyware attacks, suspicious file download.
- Incompatible or outdated software/hardware installed on your Mac.
- The startup drive is filled with junk files.
How to Solve the Error Code 100006 on your Mac?
1. Run an Antivirus Scan
Apple has built-in protection tools working in the background on Mac: File Quarantine/Gatekeeper and Xprotect. If you have an antivirus on your Mac — run a full scan. If not — you can always download one by choosing a trustworthy antivirus app.
2. Delete Suspicious Apps
Unwanted apps are often bundled with other software that you download and install. This way you may end up having apps you were not intending to use.
To locate the apps on your Mac, use any of these two methods:
A. Go to the Finder → Applications folder > look at the apps you don’t remember installing. These apps can potentially be harmful. Delete the ones you don’t recall downloading.
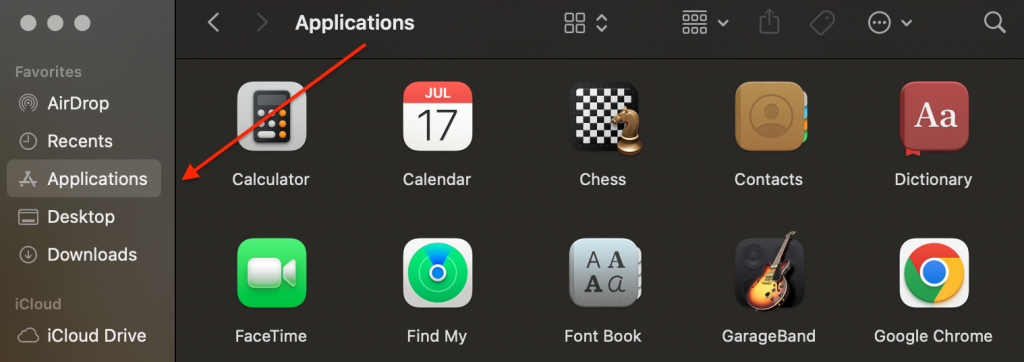 Applications folder on Mac
 B. Open Activity Monitor using Spotlight. When in the Activity Monitor app, click the Memory tab. Check which apps use the most significant amount of memory, and make sure these apps are trustworthy. If not, consider deleting them.
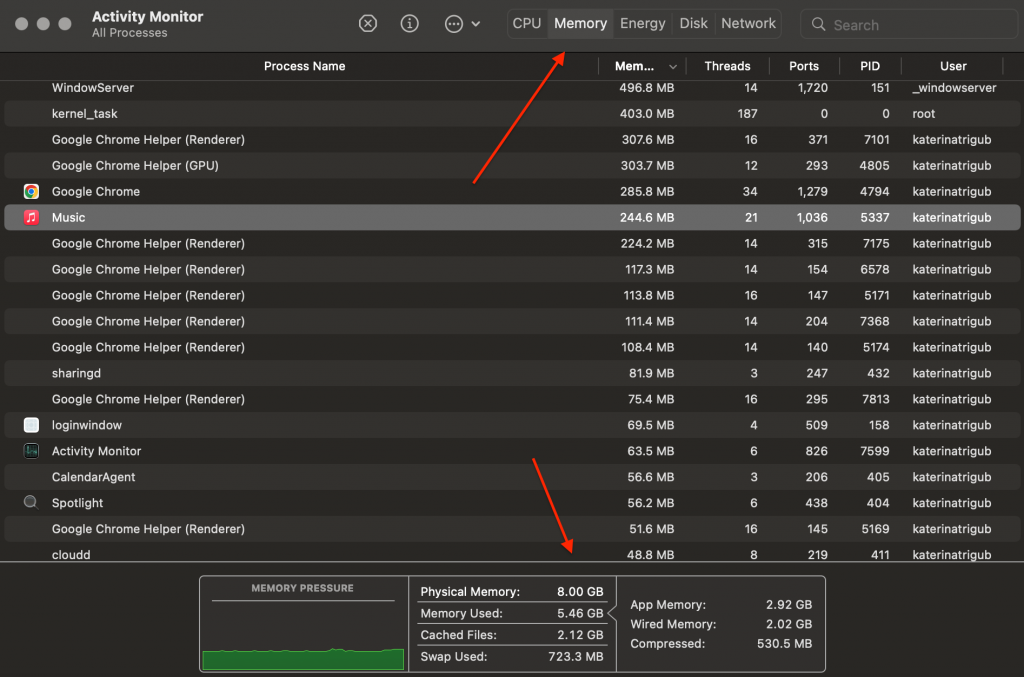 Activity Monitor > Memory tab
 3. Free Up Disk Space on Your Mac
Lack of disk space on the Mac can cause Error Code 100006 as well. Here are simple steps on how to optimize storage space:
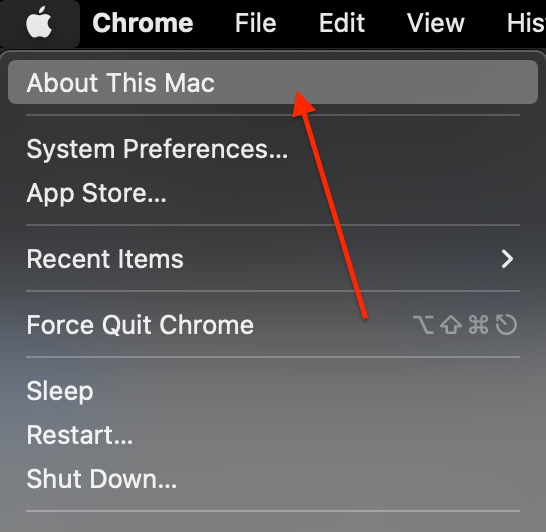
A. From the Apple menu in the left-up corner of your screen click About This Mac.
 Apple Logo > About This Mac
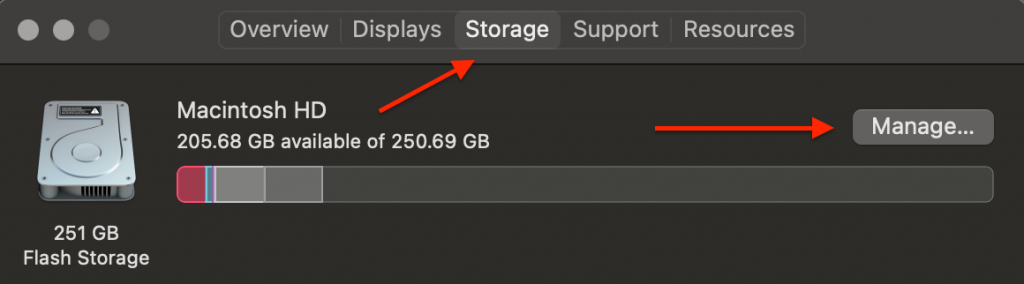
 B. Click Storage. The storage bar calculates the amount of used and free storage space. After this analysis, it will show several categories of files.
C. Click the Manage button to open the storage control window.
 Apple Logo > About This Mac > Storage
 D. To start the optimization process, choose from the listed features (Store in iCloud, Optimize Storage, and Reduce Clutter) and delete the files you don’t need. Learn more about these features.
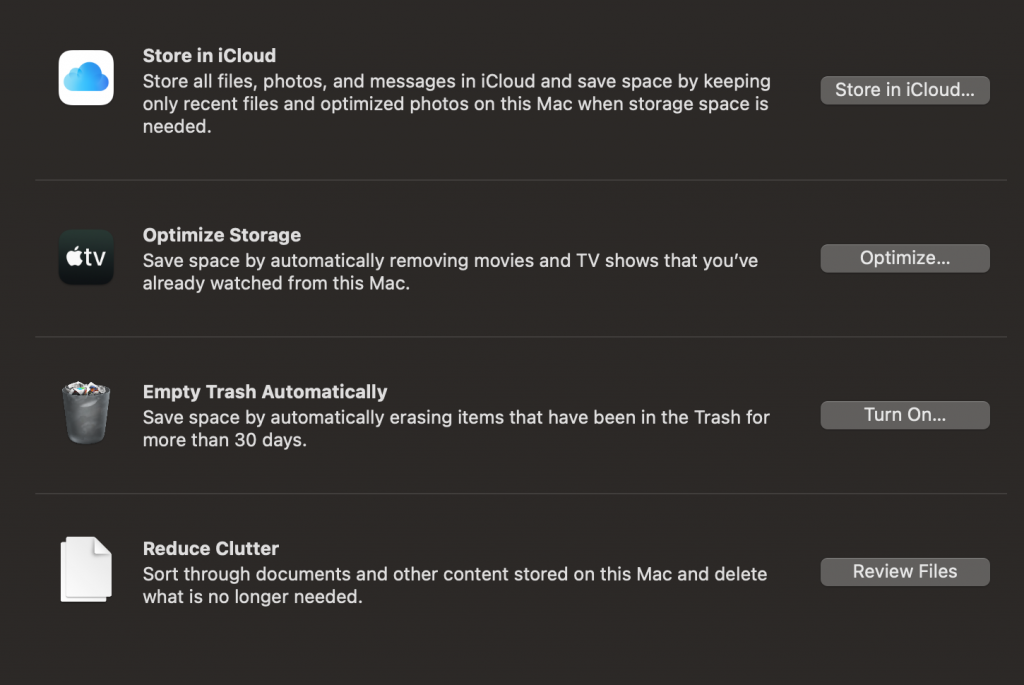 Storage management tool on macOS Monterey
 E. Check the available space shown to see the improvements made. Also, you can check it in the About This Mac window.
4. Run Disk Utility First Aid
The Disk Utility tool checks your Mac’s disk status. It has tools that locate and fix errors for you. After the analysis, the First Aid function will detect and resolve the issue causing error code 100006.
Follow the instructions below to run Disk Utility First Aid:
A. Go to Finder > Applications > Utilities and open Disk Utility.
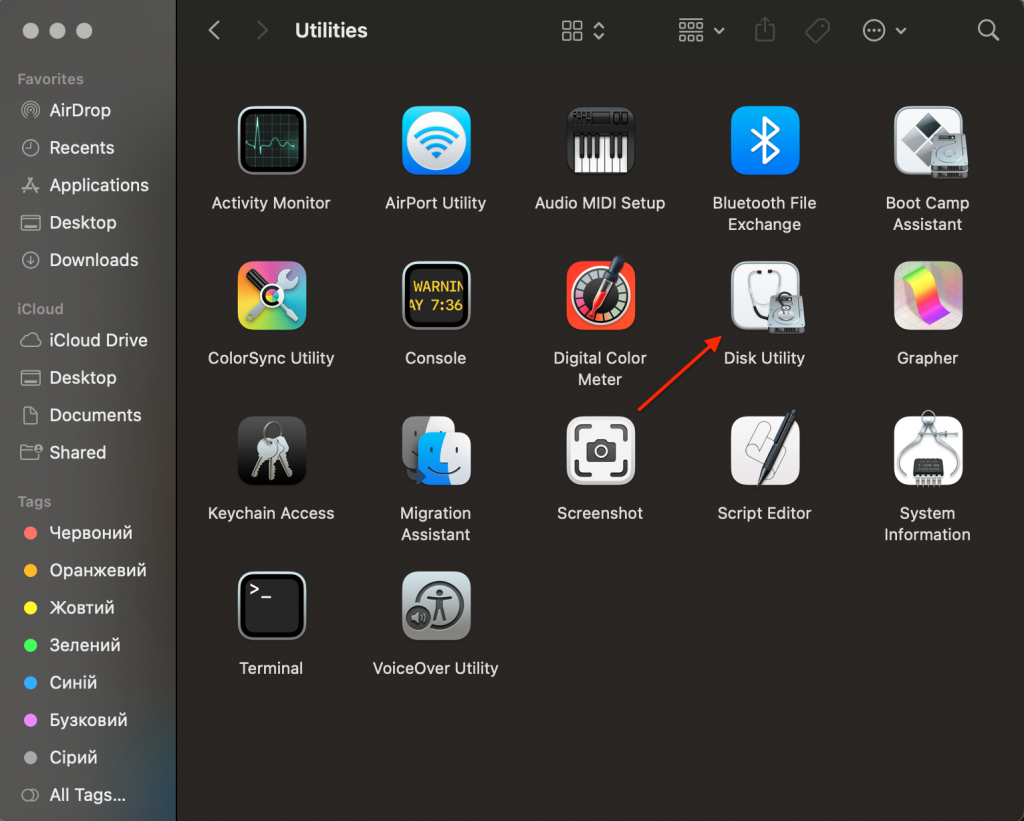 Applications > Utilities folder > choose Disk Utility
 B. In the left sidebar, select the disk you want to check.
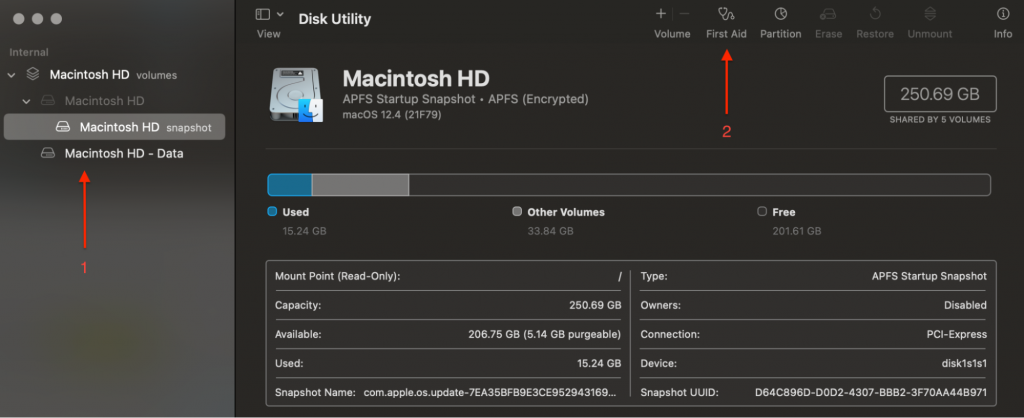 Disk Utility > choose a disk > run First Aid
 C. Click the First Aid icon at the top > hit Run.
D. After the scan, you’ll see a menu showing the status > click on it to find out the details. The Disk Utility tools will fix the errors and alert you about the issues it can’t repair.
5. Update Your Mac
Checking for and installing software updates on your Mac is essential. Updates to macOS add new features to your Mac, improve the power efficiency, or fix problematic software bugs.
Don’t forget to back up your Mac. After that, follow the instructions below to find and install the software available.
A. Tap on the Apple menu in the upright corner of your screen, and click System Preferences.
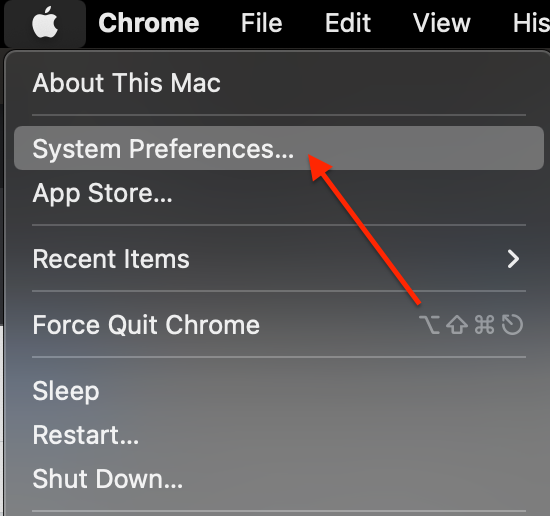 Apple Logo > About This Mac
 B. In System Preferences, choose Software Update.
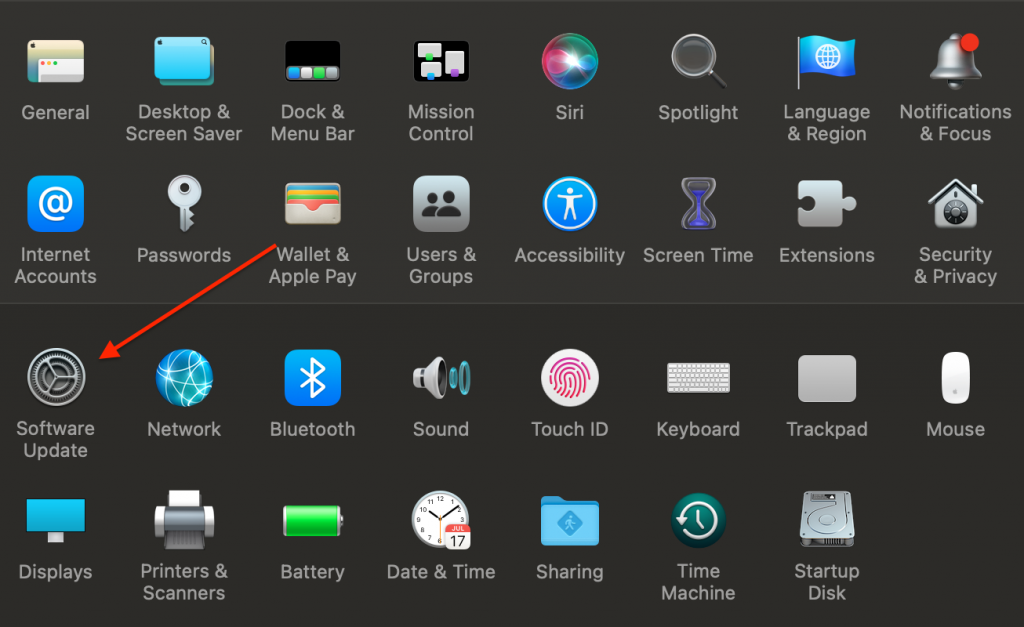 System Preferences > Software Update
 C. Tap Update Now or Upgrade Now:
- Update now installs the newest updates of the current macOS available, from macOS Big Sur 11.5 to macOS Big Sur 11.6, for example.
- Upgrade Now installs a significant new version with a new name, like a macOS Monterey.
Related: macOS Monterey Update: Recent Problems And Fixes
6. Reinstall macOS
Reinstalling macOS is a practical troubleshooting step applicable when fixing error code 100006 on your Mac. First, find out whether you’re using Mac with Apple silicon or an Intel-based Mac (the instructions will be different for each one). Next, follow the steps suitably to go into the Recovery Mode:
Apple silicon
- Turn on the Mac > press and hold the power button. You should see the startup window.
- Click the Options button (gear icon).
- Tap Continue.
Intel processor
- Turn on your computer and instantly press and hold Command (⌘) + R until you see an Apple emblem or another image.
- Choose a user > click Next and fill in the administrator password if prompted.
- To begin the installation process, you’ll need to choose the Reinstall macOS option. Then, click Continue and follow the instructions you see. After reinstalling macOS, your data will remain on your Mac. It won’t be deleted after this process.
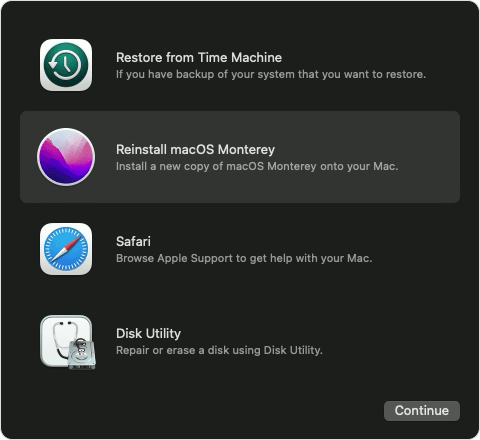 macOS Recovery window
 Wrap Up
It’s always confusing and annoying to get errors popping up when you are working, playing, or just browsing social media on your Mac. And it’s always pleasing to know that you fixed the issue on your own like a proper technician! We hope one of these solutions helped you fix error code 100006.
Related reading:
[Explained] macOS Recovery Mode and How to Use it
What is Other Storage on Mac and How to Clean it up
Was this article helpful?