The Windows operating system comes equipped with a lot of built-in tools and applications to make the user experience more satisfactory and enjoyable. Among other applications is a media player called the Windows Media Player, which you can use to play video and audio files, such as MP4, MOV, MP3, etc.
The Windows Media Player (WMP) supports native display resolutions and is updated fairly regularly along with Windows updates. It has a simple interface that most users find easy to use. For people who only seek to play video and audio files (without much customization to audio or video playback), this should be sufficient. But sometimes, a simple media player like this might cause a few issues when playing video files.
You may encounter stuttering, lagging, or slow playback of video files on WMP, and it may be quite inconvenient if you don’t have a backup media player installed. If you encounter such issues, we can assure you that there’s no need to install another media player. WMV issues can be fixed with a few simple steps that are detailed in this post. But before we go to the fixes, let’s take a brief look at why these issues show up in the first place.
WMP is a lightweight application, which means it doesn’t hog up much system resources to run. There might be a few exceptions when running on outdated systems or higher resolution videos, but otherwise, users don’t report facing any issues when playing videos on WMP. So why do issues like laggy or slow video playback occur on it? Let us take a look at some of the common reasons:
- Background applications – If you’re running any background application that is consuming a majority of your memory and CPU resources, this might lead to your video playback slowing down or stuttering.
- Outdated version – If you are running an older version of Windows like Windows 7, 8, or 8.1, you will not get frequent updates for your applications. Eventually, this might lead to faulty playback.
- Malware – Some malware or virus can be consuming your system resources, making your computer perform worse.
- Outdated drivers – When your graphic card’s drivers are outdated, you may encounter glitches and lag in your video playback.
- Corrupted video file – A corrupted video file will fail to play or play slow or with a lot of lag and stuttering.
Now that we’ve seen the reasons, let’s proceed with some of the most common fixes to the issue.
How to fix slow video playback in WMP issue?
1. Use an anti-malware software
Malware or viruses can affect how your application or files behave. This might be the reason why your computer might be performing poorly, leading to issues with the media player. We suggest installing anti-malware software and getting rid of all the malware before proceeding with any further steps.
2. Close the background applications
If you are running any memory-intensive applications in the background while playing a video file on WMP, we suggest you close them to prevent the lagging video playback.
Note: You can also open Task Manager by right-clicking on your Taskbar at the bottom of your screen to see which unwanted application is taking the most resources and terminate them from there. But this is recommended for advanced users only; there are some vital system tasks there, which when closed abruptly, can potentially crash your computer.
3. Update WMP
Running an outdated WMP can result in videos playing slowly. We suggest you visit the official Windows website and install the latest version of the player to prevent any video playback glitches, slowing, and lagging issues.
4. Update your Windows and drivers
If you are running Windows 10, you must update it regularly. Windows releases updates for its applications and drivers on a weekly or fortnightly basis. We suggest you keep an eye out for these updates and follow through regularly.
5. Audio syncing issue
If you’re facing some simple audio syncing issues in the media player, they can be easily fixed. Audio sync issues can make the video viewing experience poor and may seem like you have laggy video playback. Follow these steps to fix this issue:
- Go to the media player and right-click on the top bar to open the following drop-down menu. Choose More options from this menu.
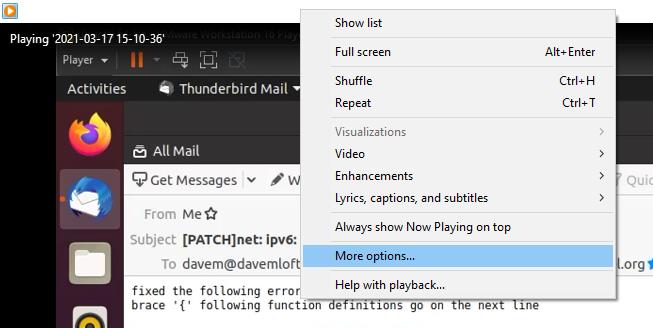 Figure: Window Media Player Options
- A dialog box will appear on your screen. Navigate to the Performance tab and check the box that says Drop frames to keep audio and video in sync, and click on OK to proceed.
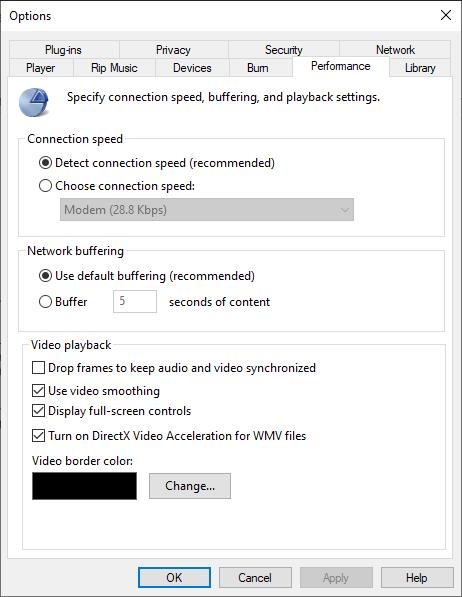 Figure – Window Media Player_Options_Performance Settings
 Now you should technically not face any issues with audio and video going out of sync in WMP. However, if you’re still seeing a poor playback performance, there might be an issue with the file itself. It may be damaged or corrupted.
In such a scenario, fixing the file might be the only solution. And luckily, we’ve got just the tool that can help you with the task.
6. Repair corrupted video file
As a quick fix, try playing the file with another media player to see if that works. If it still plays slowly or the player crashes, you can be sure that the file is corrupted. The final full-proof technique that you can use is repairing the file with Stellar Repair for Video.
Stellar Repair for Video is a competent and reliable tool specially designed to enable users to repair corrupted video files of any format, including MP4, MOV, MKV, etc. The software is compatible with Windows and macOS and is effective and safe to use. It supports repairing files saved on most storage media, including SD cards, HDD, SSD, etc. It’s very simple to use and comes with a free trial for you to try it before buying.
Allow us to show you how to use the software to repair your corrupted video files.
Downloading and installing Stellar Repair For Video
- Go to the official website page for Stellar Repair for Video and click on the Free Download button.
- After the download completes, double-click on the .exe file to run the installer.
- Once the installation is completed, launch the application and follow these steps to repair your corrupted video files.
- On the software’s interface, click on the box that says “Add File” to add the video file that needs to be repaired. You can also add multiple files here.
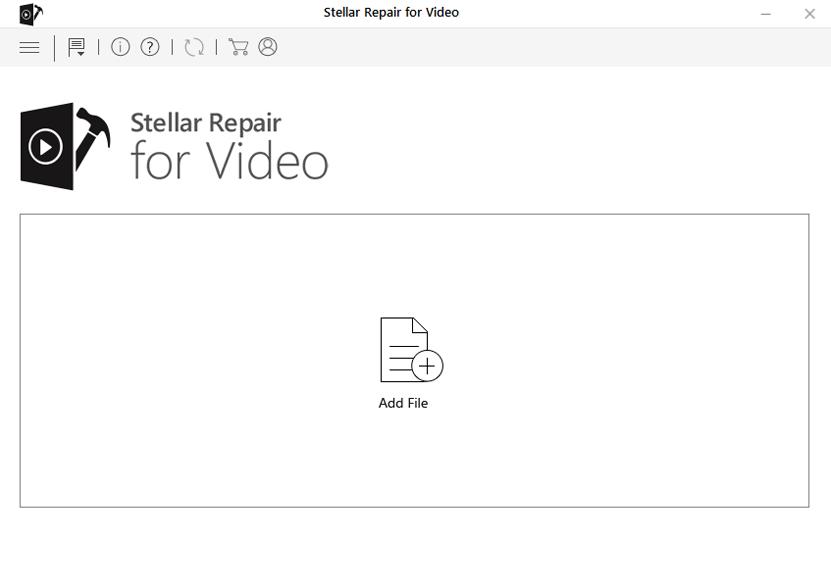 Figure: Stellar Repair for Video_Main Interface
- After adding the files to the tool, click on the “Repair” button to start the repair process.
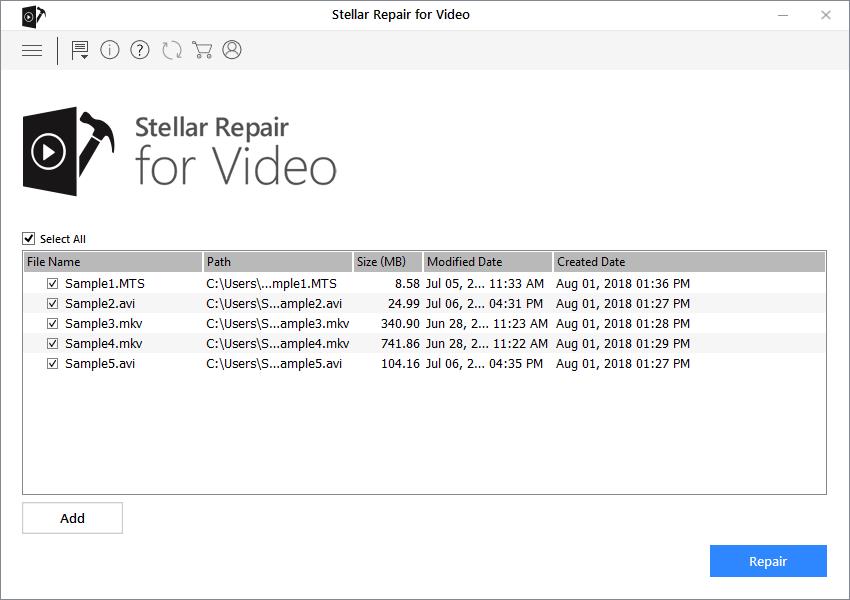 Figure: Stellar Repair for Video_Add Files
- When the repairing process has begun, a progress bar will show how much of the added files have been repaired.
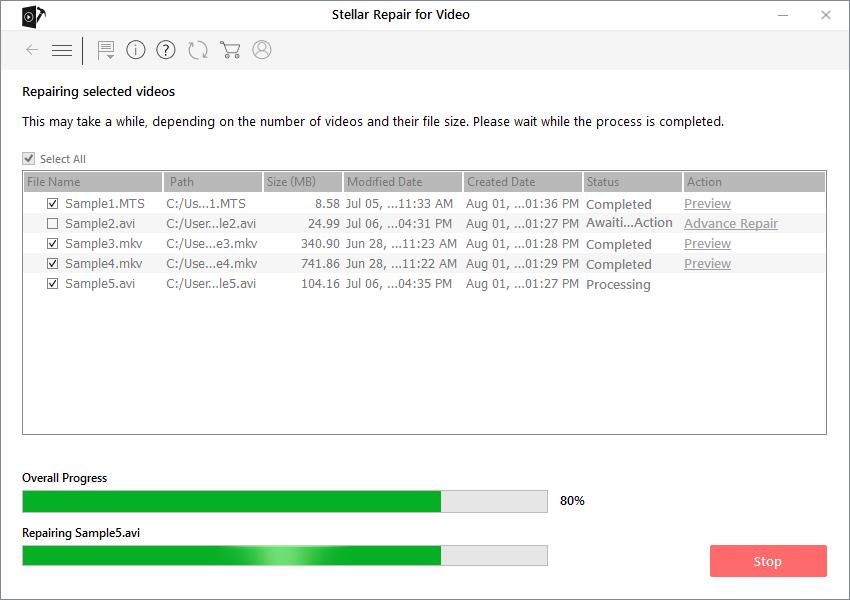 Figure: Stellar Repair for Video_Repair Process
- After the video files have been repaired, you can preview them before saving them to your computer.
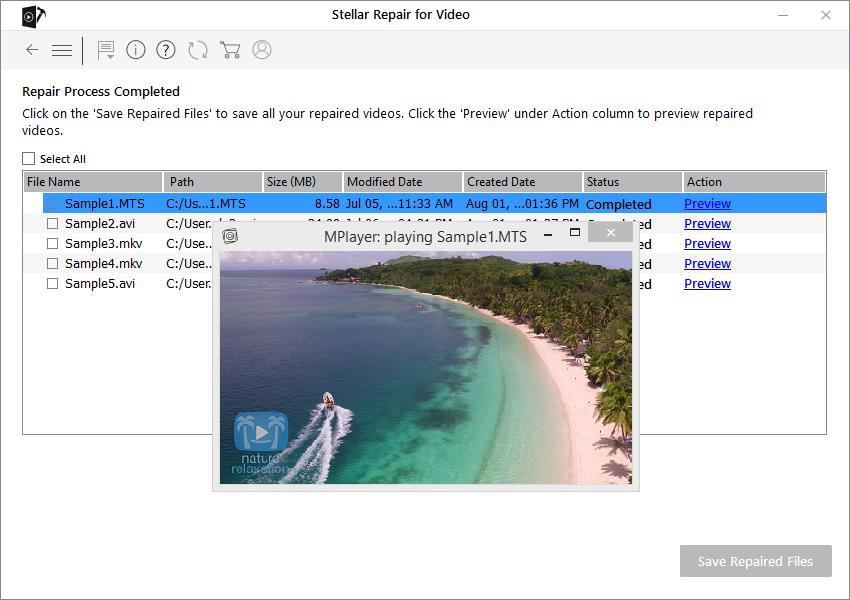 Figure: Stellar Repair for Video_Preview and Save Repaired Files
 This is how you can fix corrupted video files. Once you’ve repaired the damaged videos, try playing them on WMP to see if the slow or laggy playback has been fixed. We’re sure it would have, if not (and if the video is very critical), we suggest you consult professionals for a deeper look.
Conclusion
It can be quite annoying when a video shows glitches or lags, or worse, fail to play. But more often than not, understanding why you may be encountering such issues can help fix them. We hope the solutions that we provided for WMP playback issues in this post were helpful. In case of corrupted video files, a simple application like Stellar Repair for Video can be a life-saver.
Was this article helpful?