Fortunately, all the right solutions to overcome this error are discussed here!
The Vcruntime140.dllerror usually occurs when you try to open any application on your system. But instead of opening, the app throws an error that reads – “The code execution cannot proceed because VCRUNTIME140.dll was not found.”
What is VCRUNTIME140 DLL?
VCRUNTIME140.DLL is linked up with DLL (Dynamic Link Library), which contains files, codes, and data that many programs can use simultaneously. The DLL codes promote code reuse, code modularization, and efficient memory usage enabling the OS and programs to load and run faster and consume less disk space.
VCRUNTIME140.DLL is a runtime library of Microsoft Visual Studio that runs the programs or software developed in this Studio. The DLL file allows the smooth functioning and working of the apps developed under this Studio. However, when the DLL files are lost /damaged, or the system can’t locate the code in the DLL file to execute the app, you may face VCRUNTIME140.DLL Not Found error.
Many users have reported that when they tried accessing applications, such as Origin, CreativeCloud, and VMware Workstation, they first encountered MSVCP140.dll is missing error message. On closing this prompted error box, when they again attempted to access these apps, they received VCRUNTIME140.dll is missing error message.
What damage VCRUNTIME140 DLL error can cause to your system?
The VCRUNTIME140. DLL Not Found error can result in the app malfunctioning, app crashing, and other problems. It means you won’t be able to access your apps and their data. Hence, solving it becomes quite crucial. Here, we discuss some workarounds that you can try to solve the error. Additionally, to recover your app data, you can use professional data recovery software.
How to Fix VCRUNTIME140 DLL Not Found Error?
You can try the following DIY (Do-it-yourself) methods to fix this DLL error on your Windows 11 system.
#1 Repair Microsoft Visual C++ Redistributable Installation Files
One of the most recommended solutions to fix this error is repairing Microsoft Visual C++ Redistributable files. This package helps multiple Windows apps run smoothly. Follow the below steps to repair it.
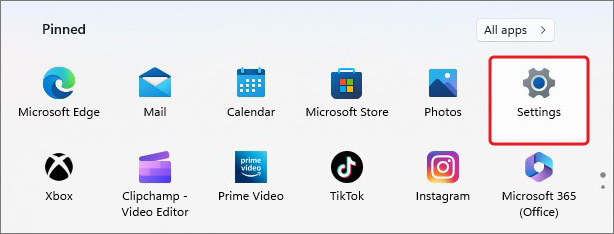
- Press the Windows button on your keyboard to access the Start menu and there, click Settings. (You can also press Windows + I to access Settings).
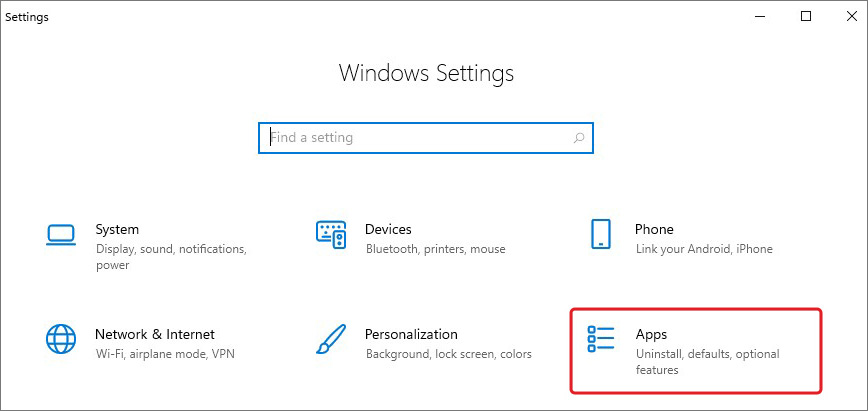
- In the Settings window, select Apps.
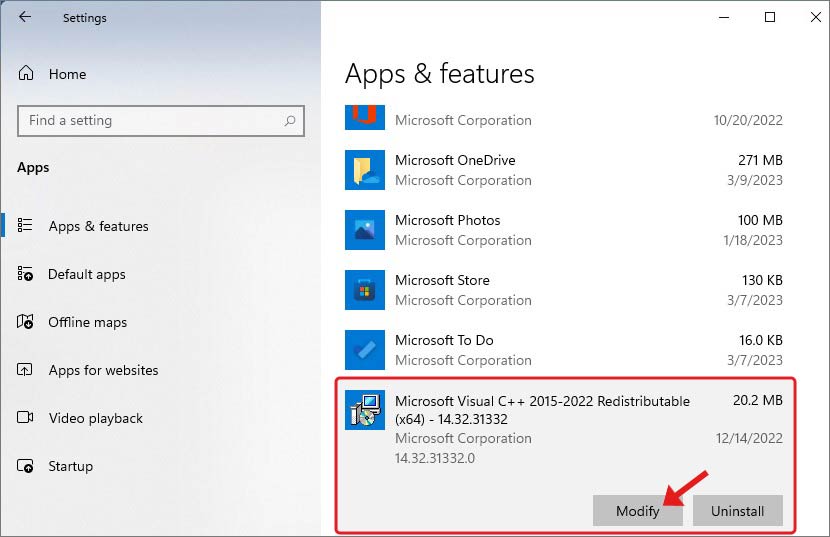
- Next, go to Apps & features > Microsoft Visual C++ > Modify.
- Click Yes, if prompted. Click Repair on the next prompt.
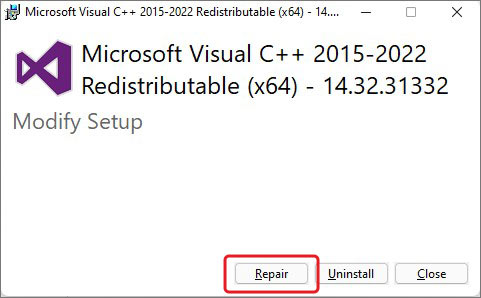
Let the process complete. Once done, reboot your system and check if the issue is resolved now.
#2 Uninstall Visual C++ Redistributable
If repairing the Microsoft Visual C++ Redistributable doesn’t work, try uninstalling it to solve the error with the following steps:
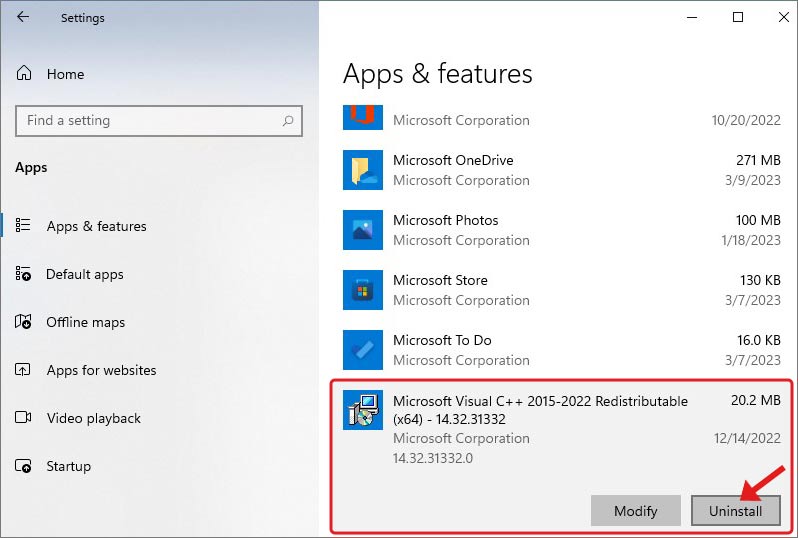
- Open Settings and follow Apps > Apps & features > Microsoft Visual C++ Redistributable.
- Select it and click Uninstall to proceed.
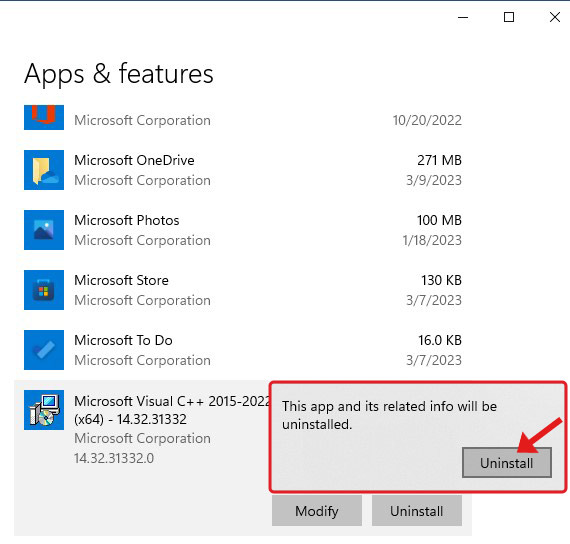
- Again, click Uninstall to confirm your action.
- Wait until the process is complete. Restart the system and check if everything’s working fine.
#3 Reinstall Microsoft Visual C++ Redistributable
Once you’re done uninstalling the Microsoft Visual C++ Redistributable package from your system, reinstall it afresh with the following steps:
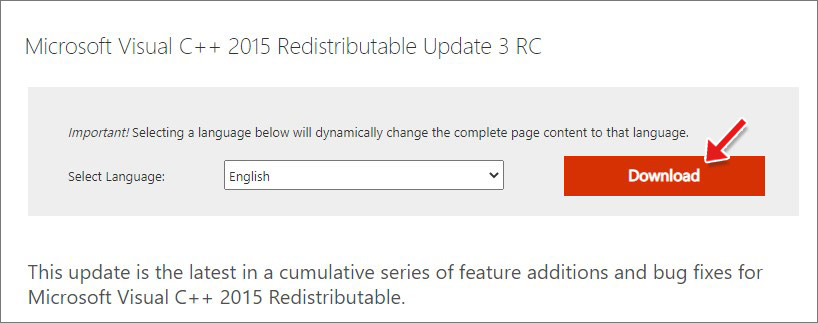
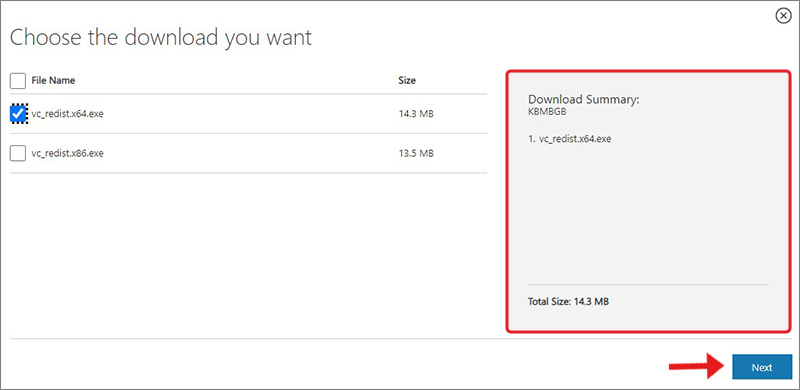
- Make sure you download the right file size as per your system and click Next.
- Open the downloaded file, check the box against ‘I agree to the license terms and conditions, and click Install.
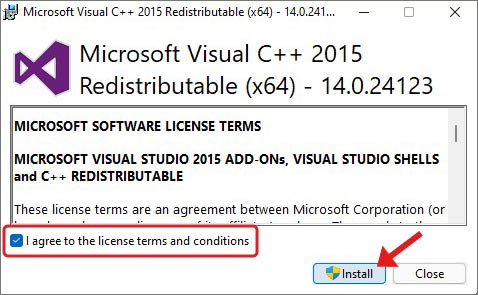
Let it install and when done, reboot your system. Finally, check if the error is fixed.
#4 Re-Register the DLL file
Registering a DLL refers to adding information to a central directory (Registry) for Windows to use. But if you encounter the vcruntime140.dll error while accessing the application, there might be some issues with the file. Hence, try re-registering it to fix the error with the following steps:
- Press Windows + S to open Search, type cmd and run the command prompt as administrator.
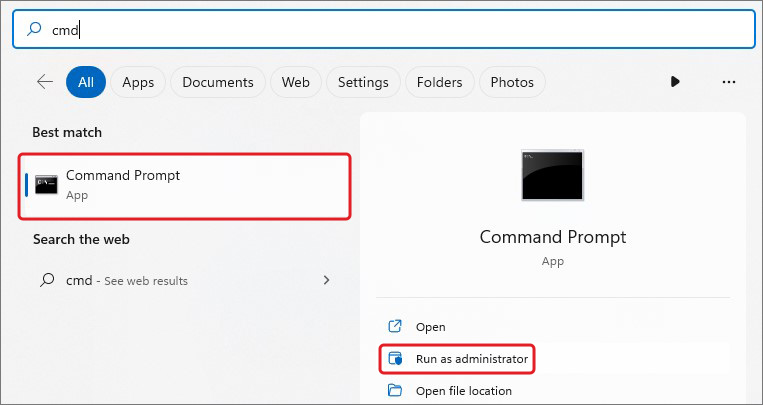
- Type regsvr32 VCRUNTIME140.dll and hit Enter.
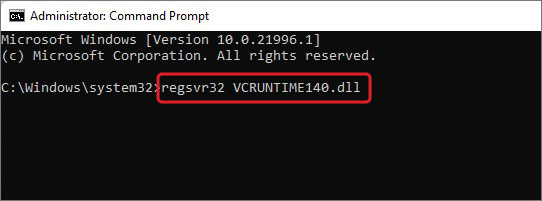
Wait for a while and then reboot your system.
#5 Run SFC and DISM Scans
DLL files are specific to Windows programs. They don’t work with other OS. And, when DLL files go missing, damaged, or corrupted, you may encounter a vcruntime error on your system. You can run the System File Checker and DISM utility to solve this issue. Follow the below steps:
- Open Command Prompt and run it as administrator.
- Type DISM /Online /Cleanup-Image /RestoreHealth and hit Enter.
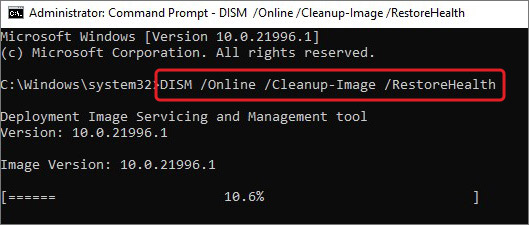
- Wait until the process is finished. Next, type sfc/scannow and press Enter.
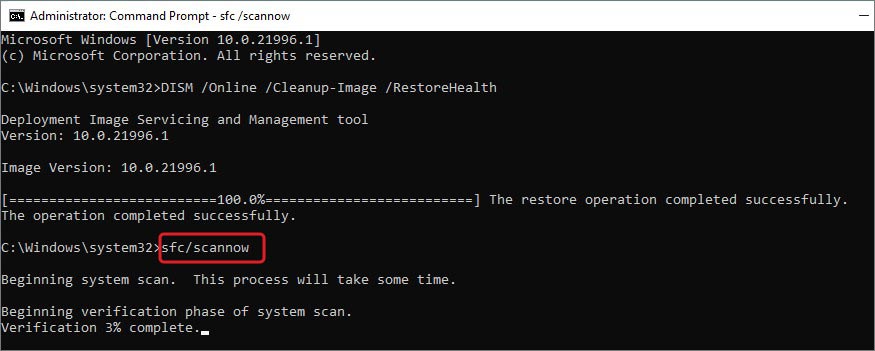
- Let the command do its work, when done, close the cmd window and reboot your system.
#6 Uninstall Recent Windows Update
If you get this error after installing a Windows update, the update might be buggy. You can uninstall it and see if things work out.
- Go to Settings and follow Update & Security > Windows Update > Update history.
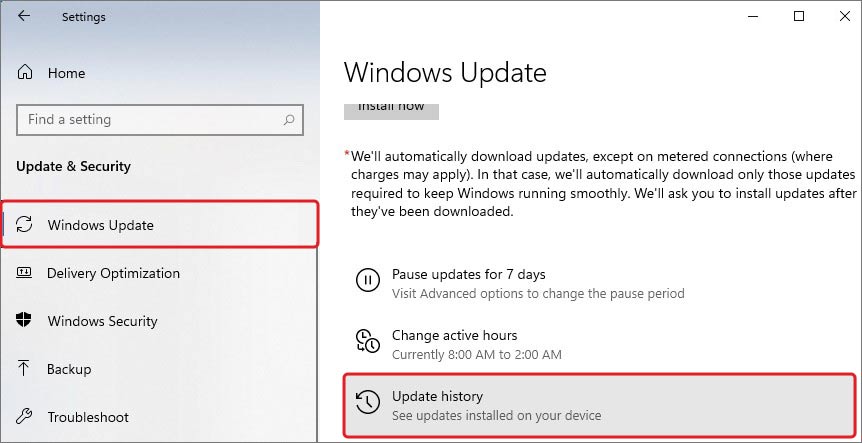
- Next, on the Update history window, click Uninstall updates.
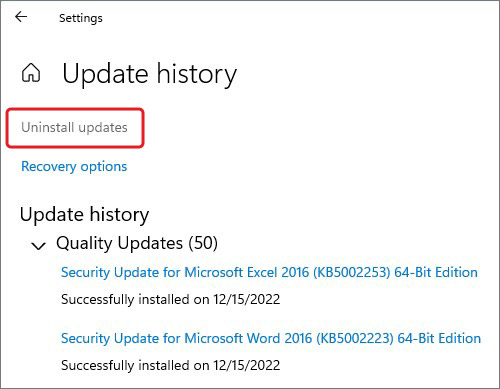
- Afterward, select the buggy update you installed recently and click Uninstall.
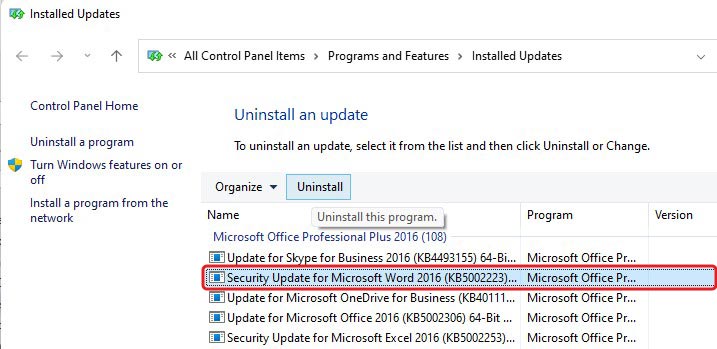
Finally, restart your system and see if the issue is resolved.
#7 Reinstall Troublesome Application
It is also possible that your application is not installed properly. There might be some broken app installation files on your system, causing the app to malfunction and throw errors. In addition, if you’re using an outdated version of applications, it may not work as expected. Hence, try reinstalling the app with which you’re facing problems. Follow the given steps:
- Press Windows + I to access Settings and go to Apps > Apps & features.
- There, select the application you want to remove and click Uninstall > Uninstall.
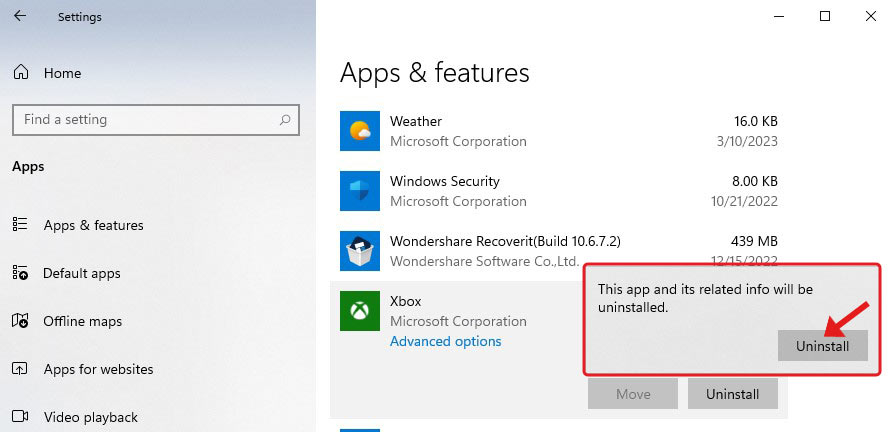
Once uninstalled, go to the official site of the application you want to install and reinstall the latest compatible version of it.
#8 Reset Windows
Lastly, if nothing works out in your favor and you still face the error, resetting Windows 11 will help you fix it. Resetting Windows will bring the system to factory settings and all the changes related to the device manager, apps, files, and others will be removed. Hence, backup your system data and programs or restore them with a dedicated data recovery software, such as Stellar Data Recovery Professional. You can use this tool to restore data from formatted, corrupted, or even crashed systems.
Once you’re done with backup or restoring data, proceed with resetting Windows with the following steps:
- Access Settings and then go to Update & Security > Recovery > Reset PC.
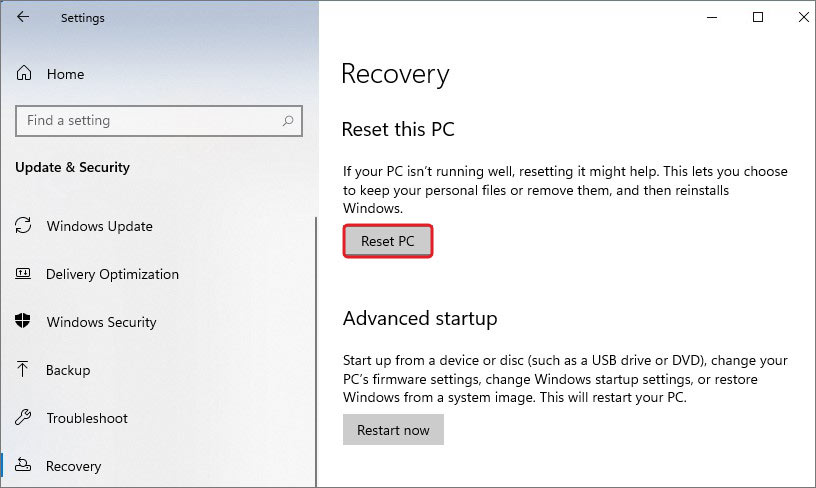
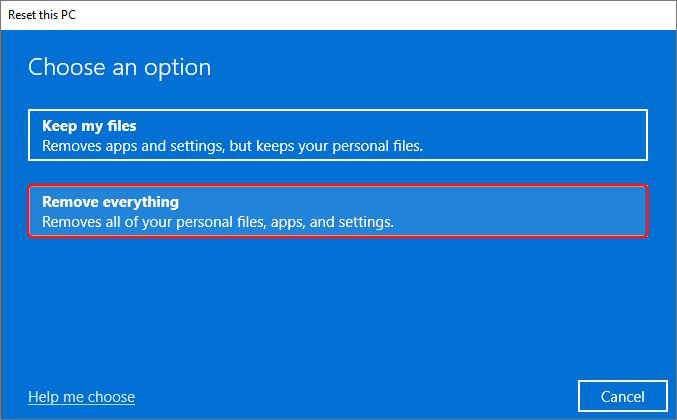
- On the next prompt, click Remove everything to let the process work efficiently.
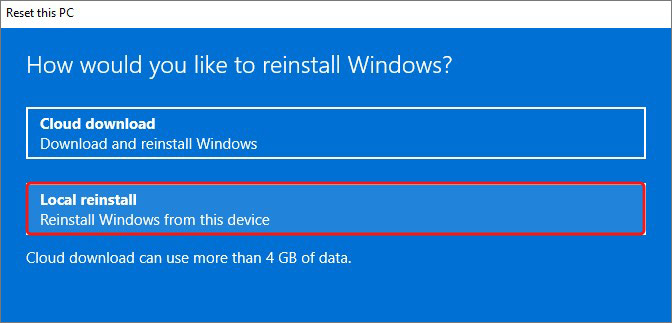
- Afterward, select Local install and proceed.
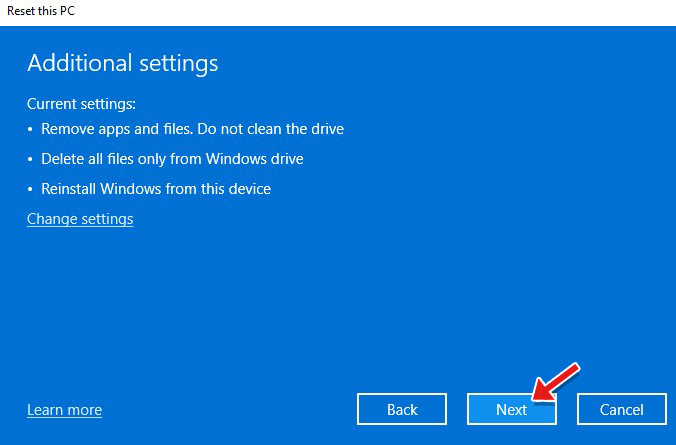
- See the current settings and if you’re okay, click Next. Else, you can click Change Settings and proceed with selecting the options you want.
- Confirm your choice and proceed to complete the process.
- Once done, restart the system.
You should be able to fix the Vcruntime140.dll with the troubleshooting methods discussed in this blog. Out of all the methods, be careful when you use the Command Prompt utility and reset Windows. If not done correctly, you may end up causing havoc on your system and losing your data. Hence, either back up your system (if possible) or use professional data recovery software to recover all the essential files, folders, and more.
FAQ