Outlook send and receive errors, such as ‘Sending reported error (0x800CCC0D)’ or ‘Receiving reported error (0x80042108), are common and may occur due to several reasons. While these errors do not obstruct users from accessing their Outlook account or historical emails, they prevent them from sending or receiving new emails or messages. As a result, this can hamper the work and impact business continuity.
Common Outlook Send/Receive Errors
Below are some common send and receive errors that you may encounter while using Outlook.
- The connection to Microsoft Exchange is unavailable. Outlook must be online or connected to complete this action.”
- “The server name you entered cannot be found on the network (it might be down temporarily). Verify that you are connected to the network and that the server name is correct.”
- “Task ‘YourEmail@Domain.com – Sending’ reported error (0x800CCC0F): ‘The connection to the server was interrupted. If this problem continues, contact your server administrator or Internet service provider (ISP).'”
- “Task ‘YourEmail@Domain.com – Sending’ or ‘Receiving’ reported error (0x8004010F): ‘Outlook data file cannot be accessed.'”
- “Task ‘YourEmail@Domain.com – Sending’ reported error (0x80042109): ‘Outlook cannot connect to your outgoing (SMTP) email server. If you continue to receive this message, contact your server administrator or Internet service provider (ISP).'”
- “Task ‘YourEmail@Domain.com – Receiving’ reported error (0x8004210A): ‘The operation timed out waiting for a response from the receiving (POP) server. If you continue to receive this message, contact your server administrator or Internet service provider (ISP).'”
Other errors:
- “Receiving reported error (0x800CCC19): ‘The server responded with an error. The operation timed out while waiting for a response from the receiving (POP) server.'”
- “Receiving reported error (0x800CCC15): ‘Unable to connect to the network. Check your network connection or modem.'”
- “Receiving reported error (0x80042108): ‘Outlook is unable to connect to your incoming (POP3) email server. If you continue to receive this message, contact your server administrator or Internet service provider (ISP).'”
- “Sending reported error (0x800CCC0E): ‘Cannot connect to the server. If you continue to receive this message, contact your server administrator or Internet service provider (ISP).'”
- “Sending reported error (0x800CCC0B): ‘Unknown error occurred while sending email.'”
- “Sending reported error (0x800CCC79): ‘Your message could not be sent because the server rejected the sender’s email address. The server responded: 530 5.7.1 Authentication required.'”
- “Sending reported error (0x800CCC67): ‘The server requires authentication to send messages. Please verify your account settings in Outlook.'”
- “Sending and Receiving reported error (0x80040900): ‘Outlook cannot resolve the server name. Please verify your account settings.'”
- “Sending reported error (0x800CCC81): ‘Unknown error (0x800CCC81). Server could not be found. Verify that the server name is correct.'”
- “Receiving reported error (0x80040119): ‘An unknown error occurred while accessing your Outlook data file. The file may be damaged or corrupted.'”
- “Receiving reported error (0x80040600): ‘An unknown error has occurred. Outlook cannot access the data file. Check the file for errors.'”
- “Sending and Receiving reported error (0x8007000C): ‘Out of memory or system resources. Close some windows or programs and try again.'”
- “Receiving reported error (0x800C013B): ‘The message store has reached its maximum size. Outlook cannot open the data file.’
- “Sending reported error (0x8004210B): ‘The operation timed out waiting for a response from the sending (SMTP) server. If you continue to receive this message, contact your server administrator or ISP.'”
Reasons for Outlook Send and Receive Errors
The Outlook send and receive errors may occur due to one or more reasons:
- Poor, unstable, or unavailable internet connection.
- Wrong or outdated email account settings.
- Incompatible or faulty third-party add-ins or anti-virus software.
- The Outlook data file (.pst) is inconsistent or damaged.
- Firewall settings.
12 Tips to Fix Outlook Send and Receive Errors
Follow these 12 tips to quickly troubleshoot and fix various Outlook send and receive errors in Outlook 2007, 2010, 2013, 2016 or 2019.
1. Check Network Connection
Poor network or internet connection can lead to Outlook send and receive errors as the client fails to communicate with the mail server. Thus, it’s important to ensure that your internet is working.
- Open the web browser on your system and open any website or do a Google search.
- If the internet is working, you will see the site loading or Google search results.
- If you don’t get any results or encounter connection issues, check your Ethernet cable. Make sure it’s properly connected. You can disconnect and connect it again.
- If you use Wi-Fi, reconnect to the network.
- Further, you may restart your router to troubleshoot your internet connection.
- Press the Start button > Settings > Network & Internet > Status to check the settings and use the Network troubleshooter to troubleshoot and fix the connectivity problem.

If this doesn’t resolve the network issue, contact your service provider. However, if the internet is working, apply the next tips.
2. Verify Email Account Settings
Follow these steps to check and verify that your Outlook email settings are correct.
- Open Outlook and go to File > Info > Account Settings > Account Settings.
- Under the Email tab, select the email profile and click Change.
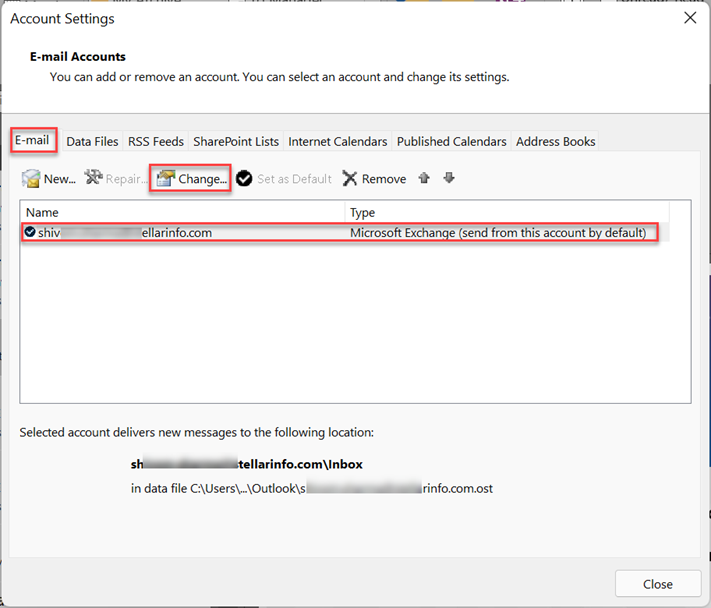
- Check the basic email settings. Make sure they are correct.
- You may re-enter the account details and settings.
- Do not close, continue to the next tip.
3. Check Outgoing Server Settings
After checking the basic email settings, click on More Settings. This opens the Internet E-mail Settings window. In the window, click the Outgoing Server tab and check the following details.
- Check ‘My outgoing server (SMTP) requires authentication.’
- Then choose ‘Use same settings as my incoming mail server.’
- Do not close the window and continue to the next tip.
4. Increase Server Time-Out Settings
By increasing the server time-out settings, you may fix the send and receive errors if caused by temporary network connection issues. In the Internet E-mail Settings window,
- Click the Advanced tab and look for the Incoming Server and Outgoing Server port numbers. Make sure these are correct and not changed. You can refer to the instructions shared by the administrator or reach out to them for the required details.
- Under the Server Timeouts, increase the duration from ‘Short’ to ‘Long.’
- Click OK to save the changes and restart Outlook.
- Click the Send/Receive tab in Outlook and click Update Folder.
- Outlook will try to synchronize the emails to and from the mail server.
If you receive new emails or emails in the Outbox folder are sent successfully, the Outlook send/receive issue is resolved. Otherwise, follow the next tips.
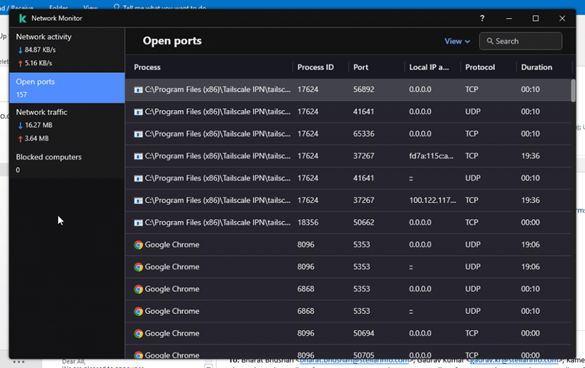
5. Disable or Re-Configure Firewall
Sometimes, firewall settings block certain ports that may prevent Outlook from communicating with the mailbox server, leading to Outlook send and receive errors. To fix this, you need to add an exception for Outlook.exe (for Outlook) and Msimn.exe (for Outlook Express) with access to your mail server’s incoming and outgoing ports.
If you are not sure, disable the firewall temporarily to check if it’s the cause behind the Outlook send/receive error. After disabling, if you’re able to send/receive new messages, contact the admin or service provider for the information and make changes to the firewall settings.
6. Clean up Emails Stuck in Outbox Folder
Check if there are any messages in the Outbox folder. If you find stuck messages, follow these steps to clear them and resolve the Outlook send and receive error.
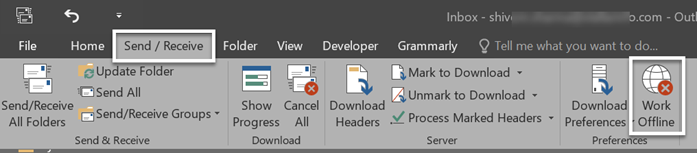
- Open Outlook, click Send/Receive > Work Offline. This disconnects Outlook from the mailbox server.
- Click on the Outbox folder and move all the stuck emails and messages to the Drafts folder or you may remove those emails. To do this, right-click on the message and choose Move > Other Folder, and then choose the Drafts folder. Click OK.
- Open the moved messages in the Draft folder and check them for large attachments. You may also try to remove the attachments and add them again.
- Click Send.
- Then go to the Send/Receive tab and click Work Offline to enable online mode and connect to the mailbox server.
- The stuck emails should be clear now, making way for new emails.
7. Start Outlook in Safe Mode
Outlook safe mode starts the client with a limited set of features. It also disables all the add-ins and thus, chances of something interfering with the client-server communication are eliminated. This can help you verify if some add-ins are causing the send/receive error. To start Outlook in safe mode, follow these steps:
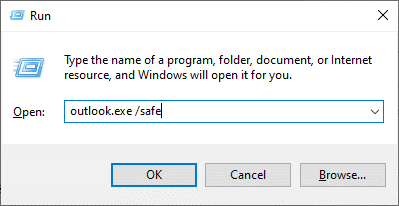
- Close Outlook.
- Press Windows + R, type Outlook.exe /safe, and click OK or press the Enter key.
Try sending a new email and ask someone to send you a new email.
8. Disable Add-Ins
If you can send or receive new emails in Safe Mode, you may want to find and remove the faulty add-ins causing the problem. The steps are as follows:
- In Outlook Safe Mode, click File > Options > Add-Ins.
- Click the Go… button.
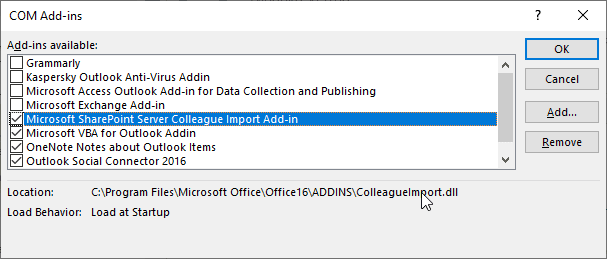
- Uncheck all add-ins and click OK.
- Close Outlook Safe Mode and start it normally.
You should now send and receive emails. To find the faulty add-in, enable one add-in at a time, restart Outlook, observe, and repeat. You should encounter send/receive issues after you enable the faulty or incompatible add-in. When found, uninstall/remove it from the Outlook add-ins.
9. Disable Antivirus
When the antivirus tool isn’t Outlook aware, it may conflict with the Outlook client and cause issues, such as send/receive errors. To verify whether your antivirus is the root cause behind Outlook send/receive error, disable it temporarily. Then open Outlook. If you still encounter the send and receive errors in Outlook, proceed to the next step.
10. Use MAPI Repair Tool
When the Mapi32.dll file is damaged or corrupt, you may encounter the following send and receive error while sending or receiving messages in Microsoft Outlook.
“Sending and Receiving reported error (0x8007000E): Out of memory or system resources. Close some windows or programs and try again.”
Luckily, you can resolve it by restoring the file using the MAPI repair tool (fixmapi.exe). The program file is located in one of the following locations based on your Windows version:
- C:\Winnt\System32
- C:\Windows\System32
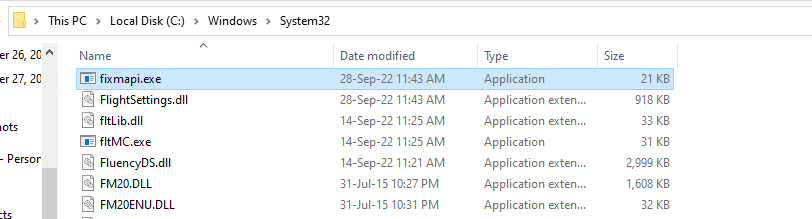
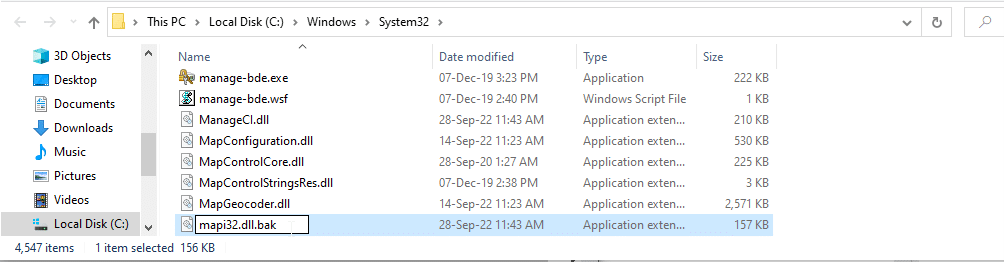
But first, rename the current mapi32.dll file to mapi32.dll.bak or anything else. To find the mapi32.dll file, you can use the Windows search or browse the C:\Windows\System32 directory.
Double-click on fixmapi.exe to fix the issue. There will be no screen or visible process when you run the program file. However, it will create a new mapi32.dll file at the same location.
After this, restart the system and launch Outlook to check if the Outlook send and receive error is resolved.
11. Check for Damaged PST Files
When your Outlook data file, such as PST, is damaged, it cannot store new mail items. As a result, you may receive send and receive error in Outlook. In such a case, you can try running the Inbox Repair Tool or Scanpst.exe to fix errors in the PST file. The steps are as follows:
- Close Outlook and all other related processes, such as Skype for Business.
- Press Windows + R, type %localappdata%/Microsoft/Outlook, and press the Enter key. This opens a File Explorer window showing the PST file.
- Create a copy of the PST file and save it at another location as a backup.
- Then go to the C:\Program Files or C:\Program Files(x86) folder and navigate to the Microsoft Office > OfficeXX folders. Here you will find the SCANPST.exe utility.
- Double-click on the utility to launch it. This will start the Inbox Repair Tool.
- Click Browse to select the PST file and then click the “Start” button to begin the PST file repair process.
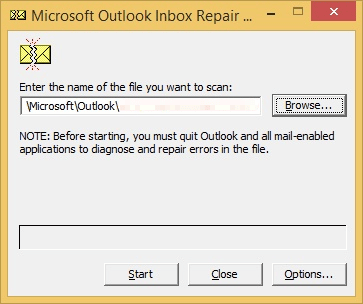
- If errors are found, click ‘Repair’ to fix them.
- Once the repair process is complete, open Outlook and check if the send and receive error is resolved.
If the Microsoft Outlook Inbox Repair Tool couldn’t fix your PST file and you continue to encounter Outlook send/receive errors after running the tool, you can use an advanced Inbox Repair Tool, such as Stellar Repair for Outlook.
You may also create a new Outlook profile to resolve the send and receive errors.
12. Create a New Profile
Creating a new profile requires you to remove the older profile to avoid conflicts and duplicate mail items. The steps to create new profile in Outlook are as follows:
Note: This action will remove the PST file linked with your old email profile containing downloaded messages and mail items from the server. To avoid data loss, take the PST file backup and use an Outlook repair tool to repair and extract the messages from the file and save them to a new healthy Outlook importable PST file.
- Close Outlook and open Control Panel.
- Go to User Accounts > Mail.
- Click Show Profiles > Add.
- Type the name for the new profile and click OK.
- Enter your email credentials and complete the sign-in process.
- Once signed in, you will see your new profile in the Mail window.
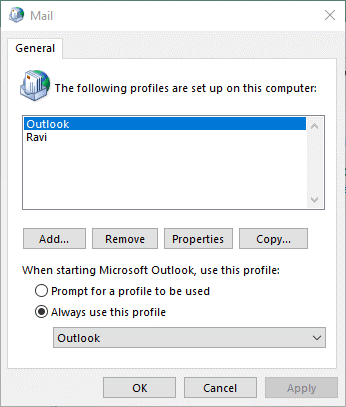
- Select the default or old profile and click Remove.
- Click ‘Yes’ to confirm. This will remove the associated PST file from the default location where Outlook saves the data file (.pst). Make sure you have the backup before clicking ‘Yes.’
- Close the Mail window and open Outlook.
Outlook will synchronize and download emails from the mail server after you set up a new profile and remove the old one.
If your email account is POP (POP3), messages are downloaded to the local PST file and removed from the mail server. You may find missing mail items after setting up a new profile.
In such a case, use Stellar Repair for Outlook to restore your mail items, such as emails, contacts, attachments, etc. from the backup PST file (which you could not repair using the Inbox Repair Tool) and export them to a new Outlook importable PST file. You can then import PST into your new Outlook profile and restore all mail items.
To Wrap Up
In this article, we’ve shared 12 tips to troubleshoot and resolve common Outlook send and receive errors that prevent users from sending or receiving new messages. If the solutions do not work, you can set up a new Outlook profile to fix the issue permanently and use Stellar Repair for Outlook to repair and restore your mail items from the damaged Outlook PST file linked to your older email profile where you were encountering the send and receive errors.
Was this article helpful?