Apple’s built-in backup utility, Time Machine, is used to back up your Mac and all files stored on your HD. Backups are an excellent way to protect your data. However, you may encounter various issues with your Mac just after a macOS update. Today we will discuss Time Machine issues and what to do when Time Machine fails after the OS upgrade.
How to Fix Time Machine not Working after Updating macOS?
Here’s a quick checklist for repairing the Time Machine.
A. Restart Your Mac
The easiest solution to fix the issues is to restart your Mac. It deletes system-related stale data and fixes macOS’s odd glitches and bugs.
Here’s how to do it:
1. Go to the Apple logo and select Restart.
 Apple logo > Restart
 2. When the Are you sure you want to restart your Mac message appears, uncheck the box next to Reopen windows when logging back in and click Restart.
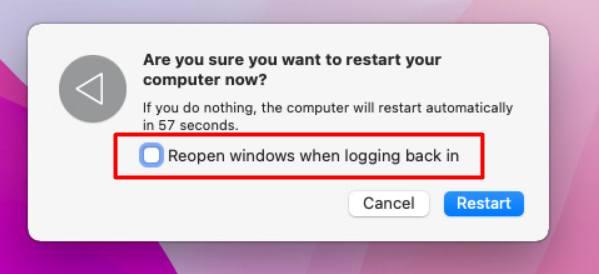 Uncheck Reopen windows when logging back in
 3. After the reboot, reopen the Time Machine app and restart the backup process.
B. Check the Latest macOS Updates
One of the reasons you are having problems with Time Machine is that you have an outdated macOS version or installed it from a source other than the official Apple resources.
Follow the steps below to update macOS to the most recent version:
1. Navigate to the Apple menu.
2. Select About This Mac > Software Update.
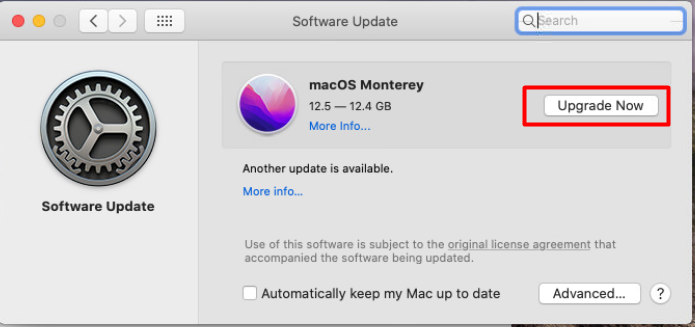 About This Mac > Software Update > Upgrade Now
 3. Search for new macOS updates in the newly opened window. If any are found, click Upgrade Now to get the most recent update.
C. Try to Restart Time Machine Backup
Stopping and restarting the backup process may help resolve the problem.
To restart the Time Machine backup, perform the following steps:
1. Select System Preferences from the Apple menu.
 Apple menu > System Preferences
 2. Choose Time Machine.
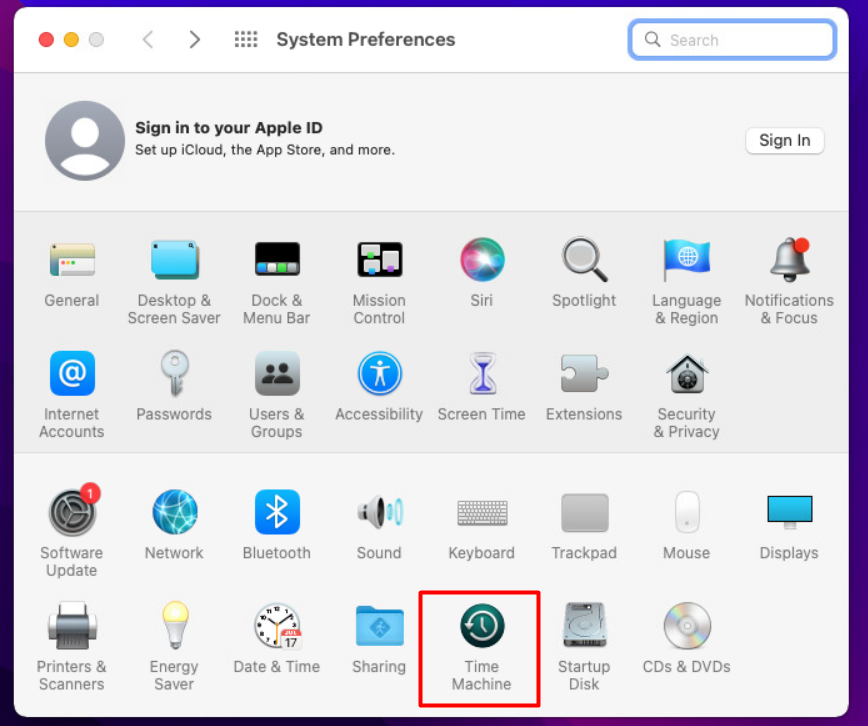 System Preferences > Time Machine
 3. To cancel the current Time Machine backup, click the X button.
4. Select Back Up Now.
D. Run First Aid
You can run disk diagnostics using the First Aid utility. It will help if the Time Machine issue is connected to the disk you use as a backup HD.
You must first launch Disk Utility in Recovery Mode. Follow these steps:
For Macs with Intel processors:
- Reboot your Mac.
- Hold down the Command + R keys.
- When the macOS utility window appears, launch Disk Utility.
For M1-based Macs:
- Restart your Mac and hold the Power button until you see the Loading Startup Options message.
- Open the Disk Utility from the Gear icon menu.
Do the following to run First Aid:
1. Launch Disk Utility and select View > Show All Devices from the menu bar.
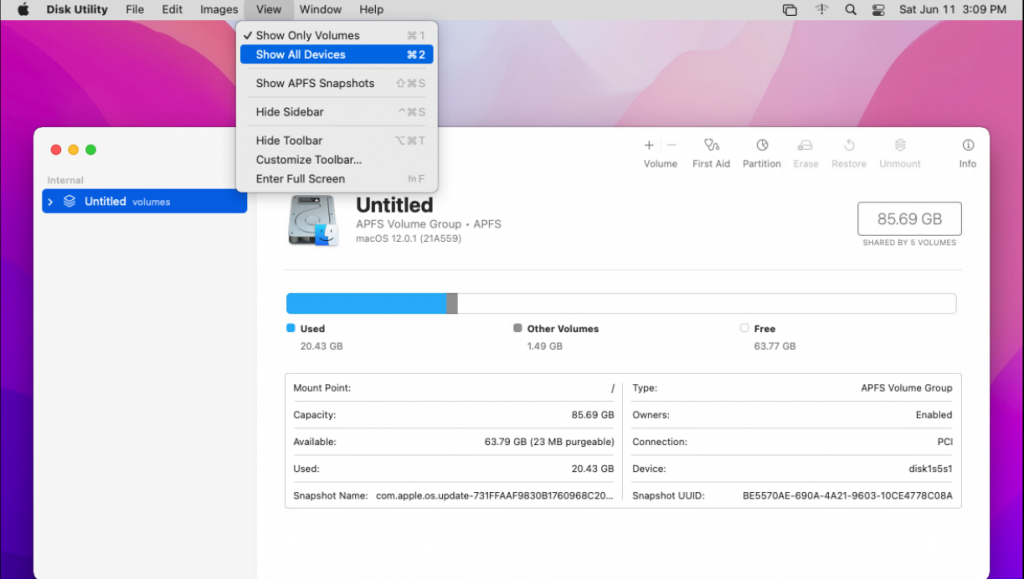 Disk Utility > View > Show All Devices
 2. Choose a disk > click the First Aid button > choose Run.
E. Delete the Backup Disk
The last alternative is to delete the Time Machine backup disk.
To delete the disk, perform the following steps:
- Restart Disk Utility in Recovery Mode.
- Select the disk to be deleted.
- To complete the process, click Erase and follow the on-screen instructions.
After that, you’ll need to restore your files. The most efficient solution is to use a specific restoring application, such as Stellar Data Recovery Professional for Mac, to restore the data that was saved on disk.
Recover Lost Data Using Stellar Data Recovery Professional
If you lost your data after the macOS update and issues with Time Machine, it is recommended to use Mac data recovery software to recover your deleted files. Professional data recovery software, such as Stellar Data Recovery Professional, can help you recover lost files on your Mac. It’s a helpful tool that can help you recover your files no matter when you lose them.
To recover lost data, follow the steps below:
1. Download the Stellar Data Recovery Professional for Mac software.
2. After the installation, you will be prompted to select the data you wish to recover.
3. Select the needed files or click on Recover Everything.
 Stellar Data Recovery Professional > Select What To Recover
 4. Then, decide where you want to recover the selected files from.
 Stellar Data Recovery > Recover From
 5. After the Stellar Data Recovery scan, you will be able to see the files that can be recovered and choose which ones you require.
 Stellar Data Recovery > Preview
 6. Finally, select the destination folder on your Mac and begin the recovery process.
Other Problems Connected with Time Machine after the macOS Update
A. Problems with Terminal
Sometimes after the macOS update disallows usage of Time Machine utility command from Terminal. For example, the following code throws an error message when executed from Terminal: $ sudo tmutil listbackups.
After verifying the admin password, the OS throws the error: “The operation could not be completed because tmutil could not access private application data on the backup disk.”
The message also suggests a resolution, “Use the Privacy tab in the Security and Privacy preference pane to add Terminal to the list of applications which can access Application Data.”
The resolution is acceptable for a single-user environment but undermines security in the case of multiple user accounts. Even non-admin account holders have the same access privilege as the admin.
In such a shared system, by using the data access rights, if any non-privileged account holder has accessed and deleted data like Mail, Time Machine backups, etc., then it can result in data loss.
B. Problems with Snapshot
Another issue faced by Mac users after the OS upgrade—Time Machine backs up data to the drive but fails to complete the snapshot, saying, “There was an error while copying files.”
The issue persists irrespective of the number of trials to back up the data.
To resolve this Time Machine backup issue, perform the following steps:
- Go to Apple menu > System Preferences > Time Machine.
- Turn off Time Machine.
- Go to Macintosh HD > Library > Preferences folder.
- Delete com.apple.TimeMachine.plist.
- Start Time Machine from System Preferences.
- Add the external drive as a Time Machine backup destination.
- Create a backup to the drive.
The newly created backup file is now accessible.
Wrapping Up
Most of the issues related to Time Machine are simple to resolve. Unless you have a severe case of file corruption, going through some quick fixes in this guide should help you get Time Machine to back up your Mac properly again. Also, do not forget about the alternative of recovering files on a Mac by installing special restoring software like Stellar Data Recovery to ensure you can get all your files back.
Read more:
Was this article helpful?