‘I upgraded to Windows 10, and now half of my JPEGS will not show thumbnails. But if I right- click and open them with Windows Picture Viewer, I can see all of my images there. How can I fix this?’
A thumbnail is a smaller or miniature version of your image file. It is usually preferred to have a quick look at large-sized pictures stored in the folder that may otherwise take a long time to open.
But sometimes, you may not see thumbnails of your photos in the folders. Although the image file icons with names and file extensions appear, preview of the image would be missing. The problem is mostly reported in Windows 10.
Why you’re unable to preview some thumbnails in Windows 10?
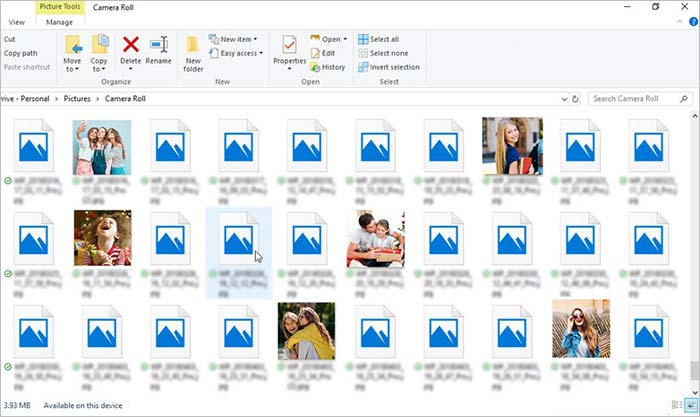 Figure: Photo thumbnails not showing in Windows 10
 Wrong thumbnails or no thumbnails could be a Windows OS bug or file systems error caused due to corruption in image files or drive.
Windows File Explorer settings to show thumbnails can get disabled and show image file icons without picture preview. Other than these, if thumbnail cache files get corrupt, then too, you won’t be able to preview pictures in File Explorer folders. It is also possible that your photos are corrupt due to which thumbnails are not visible in the folder.
However, Windows allows you to troubleshoot the problem. Here we bring the various methods to try in Windows 10 and fix the ‘picture thumbnails not showing’ issue.
Methods to fix picture thumbnails not showing
- Change File Explorer settings
- Restore File Explorer options to default
- Change Visual Effect Settings in Windows 10
- Use Disk Cleanup to delete thumbnail cache
- Use Command Prompt to remove thumbnail cache
- Run SFC scan
- Run the DISM Tool
- Use Stellar Repair for Photo
Method 1: Change File Explorer settings
If the Windows 10 File Explorer settings is somehow changed to show only file icons and not thumbnails, you won’t be able to preview pictures in folders.
Follow the below steps to disable this setting in File Explorer:
- In the search box, type File Explorer Options.
- Select File Explorer Options from the menu.
- In the File Explorer Options window, click on the View tab.
- Uncheck Always show icons, never thumbnails option.
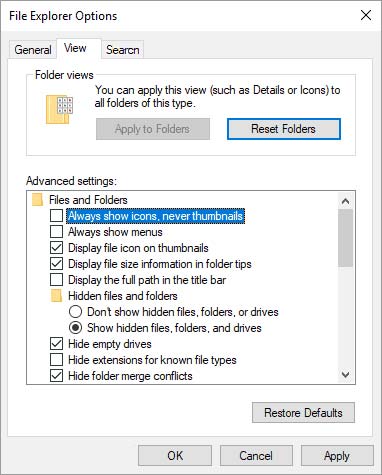 Figure: File Explorer Options
 Check if this enabled thumbnails for pictures in Windows 10.
Method 2: Restore File Explorer options to default
Set the File Explorer Options to Default, so that the thumbnails again appear on your Windows 10 PC. To do so, follow the below steps:
- In the search box, type File Explorer Options.
- Select File Explorer Options from the menu.
- Click on the View tab.
- Click Restore Defaults button.
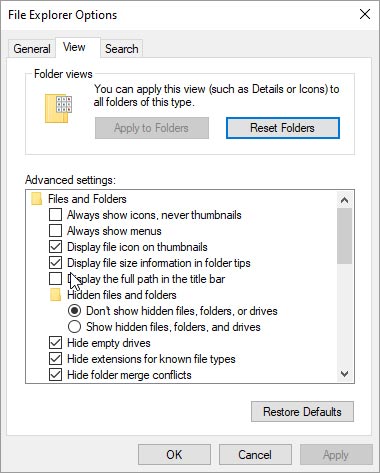 Figure: Restore Defaults in File Explorer
 Windows 10 image thumbnails not showing problem should resolve now.
Method 3: Change Visual Effect Settings of Windows 10
Check and change the visual effects settings of your Windows to show pictures thumbnails by following the below steps:
- In the search bar, type View advanced system settings.
- Select View advanced system settings.
- In the System Properties dialog box, click on the Advanced tab.
- Under Performance section, click Settings.
- In the Performance Options box, click on the Visual Effects tab.
- Under the Custom section, select the Save taskbar thumbnail previews and Show thumbnails instead of icons options.
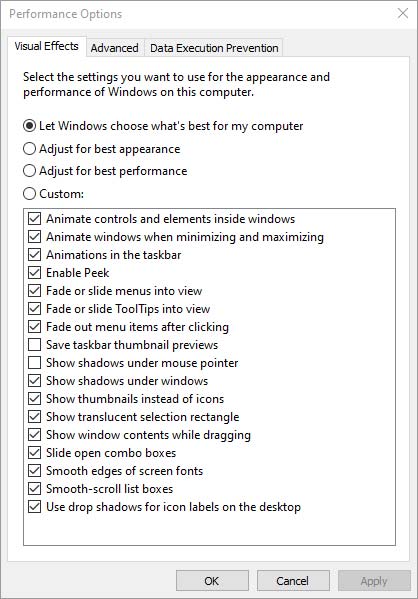 Figure: Visual Effects tab in Performance Options
- Click OK to save the changes. Check the folders, if the photo thumbnails are showing or not.
Method 4: Use Disk Cleanup to delete thumbnail cache
For every photo on your computer, Windows 10 creates a cache file. Over time, the thumbnail cache piles up and sometimes get corrupt too. As a result, you are not able to view thumbnails or see wrong thumbnails of the photos in File Explorer folders. However, Windows 10 allows you to delete thumbnail cache and rebuild the thumbnail cache database. You can remove thumbnails cache by using Disk Cleanup tool and fix the ‘picture thumbnails not showing’ issue.
Follow the below steps to delete thumbnails cache using Disk Cleanup:
- Open File Explorer > This PC.
- Right-click on the C: drive.
- Select Properties.
 Figure: Properties in C: drive
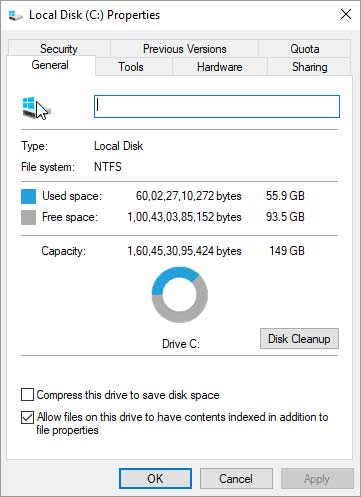 Figure: Disk Cleanup button
- In the Disk Cleanup box, check Thumbnails option. Uncheck the rest of the options.
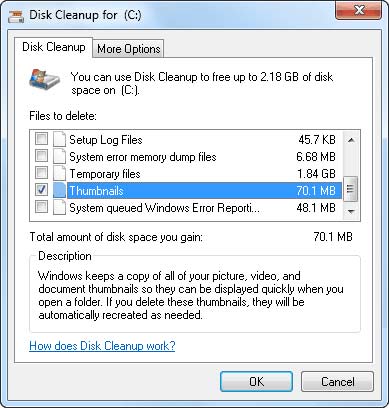 Figure: Check thumbnails in Disk Cleanup
- Click OK.
- Click Delete Files.
Method 5: Use Command Prompt to delete thumbnail cache
Alternatively, you can try command prompt to delete thumbnail cache on Windows 10 system by following the below steps:
- In the search box, type Command Prompt.
- Right-click on Command Prompt. Choose Run as administrator.
- In the Command Prompt, type the following three commands and hit Enter after each:
taskkill /f /im explorer.exe
del /f /s /q /a %LocalAppData%\Microsoft\Windows\Explorer\thumbcache_*.db
start explorer.exe
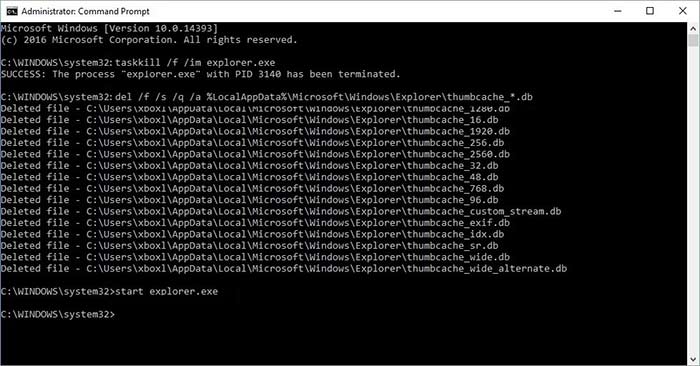 Figure: Command Prompt window
- Press Enter and close the Command Prompt window.
The thumbnail previews of JPEG, PG, TIFF, and other image files should be visible now in Windows 10.
Method 6: Run SFC scan
SFC scan is a system file checker that can fix any system file issues. If the picture thumbnails are not showing in Windows 10 due to system file error, runing SFC scan can resolve the issue.
Follow the below steps to run SFC on Windows 10:
- In the search box, type Command Prompt.
- Right-click on Command Prompt. Choose Run as administrator.
- In the Command Prompt, type sfc /scannow.
- Hit Enter. Wait until the scan process is complete.
Once the scan is completed, check if the ‘thumbnails not showing’ issue is fixed in Windows 10.
If you continue to face image thumbnails issue after running the SFC scan, run the DISM Tool. DSIM can repair, if required, as well as update the system files fixing the Windows problem.
Follow the below steps to run DSIM Tool:
- In the search box, type Command Prompt.
- Right-click on Command Prompt. Choose Run as administrator.
- In the Command Prompt window, type the following two commands and hit Enter after each command:
DISM.exe /Online /Cleanup-image /Scanhealth
DISM.exe /Online /Cleanup-image /Restorehealth
- Type Exit and hit Enter. It may take a few minutes to finish the process. Don’t stop the process in between.
Method 8: Use Stellar Repair for Photo
Thumbnails are the smaller sized version of the original pictures. If image thumbnails are not showing up and you are not able to open the photos also, chances are, the image files have turned corrupt.
You can always repair your photos by repairing them with Stellar Repair for Photo software. Once the photos are repaired, their thumbnails would also show up in Windows 10.
Further, the software can also extract thumbnails of your images. You can repair and obtain thumbnails of JPEG/ JPG, TIFF, DNG, RAW, ARF, SR2, NEF, MxPEG, and SRF and other image file formats.


Steps to repair corrupt pictures using Stellar Repair for Photo
- Download and launch Stellar Repair for Photo on PC or Mac.
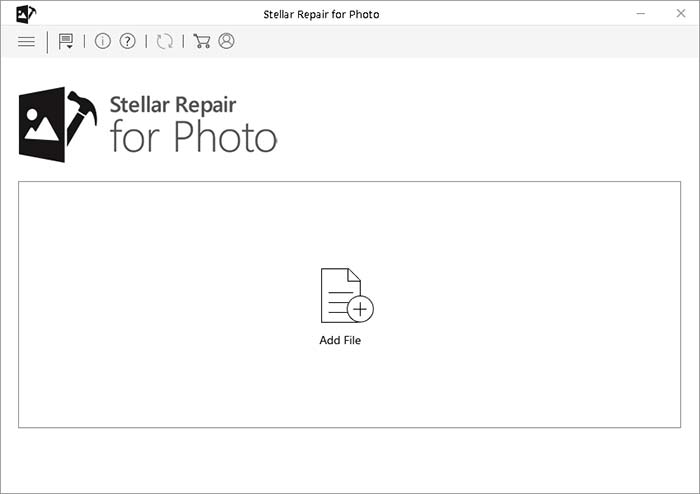 Figure: Main interface of Stellar Repair for Photo
- Click Add File to add corrupt photos.
- Click Repair.
- Preview the repaired photos and their thumbnails. Click Save Repaired Files.
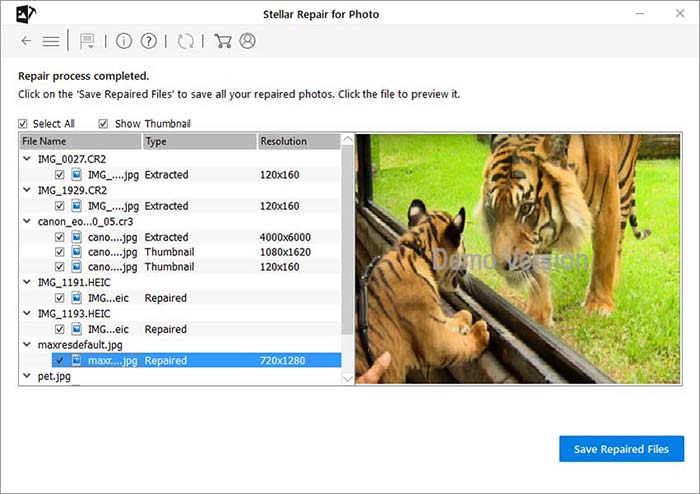 Figure: Preview and save repaired photos
 Wrapping Up
This post shares 8 methods to resolve thumbnails issue on your Windows 10 PC. As you may not be aware of the cause of the problem, it’s better to try each, and one should fix picture thumbnail not showing on your system.
Do share with our readers, which method worked in your case, in the comments box below.