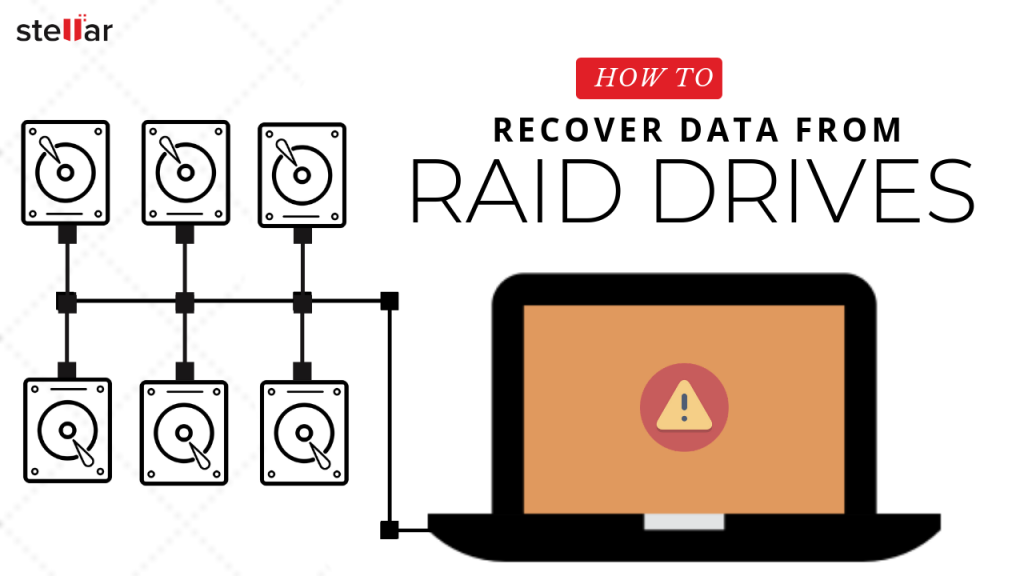
Summary: Data recovery from RAID drives is a tedious and complicated job that requires specialized tools. In this guide, we will take you through an effortless way to perform data recovery from RAID 0, RAID 5, and RAID 6 drives in Windows using Stellar Data Recovery Technician software.


It’s a common belief that RAID arrays— except RAID 0—should not fail due to their fault-tolerance and auto rebuild capabilities. Consequently, RAID backups are rarely done, which often leads to inevitable data disaster.
Depending on the RAID configuration and implementation—software or hardware-based— a RAID array may degrade, fail, or get damaged and corrupt due to several reasons. And some of the common reasons are as follow,
- Hardware or software failure
- Human errors
- Virus or malware infection
- Power outage
- Abrupt and forced system shutdown or system crash
- Disk errors or failure
- Mechanical or physical damage
- RAID rebuild errors and more
These errors may occur during normal use of the RAID array or while RAID rebuild process.
Steps to Recover Data from RAID Drives
The following steps help you to recover data from RAID 0, RAID 5, and RAID 6 drives effortlessly. All you need to do is select a few options and save recovered data after a ‘Quick‘ or ‘Deep’ scan.
Step 1: Inspect RAID Drives for Errors
Unplug the RAID drives from RAID array and connect it to a Windows PC individually via SATA connector or use SATA to USB converter cable/enclosure. Then,
- Install and run Stellar Data Recovery Technician software

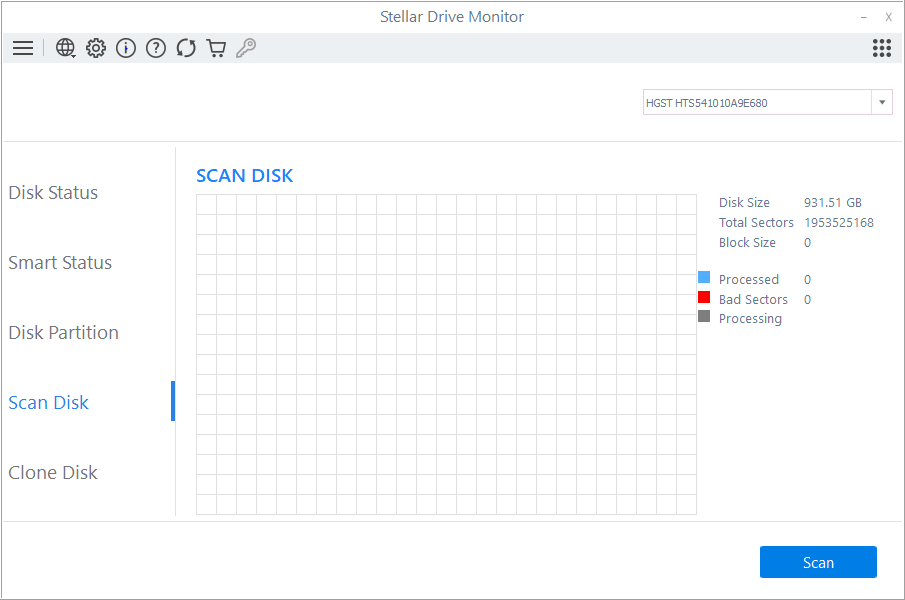
- Click ‘Monitor Drive’ under the Waffle icon menu at the top-right, choose RAID drive(s)—one at a time—to check the RAID drive health, performance, and SMART status. You may also scan and check the drive for bad sectors—which may have led to a RAID failure

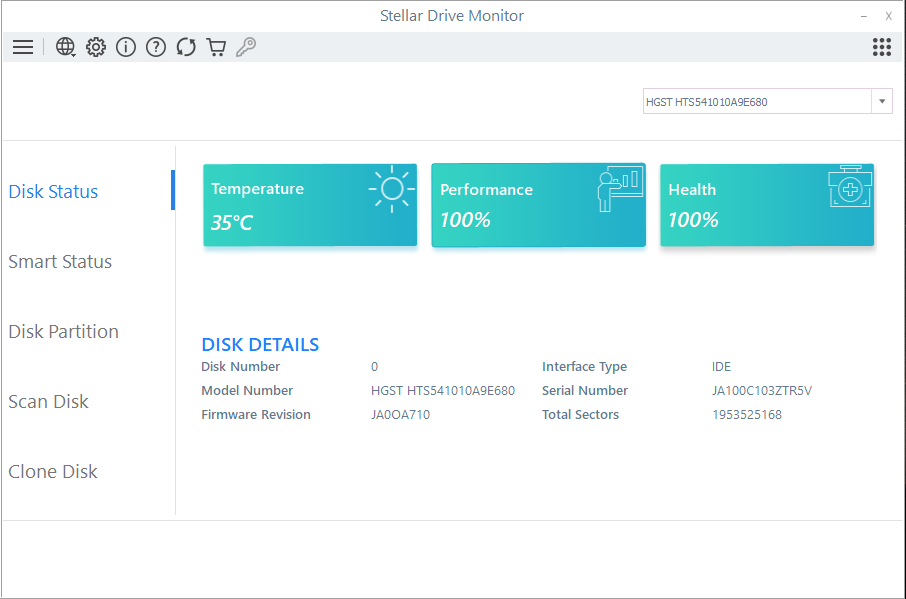

- If the RAID drive health status is all green or orange with no critical SMART errors, skip to the Step 2. If the drive health is poor and you see errors under SMART Status, follow the instructions below to clone degraded RAID drive(s),
NOTE: This drive cloning is optional but highly recommended for safe data recovery from RAID drives
- Connect a new or healthy hard drive with volume size equal or larger than the affected RAID drive
- Click ‘Clone Disk’ and choose the source (affected drive) and target disk (new or healthy drive) from respective drop-downs
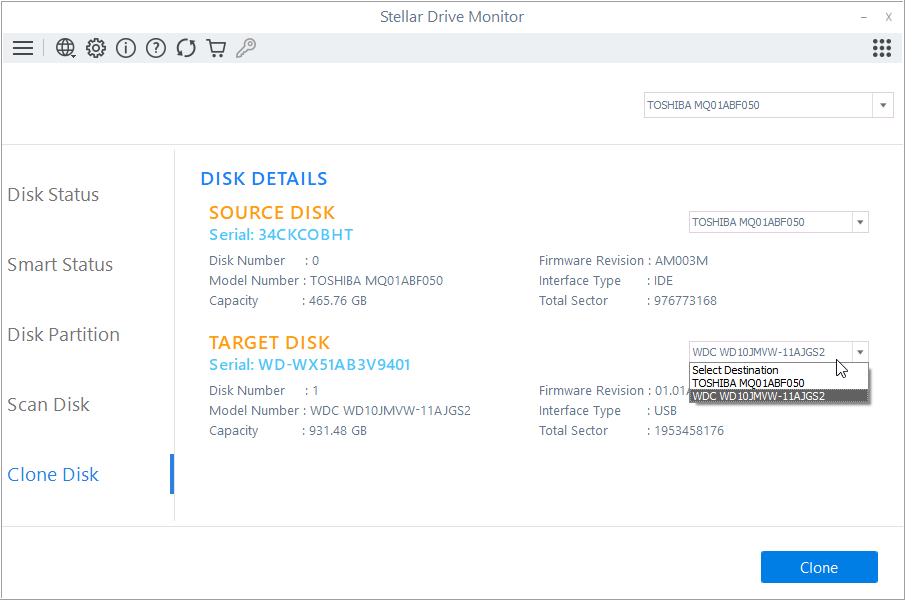
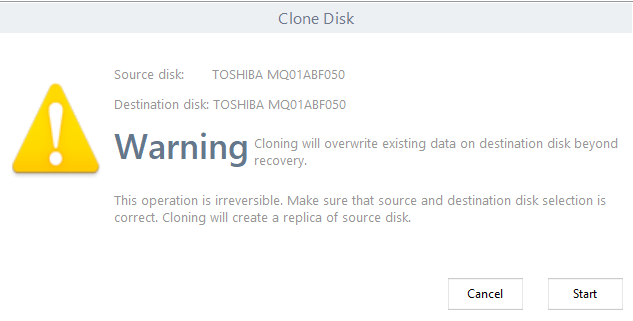
- Click ‘Clone’ and click ‘Start’ to accept and begin clone process

- Wait for the cloning process to finish. Repeat the steps for other degraded RAID drives
After the clone, replace the degraded RAID drive with a newly cloned hard drive and proceed to the next step to perform effortless data recovery from RAID drives.
Step 2: Recover Data from RAID 0, RAID 5, and RAID 6 drives
- Close the Drive Monitor window and start the software again.
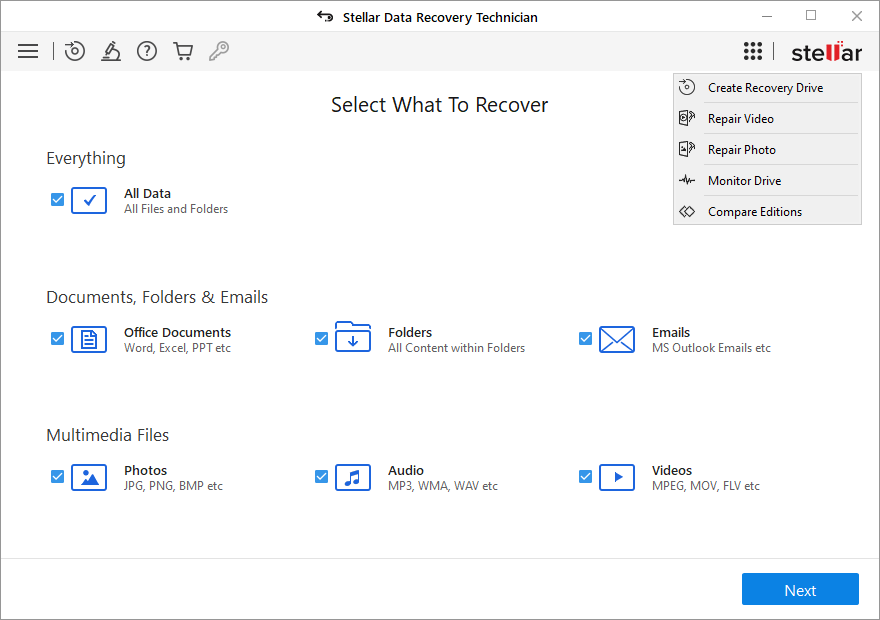
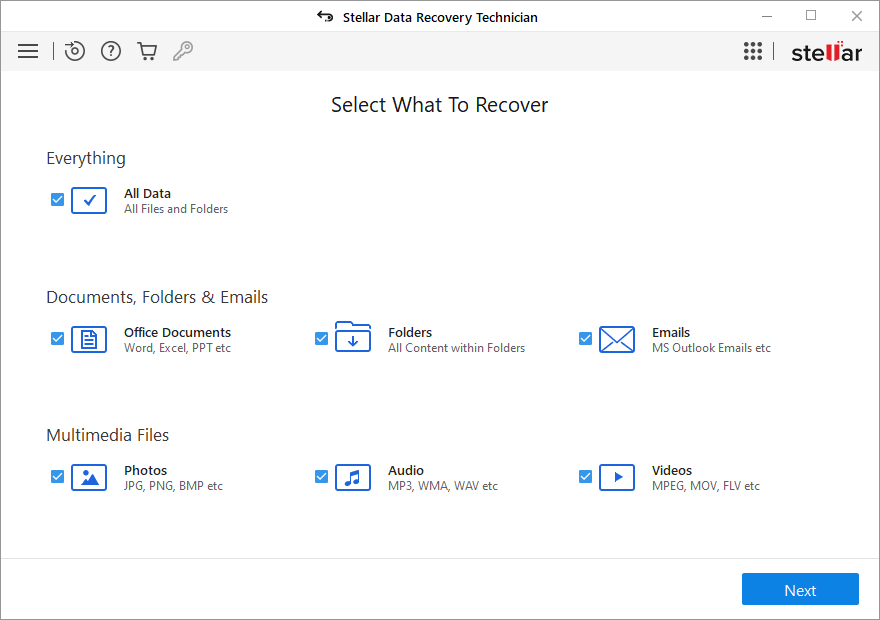
- Choose ‘All Data’ and click ‘Next.’
Pro Tip: You can use ‘Add Header’ option from main menu to add custom or uncommon file types based on sample files for data recovery. This option enables you to recover virtually any file type from any Windows-based media including RAID 0, RAID 5, and RAID 6 arrays.
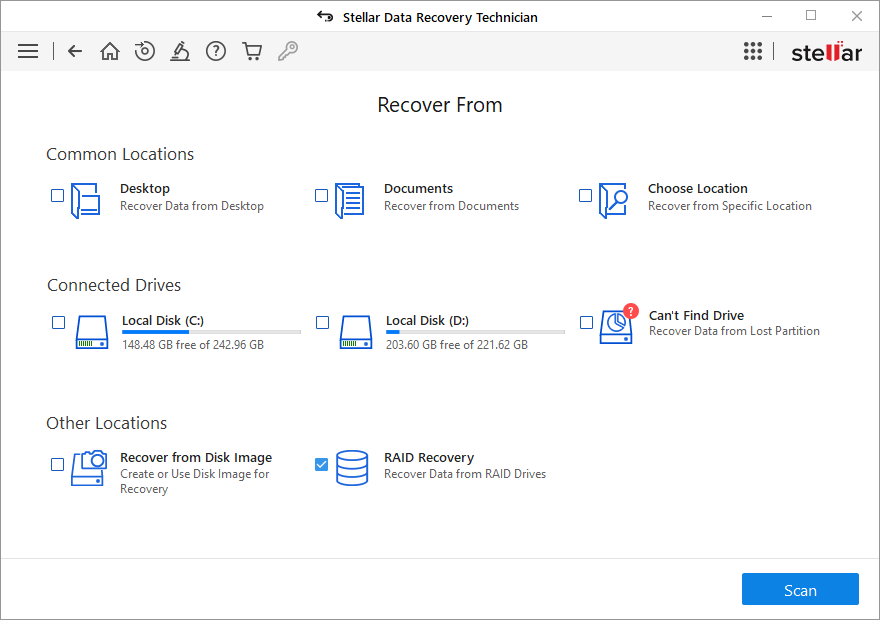
- Click ‘Raid Recovery’ under ‘Other Locations’ and then click ‘Scan.’
- Choose the RAID tab—RAID 0, RAID 5, or RAID 6

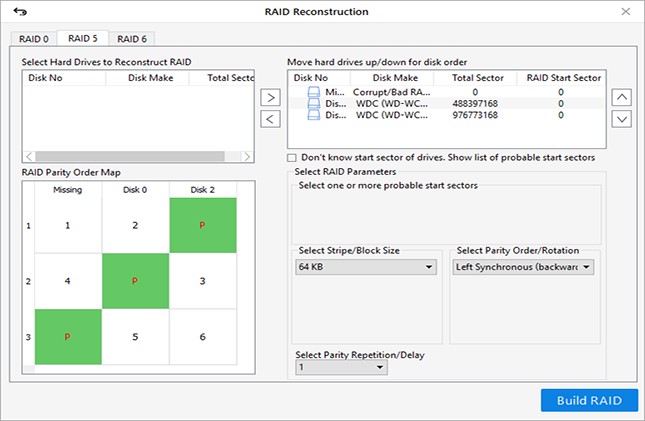
- All the hard disks connected to the system are visible under ‘Select Hard drives to reconstruct RAID’ list box. Click on the hard disks—one at a time—and use the arrow button to add or remove RAID drives from the ‘Select Hard drives to Reconstruct RAID’ list box to ‘Move hard drives up/down for disk order’ list box
- Use the up or down arrow buttons adjacent to the list view box to arrange disks in sequence, which sequence starts from Disk 0. Arrange disks in the same order as they were in the respective RAID stack
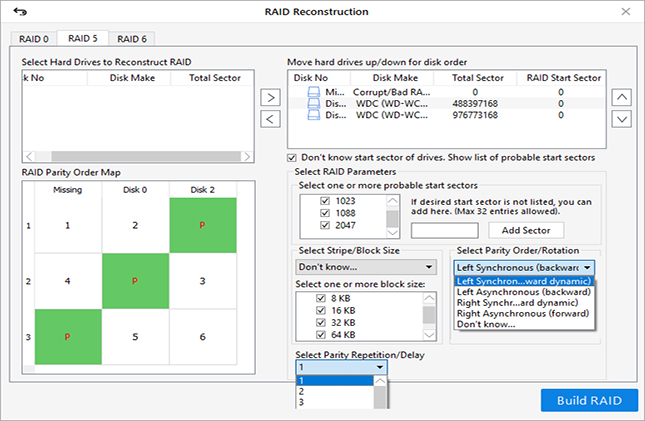
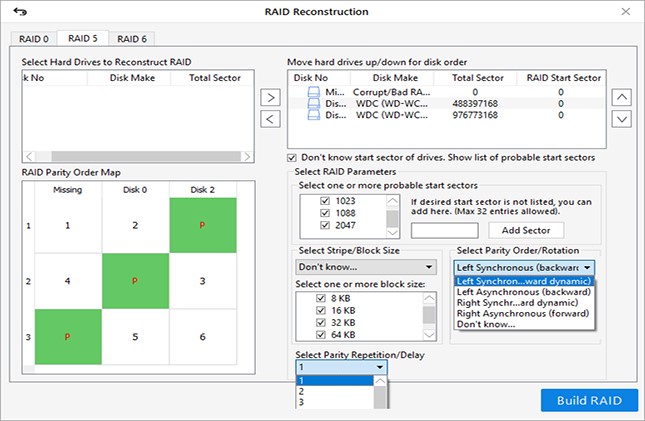
- Click the ‘Don’t know start sector of drives. Show a list of probable start sectors’ checkbox: only if you don’t know the start sector of the drive. A new checklist box appears in the ‘Select RAID Parameter’ section
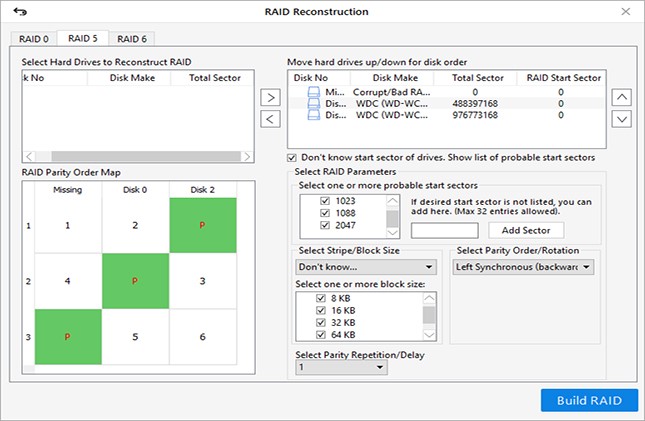
- Choose one or more probable start sectors or add desired start sector in the text box & click the ‘Add Sector’ button
- Choose stripe or block size from the ‘Select Stripe/Block Size’; Select parity order or rotation from the ‘Select Parity Order/Rotation’ dropdown; and then select the parity repetition or delay from the ‘Select Parity Repetition/Delay’ dropdown. The RAID admin or user who built it knows these values
- After adding and selecting the respective RAID parameters in the software, click the ‘Build RAID’ button
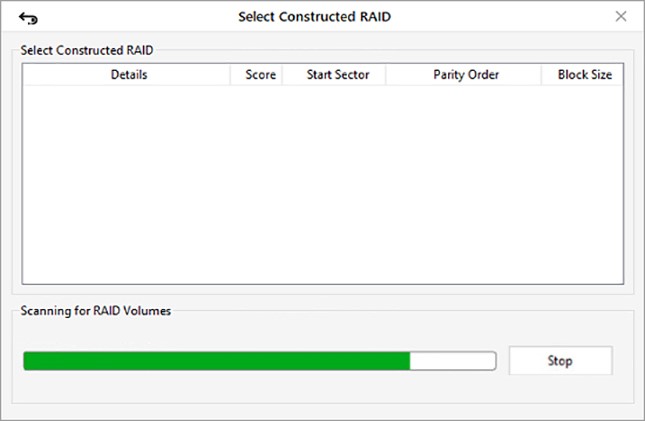
- Wait until the software reconstructs your RAID volume or probable RAID volumes if you don’t know required RAID parameters
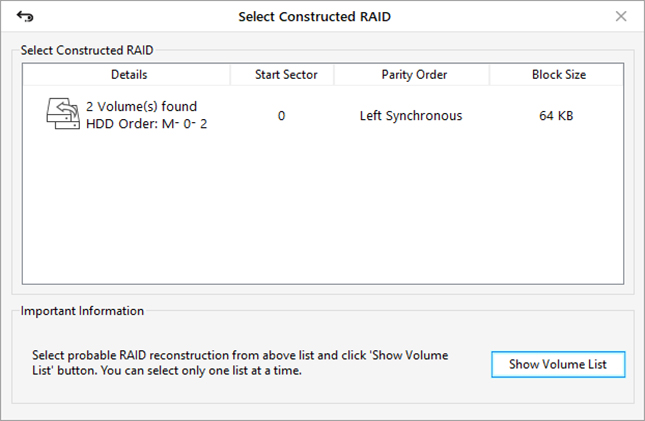
- After RAID construction is finished, the RAID volume(s) is displayed in the ‘Select Constructed RAID’ window. Click on ‘Show Volume List’ button
- In ‘Select Volume to Recover Data’, choose the volume from the listed volumes of RAID
- Then click the ‘Scan’ button and wait for the scan to finish

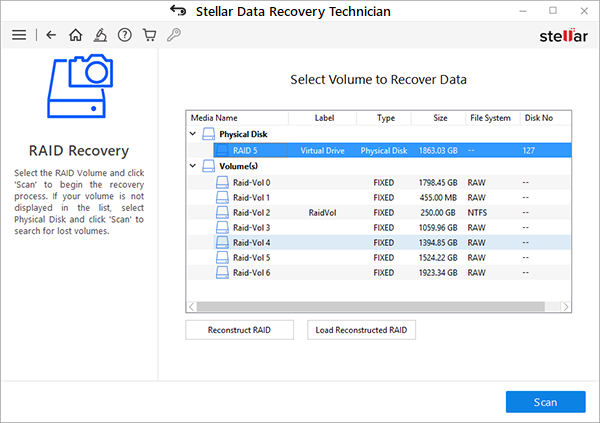
- If the desired files are not found in the scan results, click the ‘Click Here’ link beside Deep Scan text at the bottom of the software to begin ‘Deep Scan’ process
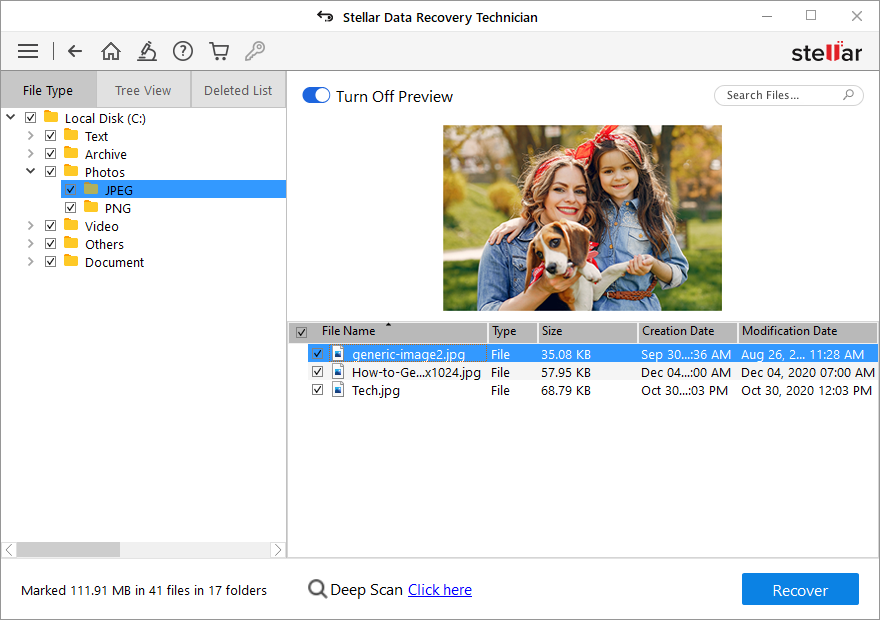
- Click on the ‘File Type’ tab and use the search bar to quickly find required data fro recovery
- At this stage, you can click on a file to see its preview and then choose the files and folders that you want to recover
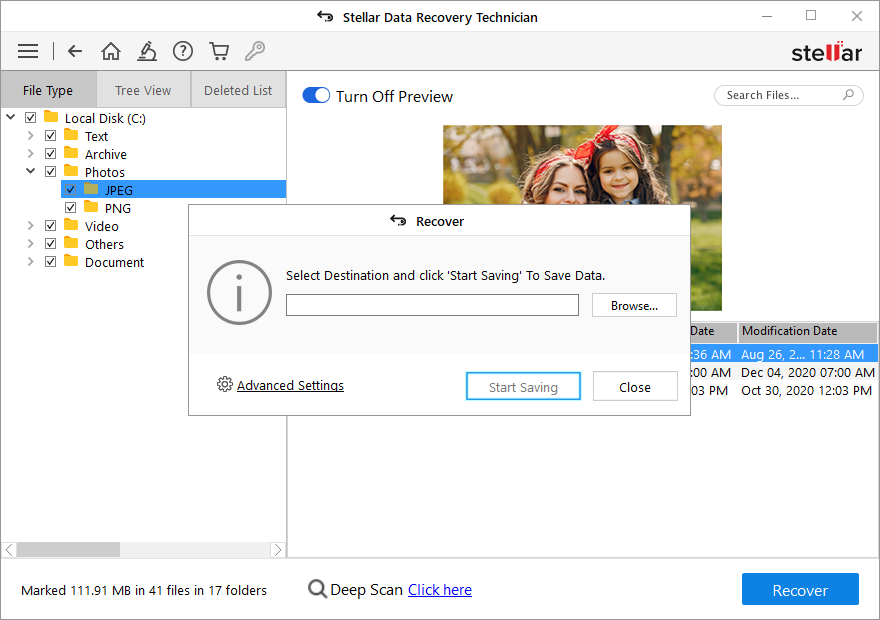
- Then click the ‘Recover’ and then ‘Browse’ button to select a save location—where you want to save the recovered data.
NOTE: Make sure not to select the drive, which was in the RAID array and now connected to your PC for recovery. Use an external disk or internal disk with enough storage space to save recovered data.
If you are running low on storage, save the scan information to recover data in stages
- Click the ‘Start Saving’ button. The selected recovered files and folders will be saved at your desired location
After data recovery, you may go ahead and build the desired RAID array from scratch. In case you need help, read this blog post that helps you decide which RAID level to choose for your data storage needs.
Conclusion
It is recommended that you should check RAID drives once in a while for SMART errors, mechanical issues, and optimization. You can perform these checks manually or automate using a tool such as Drive Monitor. These checks help you safeguard your RAID array against many common causes of RAID failure.
However, if RAID fails, you can use Stellar Data Recovery Techniciansoftware as an ultimate solution for your entire RAID and other Windows data recovery needs. The software can get back virtually any file format from a broken, corrupt, and degraded RAID 0, RAID 5, and RAID 6 array in no time. You can also bring back deleted files from RAID arrays and Windows-based storage media such as hard drives, memory cards, SSDs, thumb drives, and more.
All you have to do is connect RAID drives, and with a few clicks, the software reconstructs RAID volumes—even if you don’t know or remember the RAID parameters. You can then scan the reconstructed virtual RAID 0, RAID 5, or RAID 6 array and recover data effortlessly from RAID drives.
Plus, the software comes with photo and video repair tools that can help your fix a corrupt or severely corrupt photo or video file.


