Before we show you how to start your MacBook in single-user mode, download the Stellar Data Recovery app to ensure your files don’t go missing while entering the single-user mode.
Mac is always considered to be a sleek computer with a swift interface. It is always associated with a fast processor, strong anti-virus base, and user-friendly experience.
However, errors and bugs are not an exception, even for macOS. That’s where you need the Mac single-user mode.
What is Mac Single-User Mode?
The single-user mode in Mac is entered to determine and fix issues with the system. It’s usually used if the system has encountered an error that blocks it from booting normally in multi-user mode (i.e., the default mode).
With single-user mode, you can examine the file system, change settings, and work with the installed programs.
Keep in mind that working in the single-user mode is an advanced operation. In this mode, you can change set-ups, analyze the file system, work with the device system, and install programs without a familiar graphical interface.

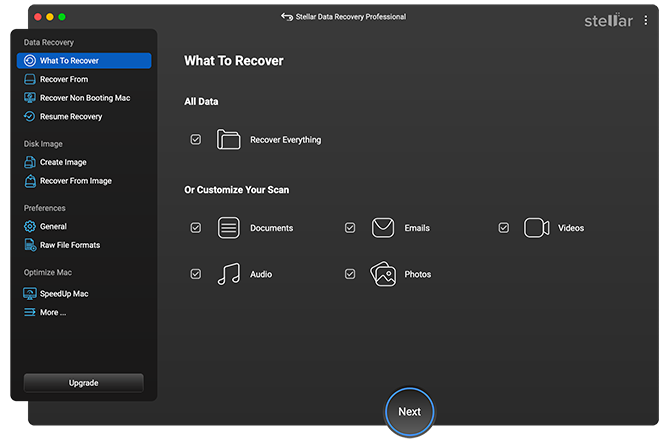
Pro Tip – It’s highly recommended to regularly back up your Mac to safeguard against data loss caused by hardware failures, software glitches, or accidental deletions. However, we all do sometimes forget to do so. That’s why we recommend you download and use specially designed software,
Stellar Data Recovery to restore any deleted files, photos, and critical documents. Even if something goes wrong on your device, the software rescues your data from
crashed or non-booting Mac
 Stellar Data Recovery > Select What To Recover
 How to Boot into Single User Mode on Mac?
Before starting the macOS single-user mode, you need to check your Mac version.
It can be a Mac computer without a T2 security chip, Apple Silicon Mac, Mac with an Intel CPU, and a T2 security chip.
Follow these steps to find out whether you have a T2 chip installed:
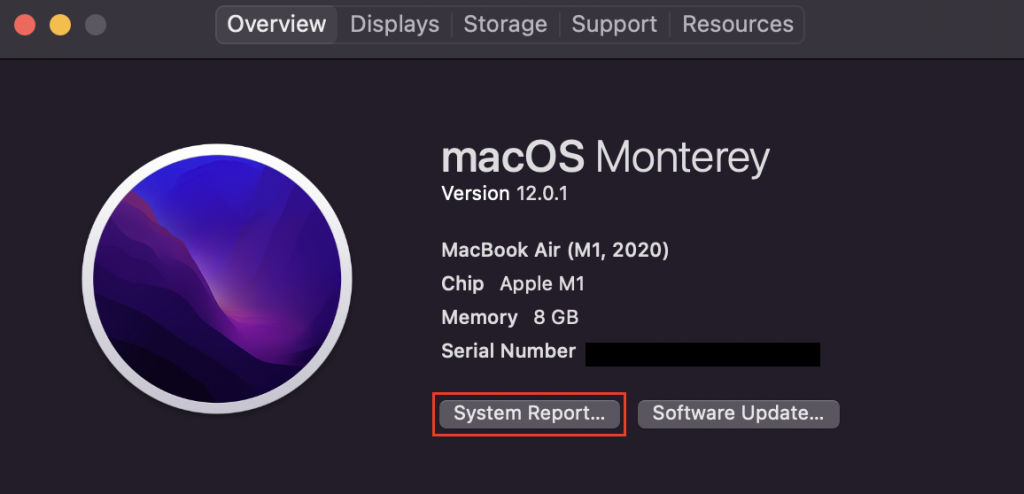
- Click on the Apple logo, and choose About This Mac.
 Apple logo > About this Mac
- Click on the System Report option.
 About this Mac > System Report
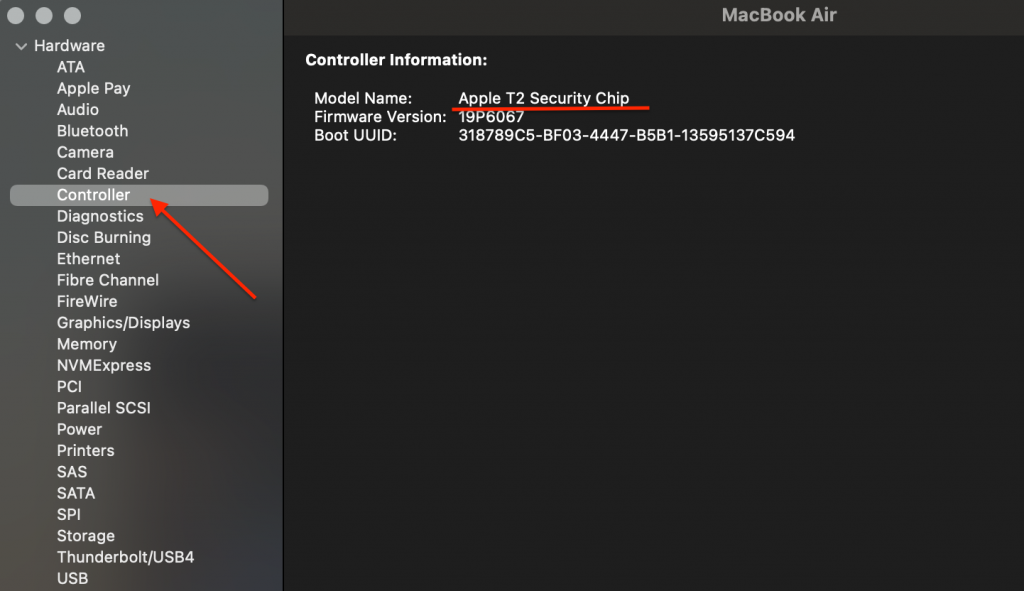
- On the left, select the Controller tab.
- Look for the T2 reference.
 System Report > Controller
 Apple created the T2 security chip in 2018; you can check the whole list with T2 chip Macs here.
What to do if you have an older Mac with no T2 chip installed? No worries, there is a solution.
Follow these steps to start your Mac single-user mode without a T2 chip:
- Shut down your Mac.
- Press the power button, then hold Command + S.
- Once you see a black background with white text, release Command + S.
- In case you see the admin-password request, type it in.
Single-user mode on Intel Mac with T2
In case you have a T2 chip installed on your device, follow these instructions to boot a single-user mode:
- Turn off your Mac.
- Now, turn it on and press and hold Command + R.
- You should see the Apple logo or a spinning globe.
- Type in your password if prompted.
- Choose Disk Utility from the macOS Utilities menu.
- Click on your startup volume in the sidebar.
- Press Mount.
- Type in your password, if asked.
- Quit Disk Utility.
- Finally, in the menu bar, click on Utilities and select Terminal.
What about Apple Silicon? On Apple Silicon, this process is quite similar to the Intel processor Macs.
Here are steps to boot into single-user mode on the Apple Silicon:
- Shut down your Mac.
- Press and hold the power button.
- You should see the Apple logo or a spinning globe.
- Release the power button.
- You’ll need to follow steps 3 to 6 to access the Terminal option in macOS Utilities.
Verbose vs. Single-User Mode
Verbose mode on a Mac is a diagnostic startup mode that displays detailed text-based information during the boot process. Enabling verbose mode can be useful for troubleshooting startup issues,
It shows the details about the system processes while starting up. Single-user mode loads only the command line and the system parts necessary to use it.
There isn’t an operational difference.
How to Get Out Of Mac Single-User Mode
So how to quit a Single User mode? Proceed with these steps:
- Go to the command prompt.
- Click on the Reboot or Exit icon.
- Click the Return key.
Wrapping up
Now you know how to boot your Mac into the macOS single-user mode in case an issue appears on your Mac. Using this method, you can quickly eliminate various problems affecting your device.
Related reading:
Was this article helpful?