Summary: Sharpening a photo enhances its details and makes it visually appealing. Use the Unsharp Mask, Smart Sharpen, or High Pass Filter in Photoshop to sharpen an image in Photoshop. Read this blog for more effective tips & tricks.
Sharpening a digital image is done to improve its overall quality and appearance. You can sharpen an image to correct blurriness, contrast, and lens distortion, making the image appear more defined.
Images that don’t look sharp result from various obstacles, such as moving subjects, a shaky camera, noise due to high ISO, or bad focus.
Although a blurred or un-sharp image may ruin a good shot, you don’t really need to toss it out right away. There’s always editing to the rescue. With their advanced editing tools, common photo editors like Adobe Photoshop can easily make your photos look pin-sharp. Read this blog for a step-by-step guide on using Photoshop to sharpen a blurred or dull image.
Ways to sharpen an image using Photoshop
“A few days ago, I was photographing for a birthday party of my friend’s kid. After the party, I noticed some photographs were not looking sharp and clear when I was viewing them.
Can someone help me know how to sharpen the images?”
You can use Adobe Photoshop, Lightroom, or other image editing software to sharpen images during post-processing. Here are some helpful tips to sharpen an image in Photoshop.
Tips to Sharpen an Image in Photoshop
Adobe Photoshop has a wide variety of tools to fix high-resolution, poorly scanned, or blurred images to make them look sharper. Let’s see how these tools work:
Unsharp Mask
The Unsharp Mask filter in Adobe Photoshop enhances details within a photo to make it sharper. You can locate the Unsharp Mask filter in Photoshop’s Sharpen section of the Filters panel.
Simply go to Filters > Sharpen > Unsharp Mask.

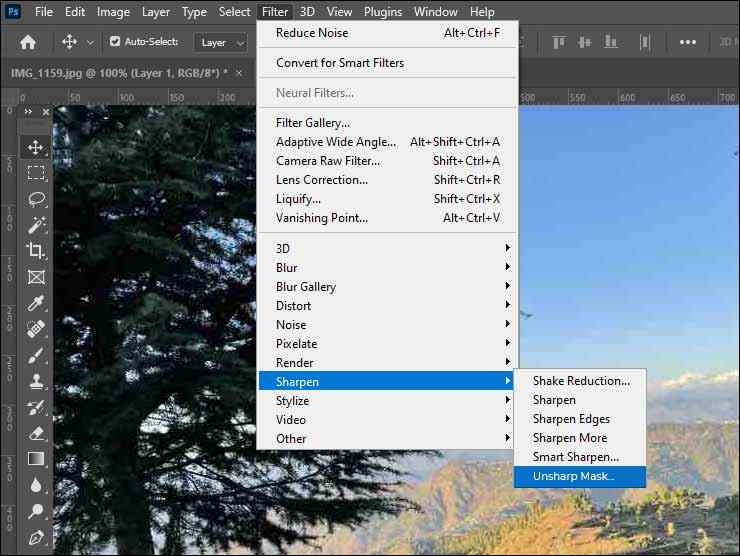
Now, adjust various sliders available to get the desired sharpness in the image.
- Amount Slider – Controls the amount of contrast you want to add to the edges. The higher the values, the stronger the contrast and the sharper the image.
- Radius Slider – Controls the width of the edge area where the sharpening effect is applied. The greater the radius, the more pronounced the sharpening.
- Threshold Slider – Prevents you from unnecessarily sharpening noise in a photo


Smart Sharpen
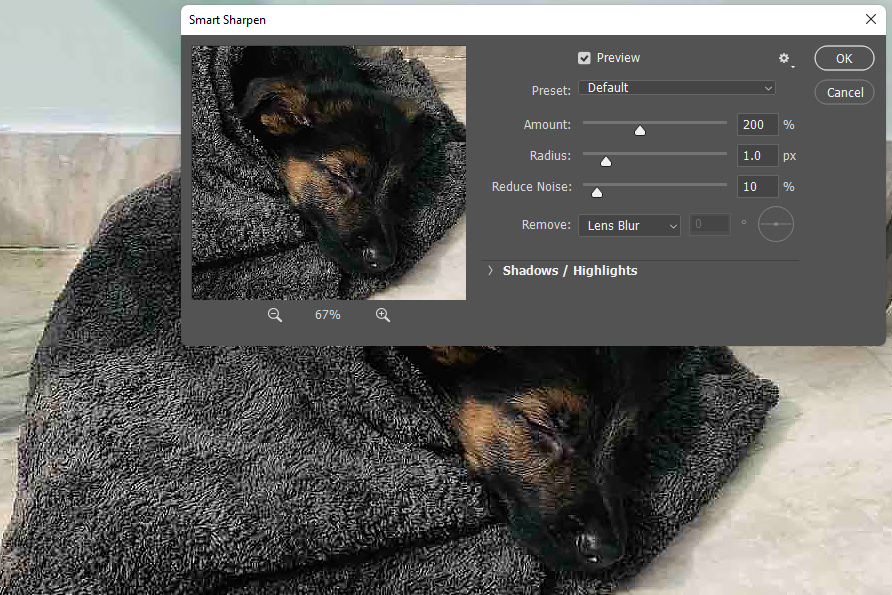
The Smart Sharpen filter in Photoshop has more sharpening control than the Unsharp Mask. It sharpens the edges within an image without sharpening the noise, which results in a cleaner image. To use Smart Sharpen in Photoshop, go to Filter > Sharpen > Smart Sharpen.

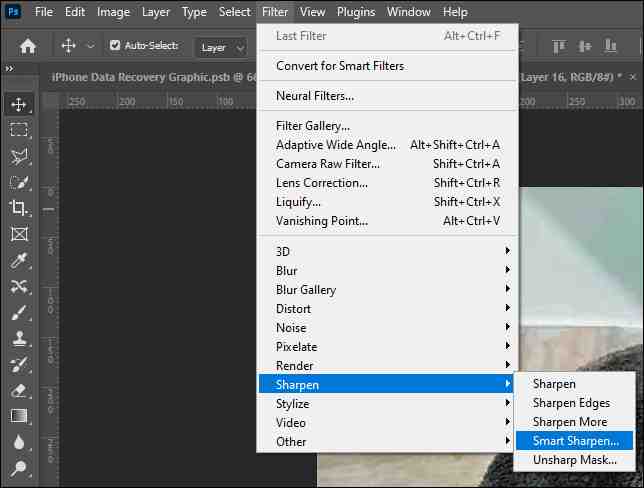
The Smart Sharpen dialog box includes:
- Preset – To resize the Smart Sharpen dialog box.
- Remove – Detects edges in the image, i.e., an area with a sudden or abrupt change in brightness between neighboring pixels. It can be set to remove Lens Blur, Gaussian Blur, or Motion Blur.
- Amount – Controls the amount of contrast applied to the edges. The higher the value, the sharper the image.
- Radius – Determines the number of pixels to sharpen around edges.
- Reduce Noise – Reduces unwanted noise to clean up the image.
- Shadows and Highlights – Use this section to fix overly bright or dark areas in an image after sharpening.

High Pass Filter
The High Pass filter is commonly used to sharpen images and remove noise from photos. You can even say it is an edge-detection filter, as sharpening a photo is all about increasing the edge contrast.
Here’s how to use the High Pass Filter to sharpen an image in Photoshop.
- Open Adobe Photoshop and go to File > Open to upload the image to the Workspace.
- Select the Background layer (i.e., your original image), right-click on it, and select Duplicate Layer. You can name this layer as Image Copy and click OK.
- Select the Image Copy layer, go to Filter > Other and High Pass Filter.


- Your image will turn grey, and you will see the edges detected by the high-pass filter.
- Now, adjust the Radius value to highlight the edges. Click OK when done.

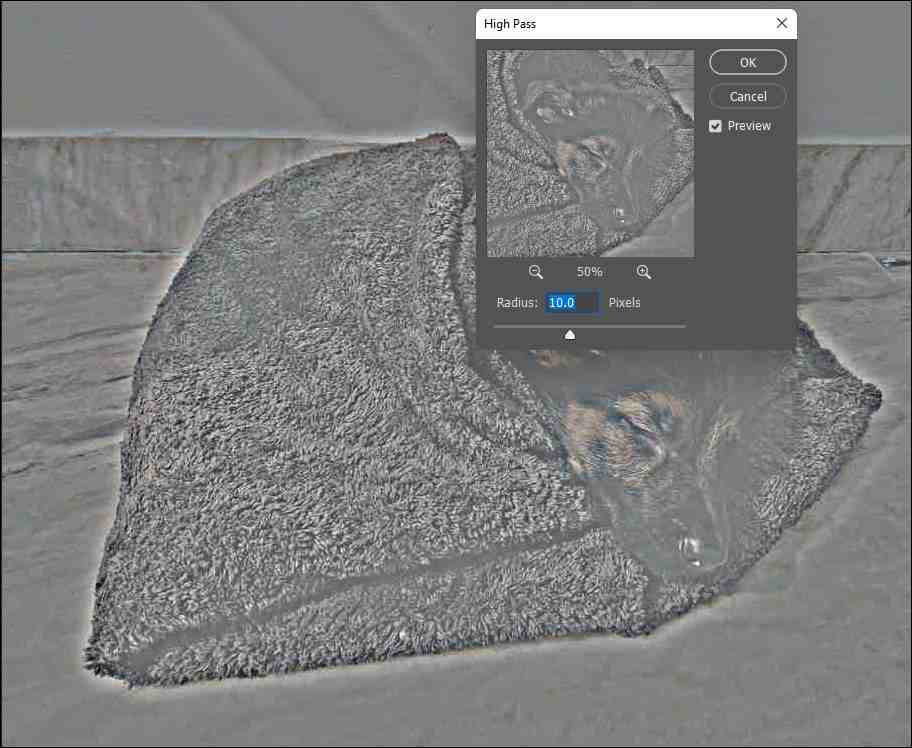
- Next, set the Blending Mode of the Image Copy layer to create the sharpening effect. Group the Background and Image Copy later to see the final image.
What to do if your edited photos get corrupt?
Sometimes, your photos edited in Photoshop may show signs of corruption due to incomplete transfer or download, bad sectors on the hard drive, virus attacks, etc. In such a situation, use professional photo repair software, such as Stellar Repair for Photo to fix corrupted images edited in Photoshop.
Conclusion
Every digital photograph needs some amount of sharpening. Using custom tools in Photoshop, you can easily reach that level of sharpness & detail in your photos. Irrespective of why you need to sharpen an image, one of these filters can do the job for you. However, you need to keep a few things in mind while applying a sharpening effect on an image:
- Be careful with the amount of sharpening you apply, as it’s easy to overdo. This can make an image look unoriginal and over-detailed.
- Use separate layers to add different components to an image and work on them one at a time without changing your original image.
FAQ
- How do we reduce haze in photos?
Use the Dehaze Filter in Lightroom to decrease haze in the photographs.
2. Which online tool can be used to sharpen photos?
You can use Snapseed, Pixlr, Fotor, PineTools, and many other online sharpening tools to sharpen an image.
3. How do you sharpen parts of the image selectively?
To sharpen parts of your image selectively, use a mask or draw a selection.


