In the unfortunate event that you have lost or accidentally deleted your file, there is still hope. Stellar Data Recovery for Mac is a powerful data recovery software that can efficiently retrieve lost files. You can download the software by clicking on the button below.
How To Find Files On Mac in 6 Ways
Method 1: Use The Recent Items Option
To find recent files on your Mac, let’s use the in-built Recent Items feature first:
- Click on the Apple logo in the upper left corner.
- Choose Recent Items on the drop-down menu.
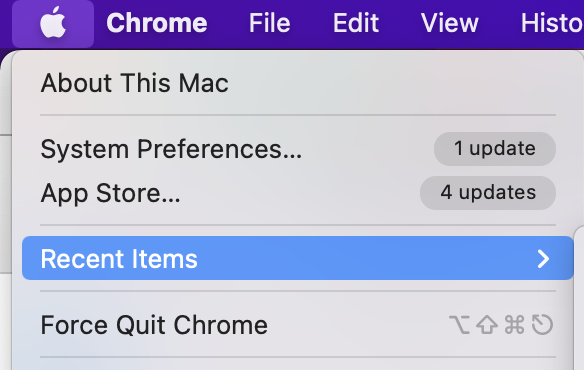 Apple Logo > Recent Items
- Look through the list of your computer's most recently opened files, folders, and apps.
- Click on the file or folder you were looking for to open it.
If you can’t locate the item on the Recent Files list, jump to the next steps.
Method 2: Use Finder to Search Files on Your Mac
Locating files on a Mac using Finder is a streamlined process that anyone can execute.
To find files on your Mac using Finder, do this:
- Open Finder from your Dock.
- Locate the search bar in the window's top right corner. In this bar, you can input the file's name and additional search terms such as file type, attributes, and keywords.
- Restrict your search to a particular folder or location > select This Mac or the folder you prefer from the drop-down menu next to the search bar.
- Once you have defined your search parameters, activate the search by pressing the Return button or clicking the magnifying glass icon.
- Finder will compile a list of all the files and folders that match your search criteria. You can choose the file you need by clicking on it.
Finder is a helpful and reliable search tool, but it may not be able to find all the files on your system. Suppose you're having difficulty locating a specific file; in that case, you may want to consider using other search techniques like Spotlight or iCloud Drive.
Method 3: Use Spotlight to Find Files on a Mac
The macOS comes equipped with a great search tool called Spotlight that can effortlessly search for a wide range of content, including files, applications, and documents stored on your Mac.
Here's how you can make the most of Spotlight to search files on your Mac:
- Launch Spotlight. You can either click on the magnifying glass icon in your screen's top right corner or use the keyboard shortcut Command + Space.
- Type in the name of the file you're looking for or a keyword that's related to it. Wait for the relevant search results to appear.
- To view all the search results, click on the Show All in Finder option located at the bottom of the search results. This action will launch a Finder window to view all the search results.
- Once you've located the file you need, you can either open it directly from the search results by clicking on it or double-clicking it in the Finder window.
Spotlight is a highly efficient and user-friendly tool for finding files on your Mac without spending time sifting through numerous folders and directories.
Method 4: Use Advanced Search in Finder
Finding a specific file on your Mac using Finder Advanced Search is another step to locate a file you need:
- Open a Finder window by clicking the Finder icon in your Dock.
- Go to the menu bar > press File > choose Find at the very bottom of the drop-down menu.
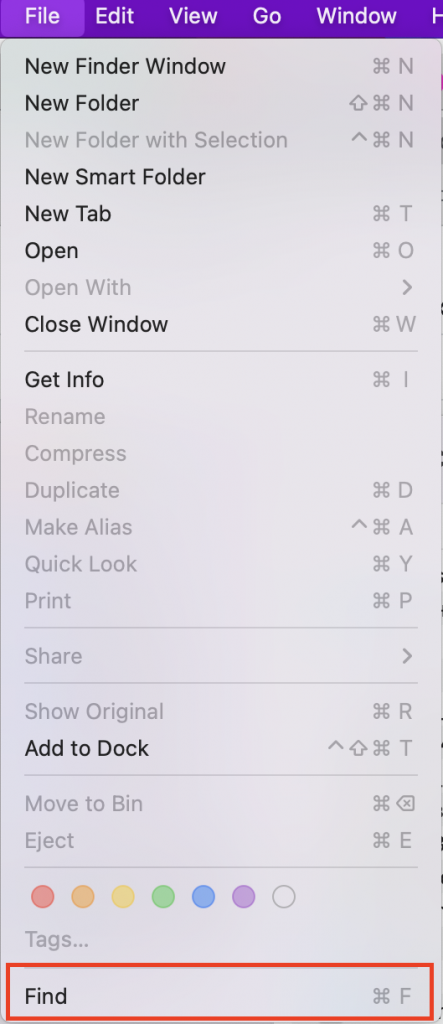 Finder > search for files on Mac
- You’ll see different search criteria you can use to help you refine your search. You can search for files by name, type, date modified, or size. Look for the missing file using as many criteria as needed.
 Finder Advanced Search
That's it! With Finder Advanced Search, you'll be able to locate the files you need on your Mac quickly and easily.
Method 5: Use iCloud Drive
Here are a few simple steps you can follow to use iCloud Drive to find files on your Mac:
- Make sure that you have iCloud Drive enabled on your Mac. To do this, go to System Preferences > Apple ID > iCloud and make sure that iCloud Drive is checked.
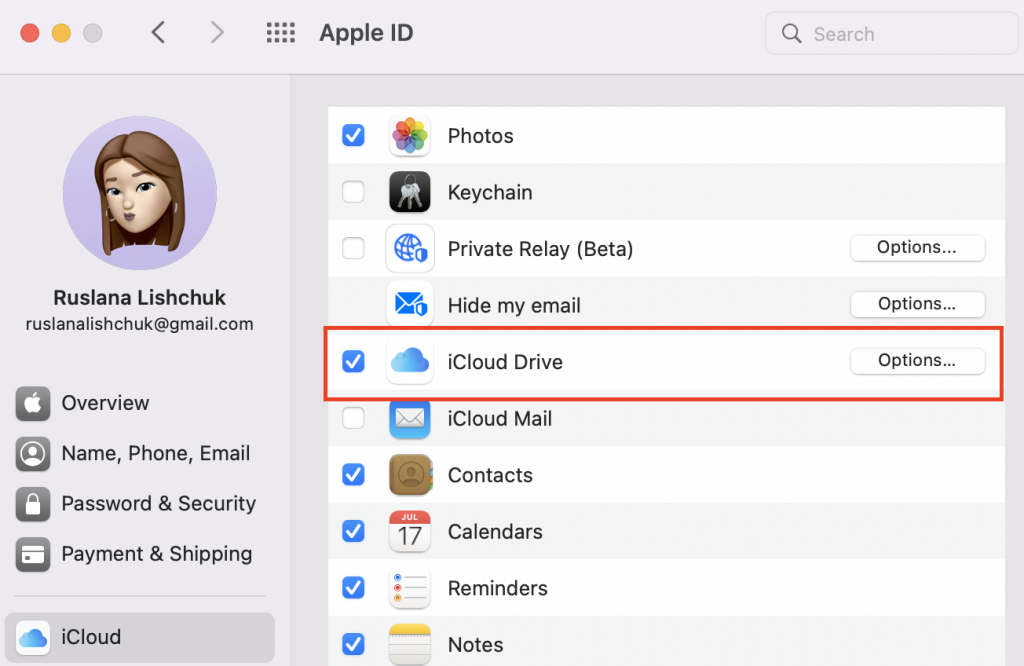 System Preferences > Apple ID > iCloud
- Open Finder on your Mac and navigate to the iCloud Drive folder. This folder should be located in the sidebar on the left-hand side of the Finder window.
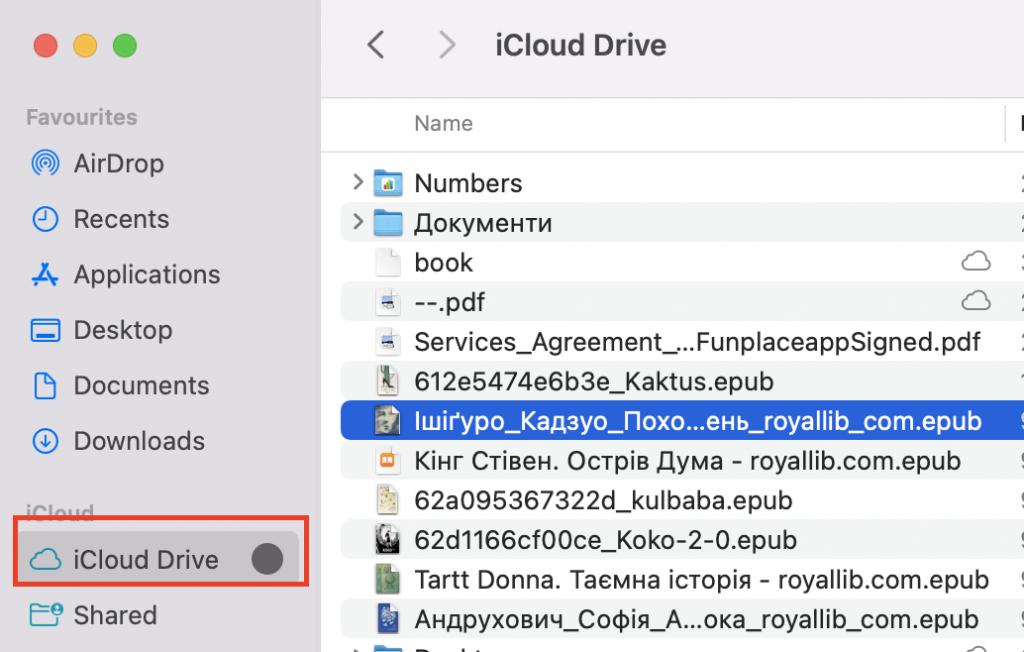 Finder > iCloud Drive folder
- Once you're in the iCloud Drive folder, you can use the search bar at the top right of the Finder window to search for specific files or folders. Simply type in the name of the file or folder you're looking for and hit enter.
Method 6: Use a Data Recovery Tool
Still looking for a file on your Mac? Consider using a data recovery tool. These tools are designed to recover lost or deleted files due to system errors or hardware failure. They can also recover files you thought were gone forever, saving you time and effort. Download Stellar Data Recovery and try it yourself!
It’s a Wrap
We hope you were able to successfully locate the file you were searching for, utilizing one or more of the techniques outlined in our blog post.
It's always a frustrating experience when a vital document or important file goes missing. Still, we trust that the information provided in our post proved helpful and aided you in your search.
Read more:
Was this article helpful?