“I used a 512 GB SanDisk Ultra® microSDXC UHS-I Card on my Sony camera to capture my sister's wedding. After the ceremony, I connected the SD card to my Windows computer; it showed that the card was write-protected. Can someone help me? How to change the SD card from read-only mode to normal?”
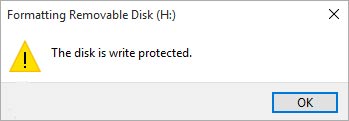
SD card read-only error, also known as SD card write-protected, is a security that restricts you from modifying, writing, or deleting any stored data. It will not even let you transfer or save media files from the SD card to your computer. You can only view the files saved in your SD card.
Your SD card is showing a read-only error message if the write protection switch of the card is locked or the file system of the SD card is corrupted. However, you can easily change the read-only mode of the SD card to normal by using the Diskpart command, Windows Registry Editor, or formatting the card.
Read this article to learn how to change SD cards from read-only mode to normal. Let’s get started.
How to Change SD card from Read Only to Normal?
Follow these steps to remove the SD card read-only error in Windows.
- Unlock the Write Protection Lock
- Use Diskpart Utility
- Use Windows Registry Editor
- Convert your SD Card from FAT32 to NTFS
- Format your SD card
Note: If your SD card is inaccessible, immediately use an SD card recovery software, such as Stellar Photo Recovery, to safeguard your stored media files from further damage and retrieve them.
1. Unlock the Write Protection Lock
On all SD cards, a physical switch or Lock allows you to lock or unlock your card. Flipping the switch towards the bottom will lock the SD card, making it write-protected or read-only. To change the read-only attribute of the SD card, unlock the Lock switch because only you can delete or modify the stored data.
Here’s how to change an SD card from read-only to normal:
- Eject your SD card from the computer or adapter.
- Check if there is a Lock switch on the left side of the SD card.

- Unlock the SD card by moving the switch from the Lock to the Unlock position.
2. Remove SD Card Read-Only Error with Diskpart Utility
Diskpart is a command-line utility that allows you to manage disk volumes and partitions. You can use the Diskpart command to remove the SD card read-only error.
Here’s how to remove SD card read-only error using Diskpart:
- Type CMD in the Windows search box and select Run as Administrator.
- In the command prompt, type Diskpart and then press the Enter key.
Note: If prompted by User Account Control, click Yes.
- Type list disk and press the Enter key to see a list of all detected disks on your computer.
- Locate your SD card in the list and note its disk number, i.e., disk 1.
- Type select disk *, replace * with the disk number you noted in the previous step, and press the Enter key.
- Type attributes disk clear read-only and press the Enter key.

- Wait until you see the ‘Disk attributes cleared successfully’ message.
- Type exit and press Enter to close Diskpart.
3. Use Windows Registry Editor to Disable SD Card Read Only Mode
The Windows Registry Editor is a graphical application that enables you to access and edit the configuration settings of your operating system. You can change the read-only SD card to normal by editing the Windows Registry key in the Registry Editor.
Here’s how to adjust Windows Registry key to remove SD card read-only attributes:
- Connect your SD card to a Windows PC using a card reader.
- Press the Windows + R key to open the Run window, type regedit, and press Enter to launch the Registry Editor.
- Go to HKEY_LOCAL_MACHINE > SYSTEM > CurrentControlSet > Control > StorageDevicePolicies in the Registry Editor.
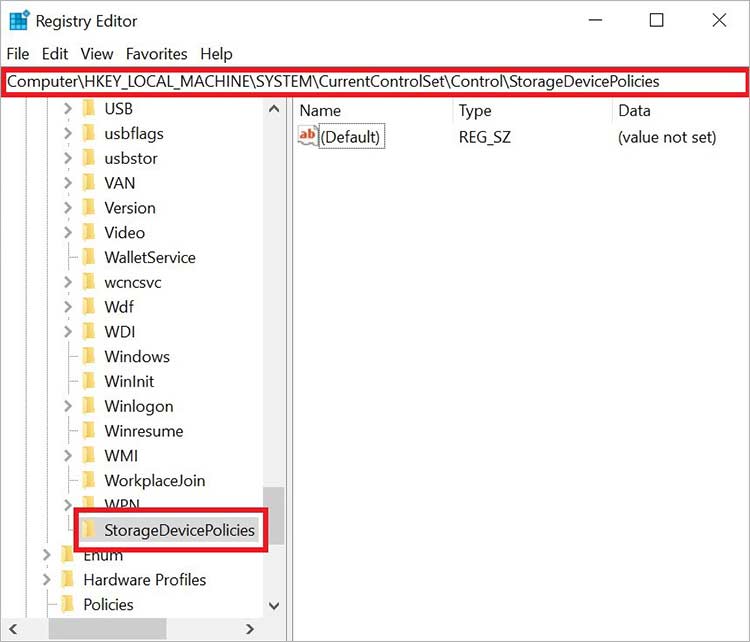

Tip - If you cannot see StorageDevicePolicies, you must manually add it. Right-click on the current Control catalog, select New > Key and name it StorageDevicePolicies.
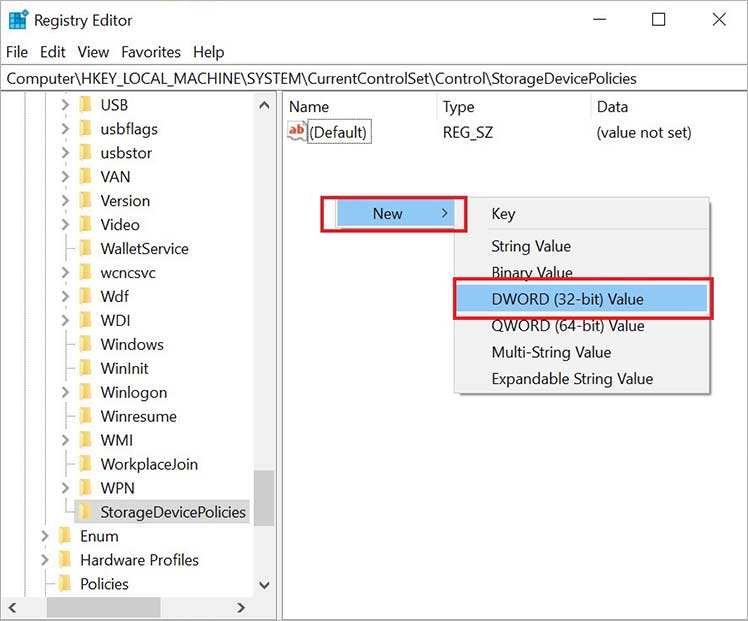
- Right-click on StorageDevicesPolicies, click New and select the parameter DWORD (32-BIT) Value for 32-bit OS or QWORD (64-bit Value) for 64-bit OS.
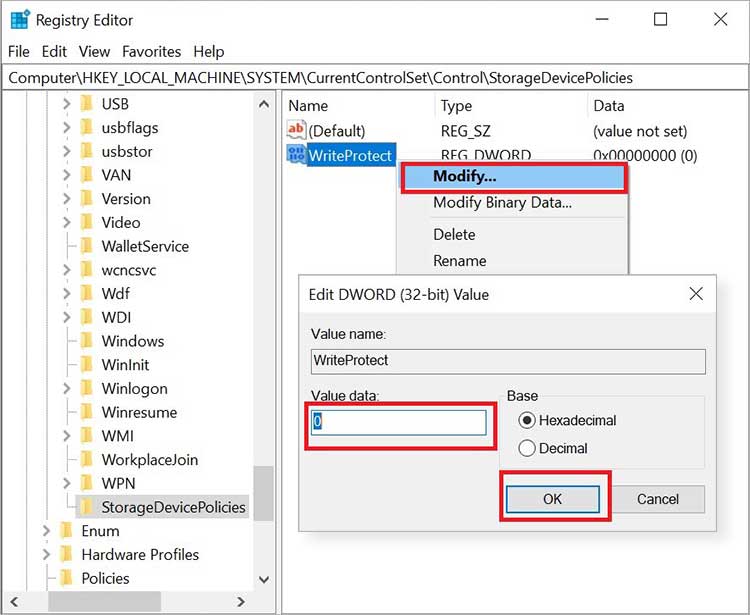
- Now, name this value as WriteProtect, right-click on it, and select Modify.
Tip - If the WriteProtect option already exists, just change the number in the Value data.
- Next, change the number in the Value data box to 0 and click the OK button.
- Once done, eject your SD card from your computer and restart it.
4. Convert your SD Card from FAT32 to NTFS
Normally, the file system of the SD card is FAT32; you can convert it to NTFS to fix the SD card read-only issue. Here’s how to convert an SD card from FAT32 to NTFS:
- Connect your SD card to the computer.
- Press the Windows + R keys together to open the Run window.
- Type cmd.exe and press Enter to launch the Command prompt.
- Type convert X : /fs:ntfs /nosecurity /x and hit Enter. Here, X is the drive letter of your read-only SD card.
- Type exit and hit the Enter key.
If none of the methods can fix the SD card read-only error, the card may be logically corrupted or affected by the virus. In such a situation, forcibly change the SD card from read-only to normal by formatting it. However, formatting will erase all the data stored on the SD card.
Here's how to format an SD card:
- Connect your SD card to your Windows via a card reader.
- Go to My Computer, right-click on your SD card, and click Format.
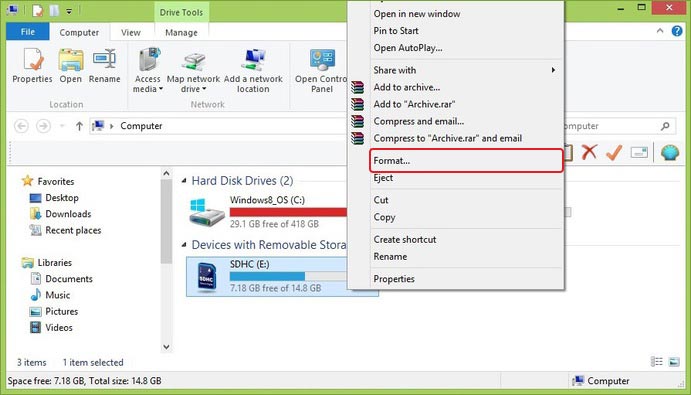
- A format window will appear. Specify the file system and set a volume label for your SD card. Then, select Format options and click Start.
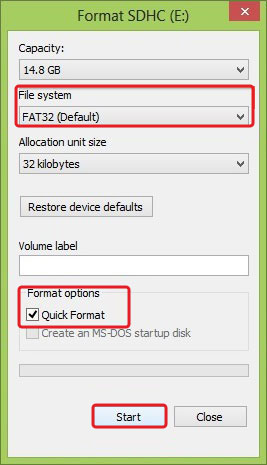
- Formatting will begin and take a few seconds to complete.
Formatting the SD card will clear all the stored data, leading to data loss. So, backup your photos, videos, and other media files saved in the SD card before formatting.
If you forget or cannot back up the SD card due to a read-only error before formatting, use professional photo recovery software like Stellar Photo Recovery to retrieve the lost photos.
This tool can easily recover lost or deleted photos, videos, and other media files from formatted, corrupted, or damaged SD cards, USB drives, and other storage media. Stellar Photo Recovery restores deleted photos in all popular formats, including PNG, CR3, HEIC, JPG/JPEG, etc.
- Connect your SD card to the Mac or Windows PC using an SD card reader.
- Download, install, and launch Stellar Photo Recovery software.
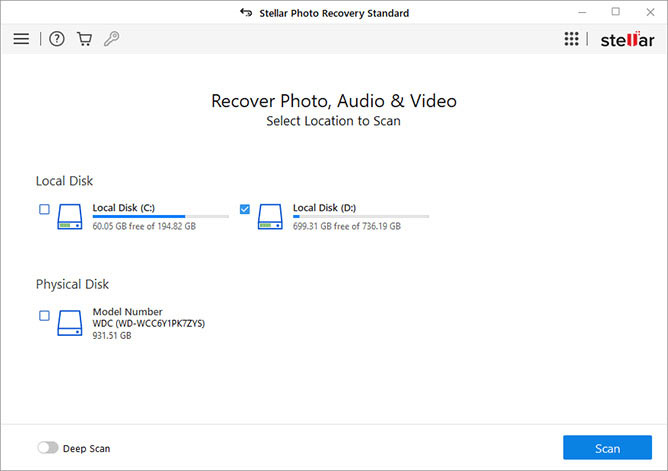
- In the home screen, select your formatted SD card from where you want to recover photos. Click Scan.
- The software will initiate SD card scanning. You can see the progress of the scan on the next screen.
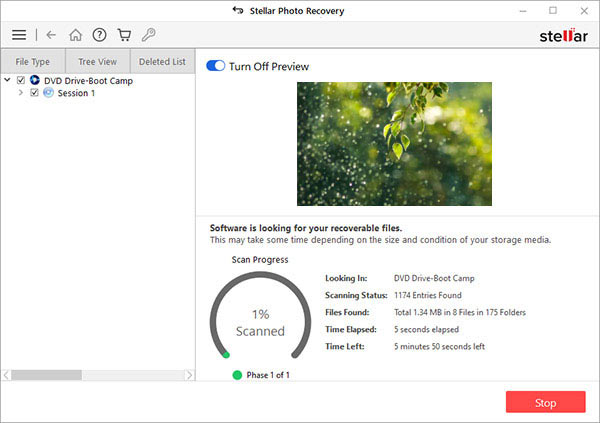
Click Stop if you want to stop the current scan process.
- After scanning, you can see the list of recoverable media files and preview them.
- Select the photos you want to restore, click Recover, and browse to save them at a desired location.

Conclusion
There can be various reasons that may cause SD card read-only errors, but it is impossible to know which exact reason is behind the read-only mode of your memory card. Therefore, some solutions mentioned above may not work for you, so we have provided several solutions. We hope one or more solutions mentioned in this blog can help you fix SD card read-only errors.
If you have any better solution or questions, comment in the comment zone.
FAQ
Was this article helpful?