When trying to open a corrupt MySQL database, you may receive any of these errors:
Irrespective of the error message you encounter, you must repair the database to restore all its components.
Steps to Repair MySQL Database using phpMyAdmin
Note: We will be accessing phpMyAdmin using XAMPP application for Windows or open the url ‘Read More’ to start using it. Or, you may access phpMyAdmin using cPanel.
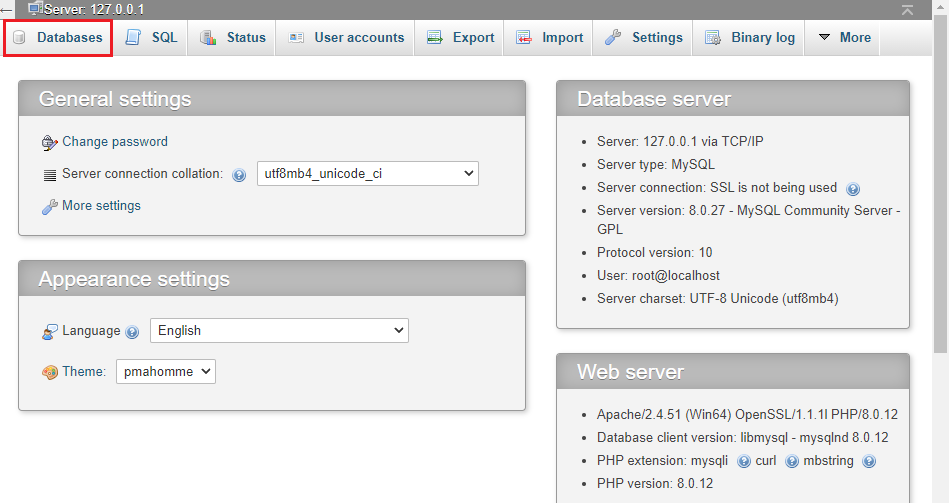
- Once phpMyAdmin opens, click the Databases tab from the main menu. This will open a list of MySQL databases.
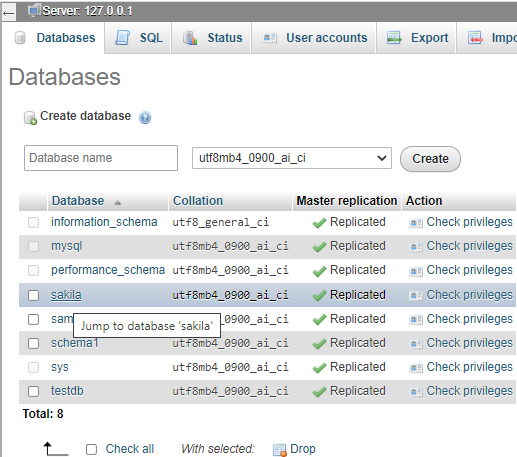
- Click the corrupt database.
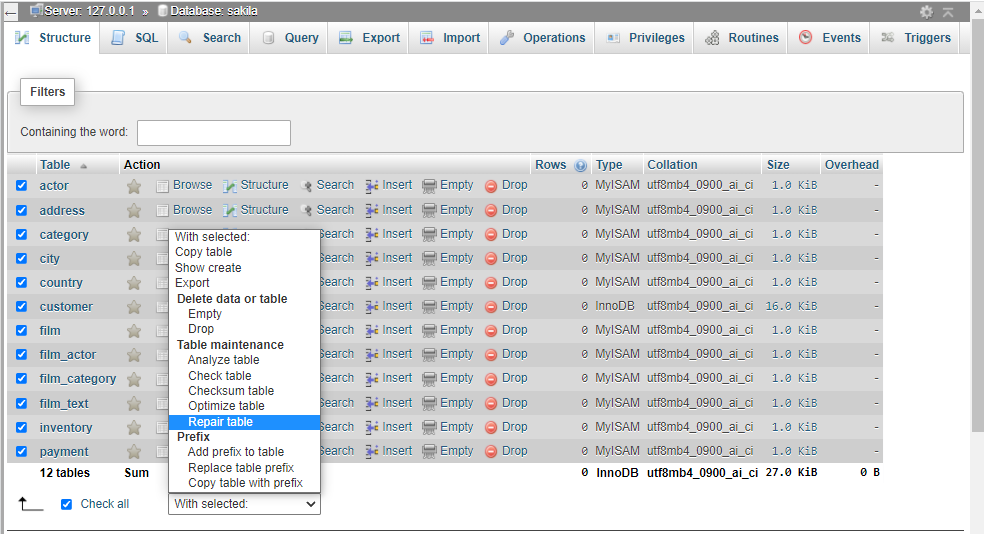
- A list of all the tables in MySQL database will open. Click Check All to select and repair all the tables. Once the tables are selected, expand the ‘With selected:’ drop-down, then select the Repair Table option.
Note:To repair a specific table, check only that table. In our case, we’ve selected two tables ‘Customer’ that we want to repair and recover.
The phpMyAdmin will run the query for the MySQL tables. On successful completion of the repair process, a message indicating that the database tables are repaired will appear.
Note:You cannot repair InnoDB table(s) using the ‘REPAIR TABLE’ option. On trying to repair an InnoDB table, you will get an error “the storage engine doesn’t support repair.” To fix a corrupted InnoDB table, refer to this blog.
Still Can’t Access the MySQL Database?
While the above method might work, it has certain shortcomings. It only allows repairing a single database at a time which can be time-consuming. Also, fixing corruption in a large database may require additional time, thereby exceeding database downtime. Further, the method may fail to repair a severely corrupt MySQL database. And, forcing InnoDB recovery with a value greater than ’4’ involves data loss risk.
Consider using a specialized MySQL database repair tool like Stellar Repair for MySQL to reduce database downtime and get back all the data. The tool can repair severely corrupt MySQL databases. Also, it supports repairing both MyISAM as well as InnoDB tables. In addition, the software also helps recover all the data while preserving the original table structure and formatting.
Steps to repair MySQL databases using the software are as follows:
- Download the demo version of Stellar Repair for MySQL software.
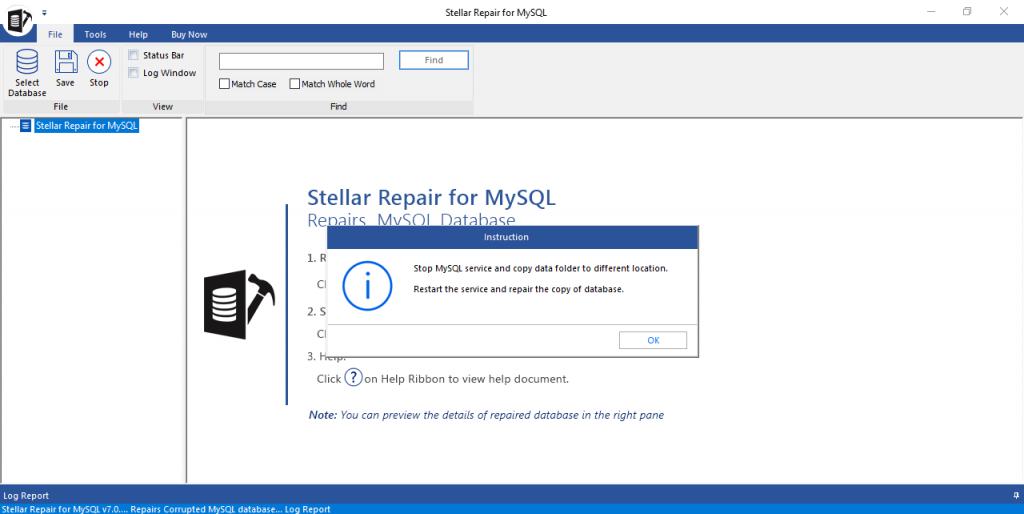
- Launch the software after completing the downloading and installation process. This will open the software home page with the following Instruction dialog box. Click OK.
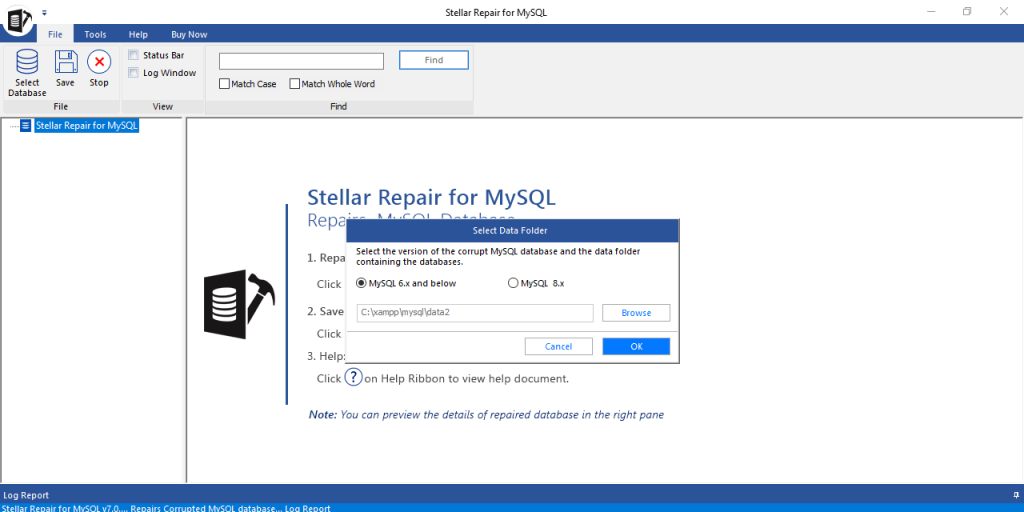
- Select the version of your corrupt MySQL database, then click Browse to select the data folder containing the databases you want to repair. Click OK.
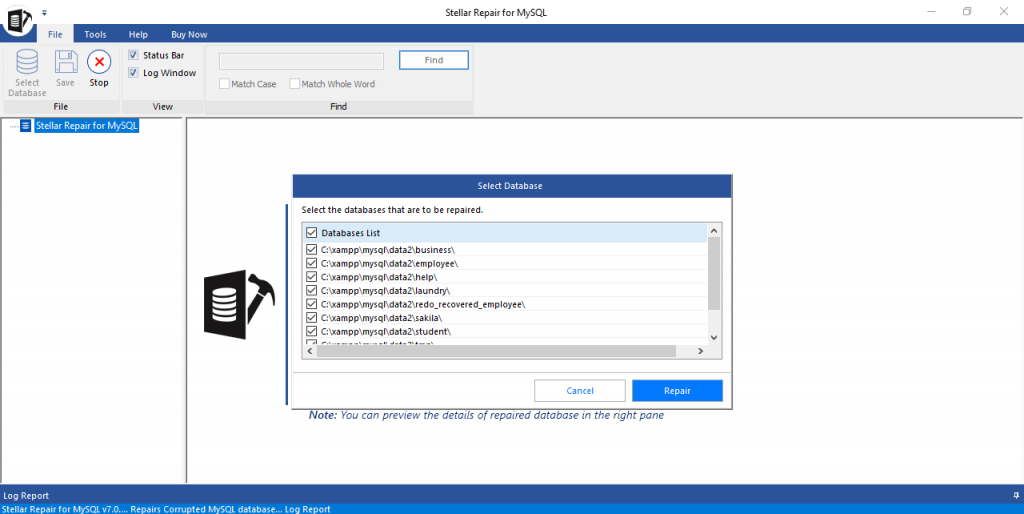
- The software displays a list of all the MySQL databases. By default, all the databases are selected. You may also choose specific database(s) to be repaired, then click Repair.
- Click OK when the ‘Repair Complete’ message box opens.
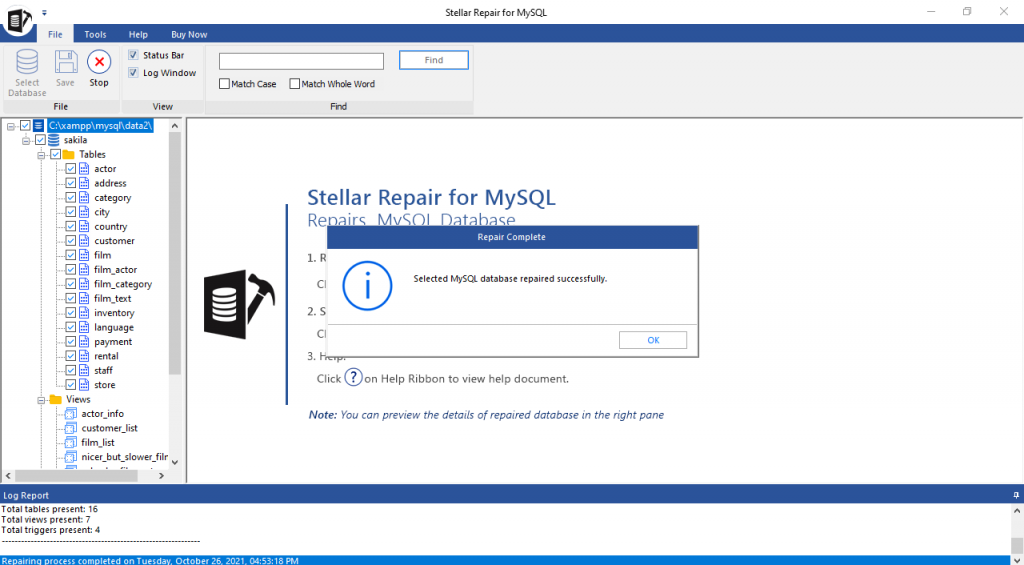
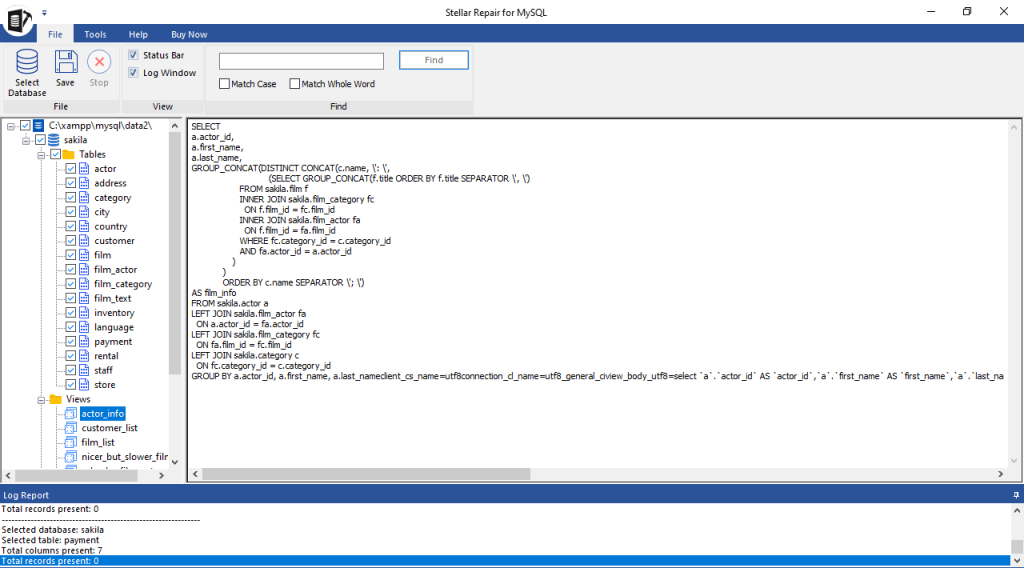
- A preview of all the recoverable tables, views, triggers, etc. gets displayed on the left pane of the software window. Click on an item to view its contents in the right pane.
- Click Save on File menu to save the repaired data.
- Select the file format to save the repaired data, enter details to connect to your MySQL server, then click Save.
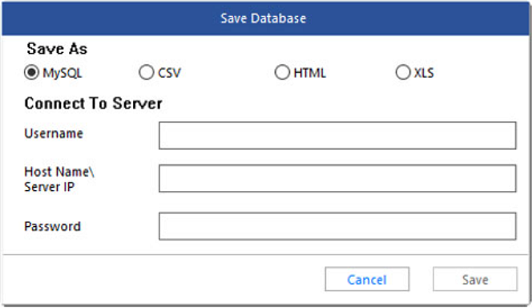
- A ‘Saving process completed’ message is displayed on completion of the saving process. Click OK.
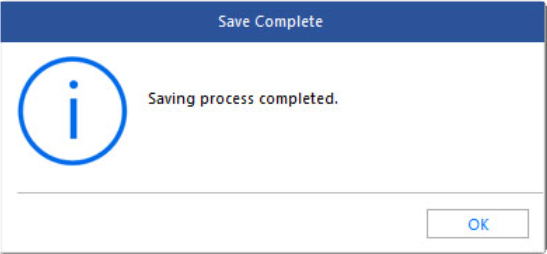
Open your MySQL folder and view the repaired file.
Conclusion
This blog discussed the process of repairing a MySQL database using phpMyAdmin. But using this method has some downsides. It only supports repairing MyISAM tables. You need to separately force_innodb_recovery to recover data from corrupt InnoDB tables. Further, you can repair databases one by one. You can overcome these limitations by using Stellar Repair for MySQL software. It helps repair both MyISAM and InnoDB tables. Also, it saves time by allowing you to fix multiple databases simultaneously.