To make your macOS Mojave 10.14 perform smoothly forever; you should perform the simple task of repairing the macOS Mojave start-up disk drive with the help of the Disk Utility application. macOS Mojave’s boot volume which is also known as the Macintosh HD will be APFS formatted. Like any other file-system; the APFS has its directory structure and the partition map. Though the former can be repaired with the Disk Utility application, the latter is impossible to fix.
Disk Utility is the free and native application that performs multiple tasks on your storage device. The utility verifies and repairs the corruption. It can re-partition your SSD or the HDD into more than a single partition. Further, the Disk Utility allows you to erase and secure erase your macOS Mojave volumes.
How to Verify & Repair macOS Mojave?
Follow the sequential steps to verify and repair macOS Mojave start-up disk drive:
- Start your macOS Mojave and launch Disk Utility from the Utilities folder
- Locate your internal SSD (or HDD) in the Disk Utility left-corner
- Figure out at what level of the storage volume you want the utility to repair? Else, you can repair all of them one-by-one. For instance: In APFS, you have the Apple HDD, Container disk# and the macOS.
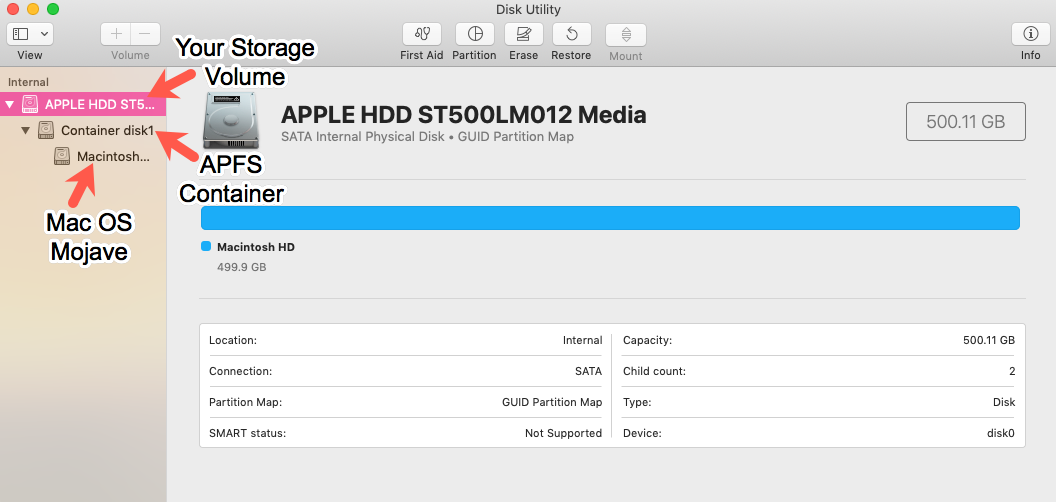
- Select the Apple HDD and press First-Aid. A message saying ‘Would you like to run First Aid on Apple HDD_’ will pop-up. Proceed by clicking on the Run.

- Disk utility will perform verification and repair of the chosen storage drive. A message saying ‘Running First Aid on Apple HDD’ will pop-up. Let the process of First Aid end successfully.
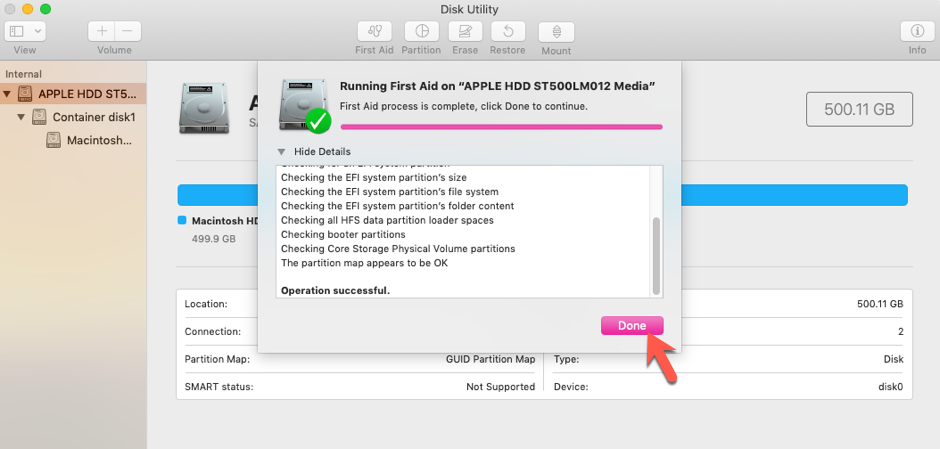
Note: A message ‘The partition map appears to be Ok. Operation Successful.’ will appear.
- Press Done and repeat the process on the start-up disk, container, and the storage volume.
Steps to Repair Container on Mojave
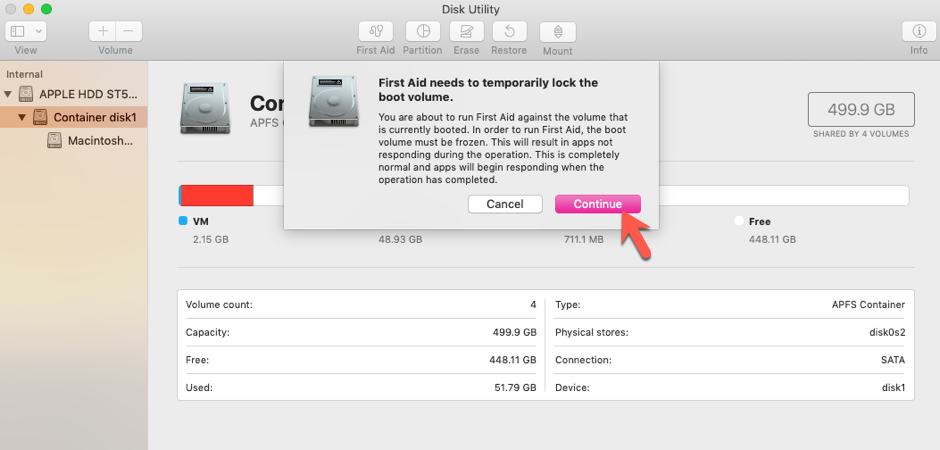
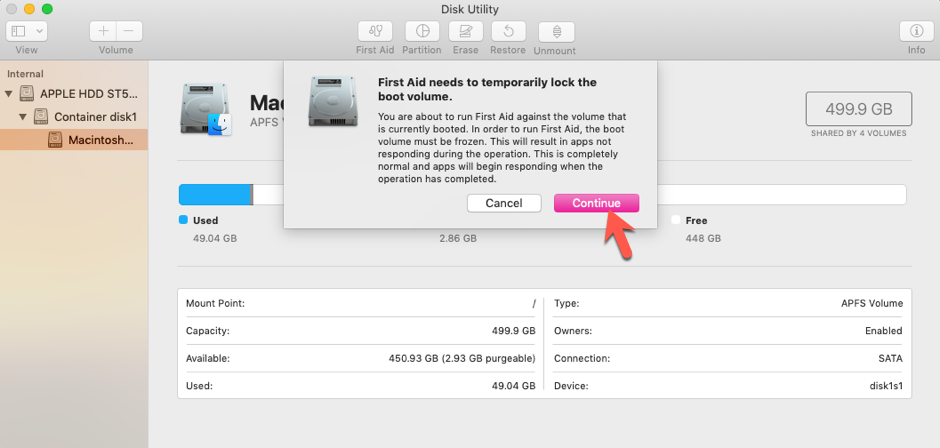
- Select Container and Click First Aid. A pop-up will appear ‘First Aid needs to temporarily lock the boot volume’. Press continue to start the repair process.
- Disk utility will soon end the repair process.
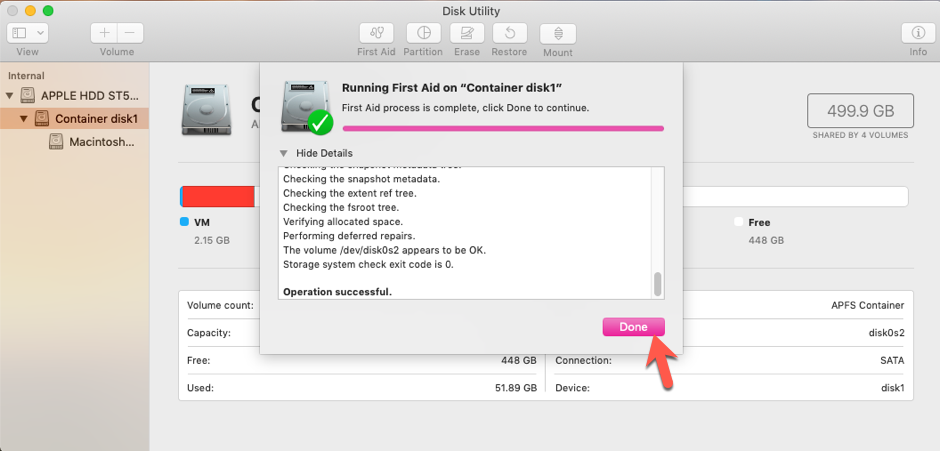
Result: Operation Successful
Steps to Repair macOS Volume on Mojave
- Select macOS Volume and Press First Aid. A pop-up will appear ‘First Aid needs to temporarily lock the boot volume’. Press continue to start the repair process.
- Click Done when finished.
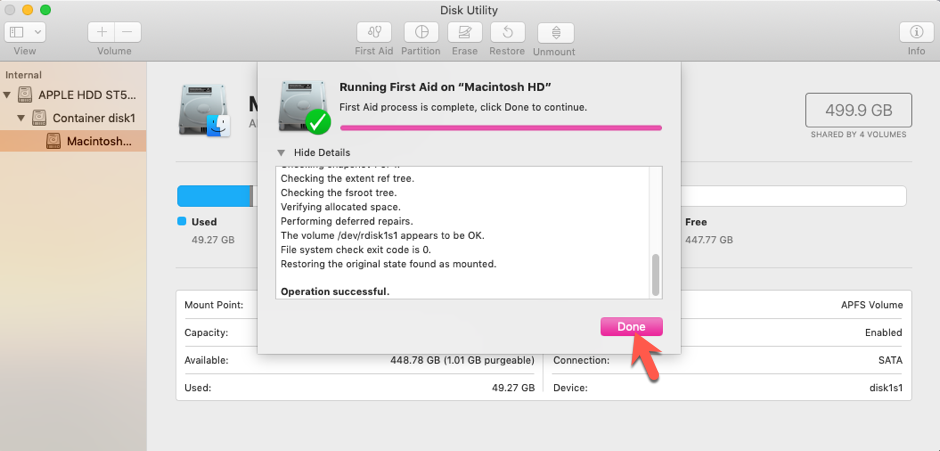
Result – Volume appears to be OK. Operation Successful
Similarly, the Disk Utility application can repair HFS, HFS+ volumes, external hard drive partitions, SSDs, USB flash drives in a similar manner.
Helpful Links:
- Download, Stellar Data Recovery DMG to run Mac data recovery free trial.
- How to Repair macOS Catalina Startup Disk
Was this article helpful?