Error: Disk Utility can’t repair this disk. Back up as many of your files as possible, reformat the disk and restore your backed-up files.
The above message doesn’t show up in normal circumstances of external hard disk errors. In most cases, the Disk Utility is vigorous enough to repair an external drive and even your start-up disk. But if the external hard drive is beyond the repair scope of the Disk Utility, then it could be possible that the directory structure of the drive is corrupt severely.
Don’t panic, the below 3 activities could be performed when Disk Utility fails to repair an external hard drive. Further, try Mac external hard drive recovery software as a last resort.
1) Backup External Hard Drive Data
You can try copy and paste all files from the corrupt external or internal hard drive to another destination. But doing this may also result in copying errors to another location. Moreover, the corruption may not allow you to copy & paste all the files from the disk.

2) Fix Mac hard drive using FSCK
You might have luck with FSCK command line.
To run fsck command you have to restart Mac and log in as ADMIN. Launch Terminal, enter df -h1 and press Return. Use of df-h1 will let you know the path of the internal disk drive.
Use below line
sudo fsck_hfs -r -d /dev/disk1s1
The command (-r) in the above code will recreate Catalog B – Tree. It will help you fix Invalid B-tree node problem occurred on the disk drive. It will further resolve errors like –
- Invalid count
- Invalid key length
- Invalid volume file count
- Invalid volume directory count
- Invalid volume free block count, and likewise.
3) Recover External Drive using Stellar Data Recovery Professional for Mac
Though helpful, FSCK isn’t the sure shot method to repair the corrupt external/internal hard drive. You might need the help of a professional external hard drive recovery software for Mac. Stellar Data Recovery Professional is a sophisticated application to scan and recover your APFS or HFS drive.
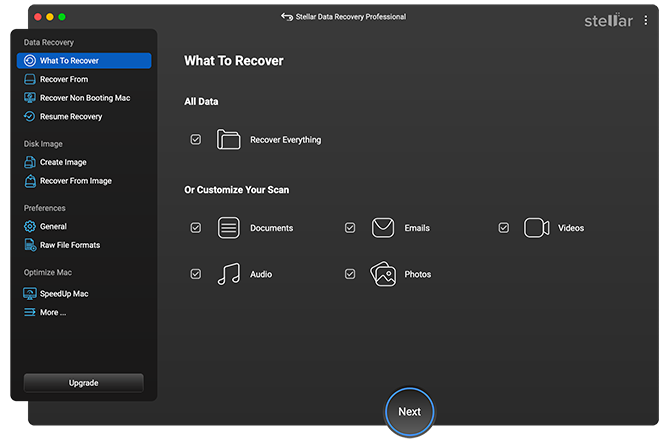
Step 1) Connect your external drive and launch Stellar Data Recovery Professional on your Mac. Customize your scan as shown below.

Step 2) Select your external hard drive and toggle on Deep Scan feature. The deep scan feature scans all the sectors of the external hard drive to bring back lost data. Otherwise, stick with Quick Scan to recover the file-structure. Press the Scan button.
Step 3) After the external hard drive scans complete, navigate through the Classic list, File or Deleted List to view and preview your files.
Step 4) If you have activated the Stellar Data Recovery Professional for Mac then you will be able to recover or save your files conveniently.
Video Tutorial – Mac External Hard Drive Recovery
Conclusion
Not just the corrupt HFS drive or volume but you can leverage & activate Stellar Data Recovery Professional for Mac to image an APFS external hard drive for the purpose of data recovery.
The process to do the job will be the same as mentioned in the sequential steps and the video tutorial.
Was this article helpful?