Photo corruption usually occurs due to malware or virus infection, bad sectors, and improper drive ejection. However, a photo file may also get corrupt due to dying storage media, system crash, sudden system shutdown, corrupt file, and file system errors.
Further, there could be a case where the recovered photos may be corrupt. That happens due to file overwriting as you continue using the storage media or the system after file loss.
Thus, when you open a corrupt photo, it displays either an error that the file can’t be opened or part of photo shows as blank or with random colorful lines and broken pixels (see screenshots below).
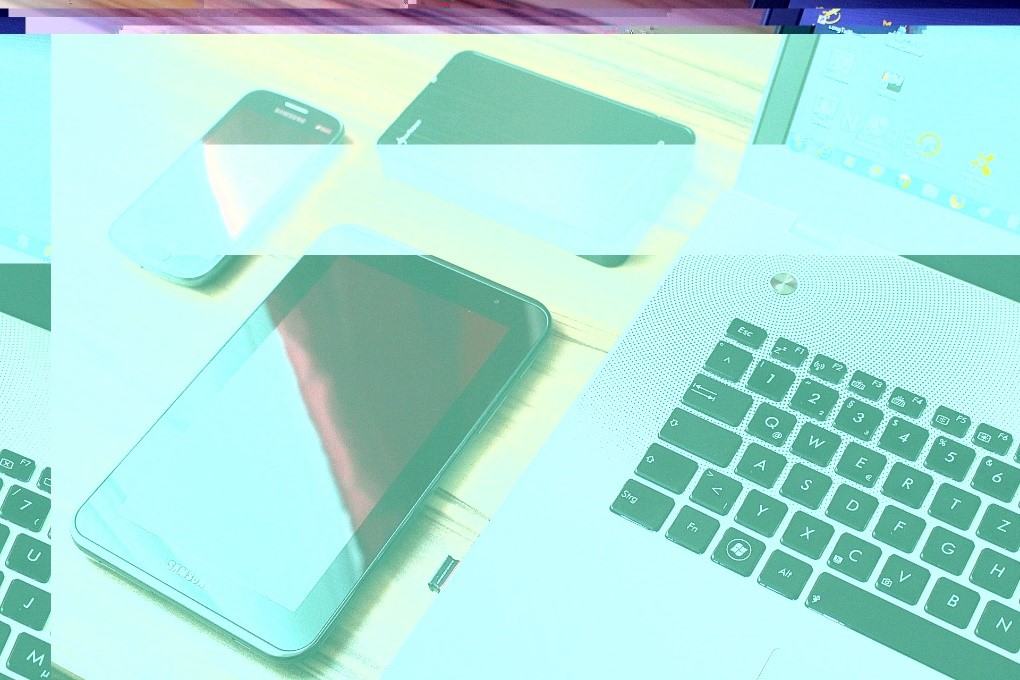 Figure 1: Corrupt Photo with distorted pixels
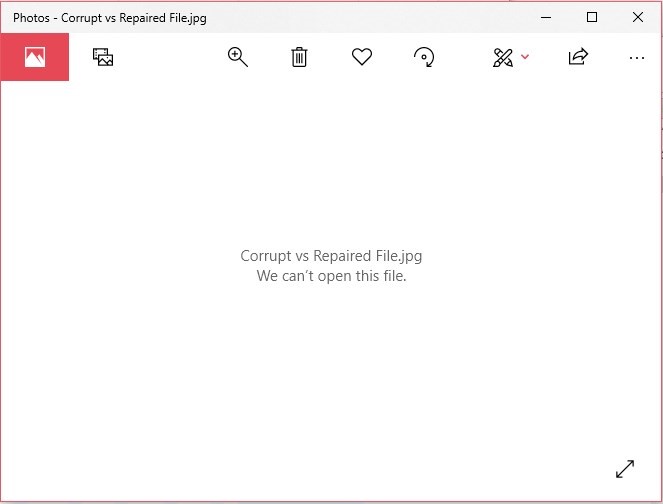 Figure 2: Error: corrupt Photo can’t be opened
 In this guide, we will show you different ways to repair corrupted photos in Windows 10.
Methods to Repair Corrupt Photos in Windows 10
Method 1: Stop Using the Storage Media
After data loss or file corruption, it’s important to stop using the storage media to avoid further damage. By minimizing the drive or system use, the chances of affecting other photos and further corrupting the damaged photo decrease significantly.
Step 2: Run a CHKDSK Scan
CHKDSK scan helps fix the file system errors and retrieve recoverable information from bad sectors. The scan may fix the corruption but before you run the CHKDSK scan, backup the corrupt photos to a different external drive.
- Connect the storage media containing corrupt photos.
- Press Windows+S keys and type cmd.
- Right-click on Command Prompt and click ‘Run as administrator’.
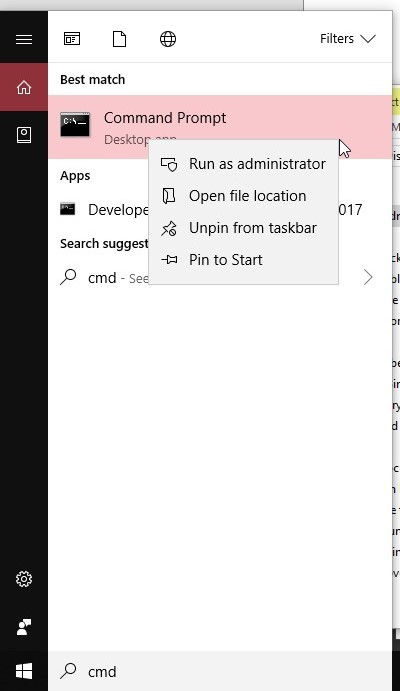 Figure 3: Run Command Prompt as administrator
- Type chkdsk /r /f X: where X is the connected drive letter.
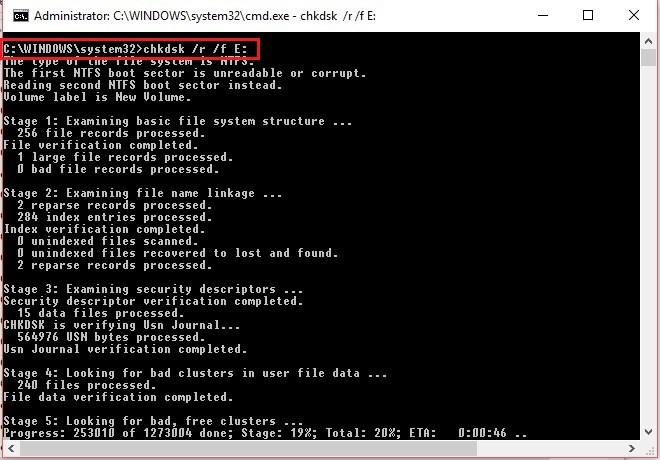 Figure 4: CHKDSK scan repairing file system errors
- Press ‘Enter’ and wait for the scan to finish.
- Then click the up arrow in the taskbar and double-click on the Safely Remove Hardware and Eject media icon in the Windows System Tray.
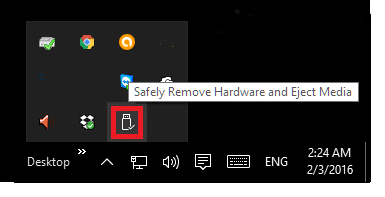 Figure 5: Safely ejecting the storage media
- Now unplug the storage media and connect it again to access the photos.
Step 3: Use the Error-Checking Tool
- Go to the File Explorer and right-click on the connected media containing the corrupt photos.
- Click ‘Properties’, go to Tools tab and click the ‘Check’ button.
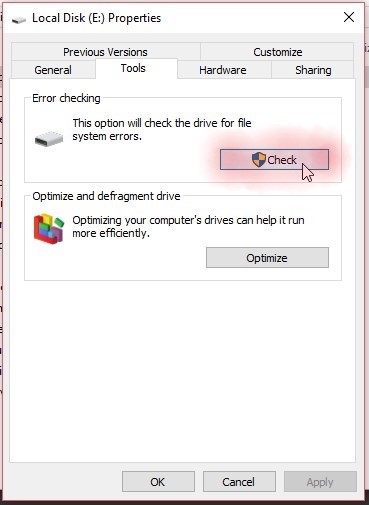 Figure 6: Running Error Checking tool
- Click ‘Scan Now’ and wait for the scan to finish.
If the tool finds any problem or error in the drive, it tries to fix it. Once the process completes, reconnect the drive or restart the system to access the photos.
However, in case the photos are still corrupt, you would need to repair them with the help of a software. The process is explained in the next step.
Method 4: Use a File Repair Tool [Recommended]
When the corruption isn’t fixed with the error-checking tool and chkdsk scan, use dedicated software such as the Stellar Repair for Photo to repair the corrupt photos.
The software can repair corrupt photos stored in any storage media. Follow these steps to repair the corrupted photos in Windows 10:
- Connect the affected storage media to your Windows 10 PC.
- Download, install and run Stellar Repair for Photo software -completely free to download and try.
- Click ‘Add File’ icon and then browse location to select the corrupt photo files.
- Select single or multiple files and click ‘Open’ to add the photo(s) in the software for repair.
- To add more photos from other locations, click the ‘Add’ button and browse to select the corrupt photos.
- Once you finish adding up required corrupt photo files, click the ‘Repair’ button.
- After some time, the software will show the prompt ‘Repair process completed.’ Click ‘OK’.
- If some photo(s) is not repaired, click ‘Advance Repair’ option.
- Click ‘Next’ and then click ‘Browse.’
- Choose sample photos taken using the same camera or device. Make sure to choose a healthy and playable video file with the format same as the corrupt file.
- If the list contains multiple photos with the same extension that need Advance Repair, click ‘Apply to all files of same format’ checkbox.
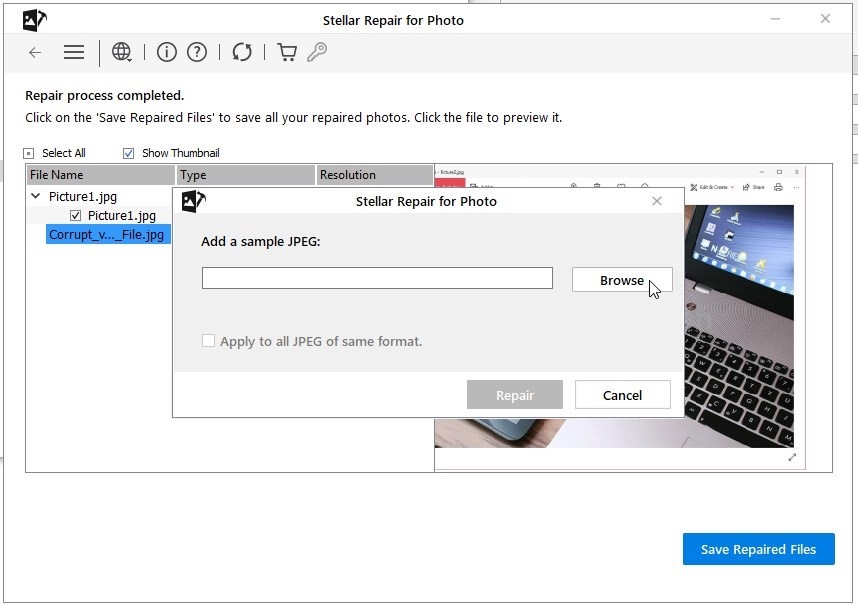 Figure 11: Advance Repair screen to restore severely corrupt photos
- Then click ‘Repair.’
- After photos are repaired, you can click ‘Preview’ to see how repaired photo files look.
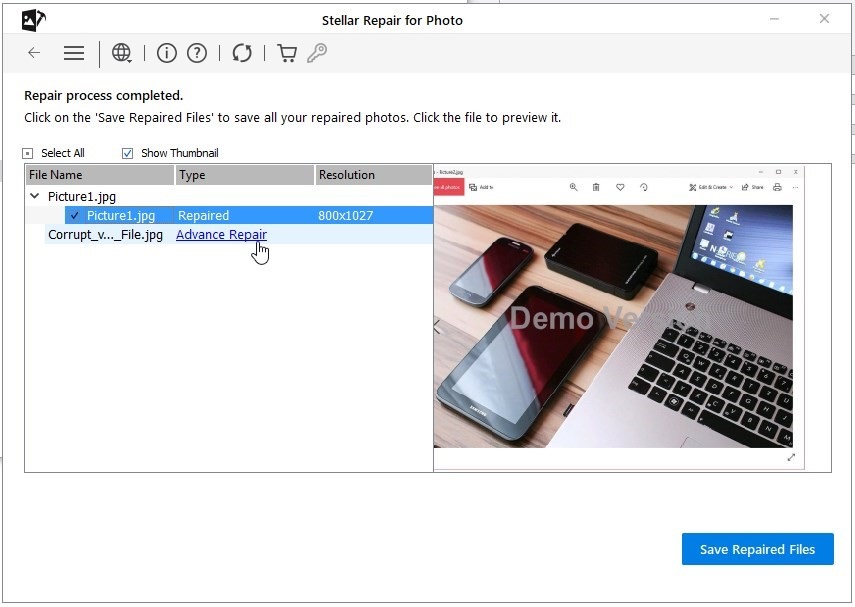 Figure 12: See repaired photo preview
- Then click ‘Save Repaired Files.’ A new pop up dialog box appears.
- Click ‘Browse’ and to save at custom location or simply click ‘Save.’
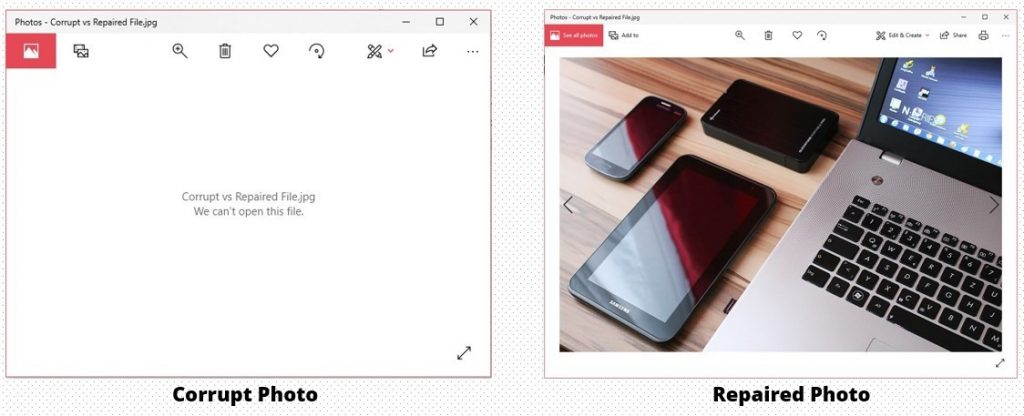
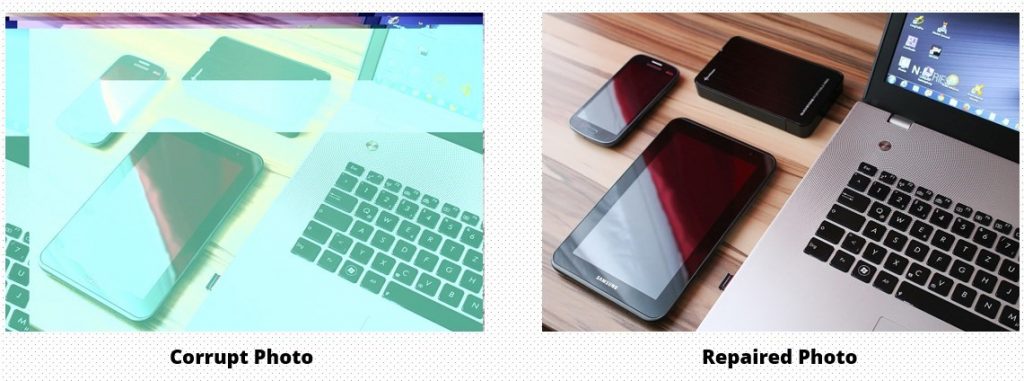 Figure 13: Repaired corrupt photo file in Windows 10
Conclusion
File corruption is a common occurrence with digital storage media, as data is prone to corruption due to several reasons discussed in this post. However, with appropriate steps as explained in this guide, you can repair the corrupt photos in Windows 10 stored in any internal or external storage media.
The photo repair tool that we have used can simultaneously repair hundreds of photos of same or different file formats and can also extract thumbnails of severely corrupted images.