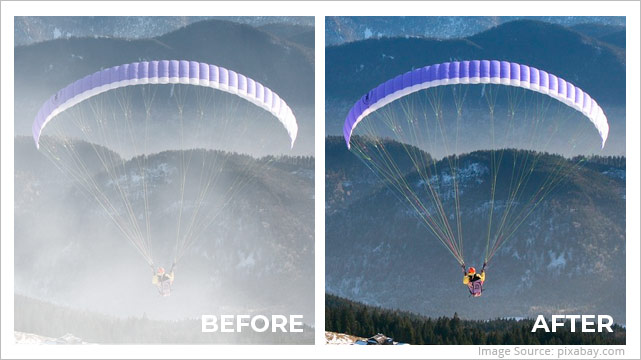
Haze is an effect that makes your image look dull by making colors look muted, and details may get concealed. Haze in photos occurs when there is a decrease in overall visibility, sharpness, or contrast in the photograph. It is caused due to various factors, including atmospheric conditions, camera settings, or poor lighting. Some common reasons for hazy photos are mist, fog, dust, smoke, or smog.
In the photography world, preferences for hazy pictures can vary. Some photographers may prefer hazy photos for their artistic vision as these photographs evoke a sense of mystery, nostalgia, or add a unique ambiance to a scene. On the other hand, some photographers strive for sharp, detailed, and clear images, so they don’t usually prefer hazy pictures.
Nevertheless, if you are looking for a solution for fixing a hazy picture, here is a detailed blog that can help you immensely.
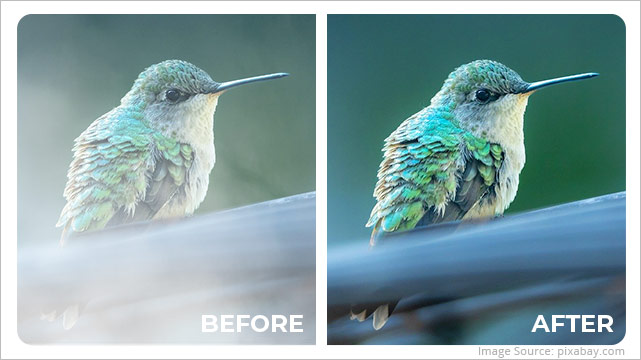
How to Reduce Haze in Photos?
“A few weeks ago, I was photographing along the forest for my Wildlife Photography project. This was not an easy project because of poor weather conditions., which made the scene unclear and undefined.
I still managed to capture some breathtaking photos. However, after the shoot, when I was viewing the photos, I noticed some photographs appeared to be hazy despite paying meticulous attention to detail.
Can someone help me to reduce haze in my photos?”
You can use Adobe Lightroom to reduce haze in photos during post-processing. Lightroom is a part of the Adobe Creative Cloud application suite used by photographers and image editing enthusiasts for editing and enhancing digital photos.
The Lightroom’s Dehaze tool can help add or reduce haze in photos. Here’s how to use the Dehaze tool in Lightroom to fix hazy pictures.
What is Dehaze in Lightroom?
The Dehaze tool removes or reduces haze by improving the visibility and clarity of pictures.
It is located in the Presence section of the Basic panel in the Develop module. Moving the Dehaze slider to the right increases the dehazing effect from the photo, improves contrast, and enhances the overall clarity of the scene.
The Dehaze slider is located in the Effects section of the Basic panel in Lightroom’s Develop module. By adjusting the Dehaze slider, you can effectively reduce the amount of haze in your photos and enhance the overall contrast and definition. On the other hand, moving the Dehaze slider to the left may introduce haziness to your images.
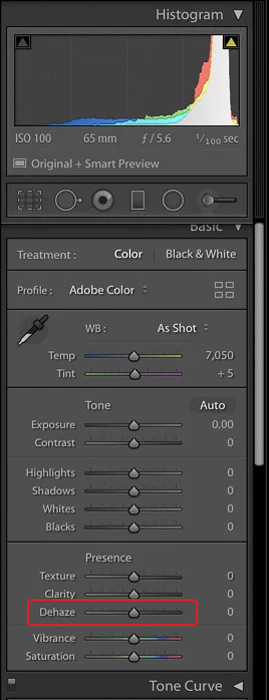
However, adjust the Dehaze slider in moderation, as overusing this slider can make your image look unnatural with excessive contrast.
The Dehaze tool in Lightroom isn’t only used to decrease haze in photos and enhance nighttime or black-and-white pictures or make creative adjustments to your images.
Let’s see how to use Dehaze Filter in Lightroom to decrease haze in the photographs:
- Launch Adobe Lightroom software on Windows or Mac.
- Go to File > Import Photos and Videos. Browse your images to select a hazy image and click Import.
- Switch to Develop module at the top-right corner.
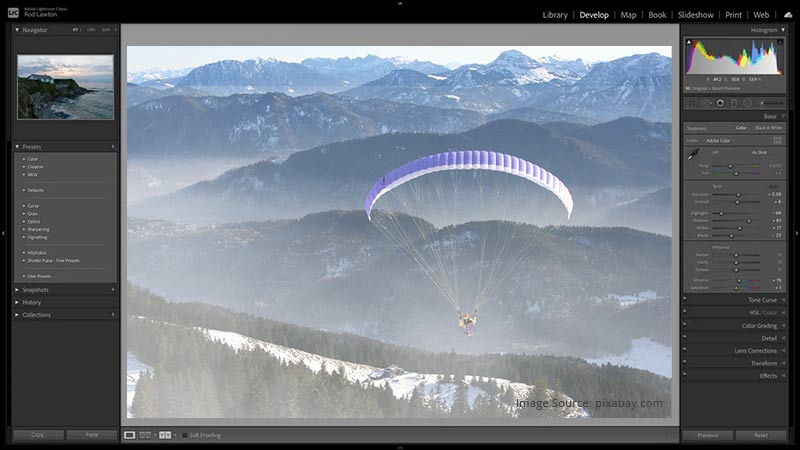
- In the Presence section of the Basic panel, you can see the Dehaze slider.

- You can slightly move the Dehaze slider to the right to reduce haze in your pictures. If you want to add more haze, move the Dehaze slider to the left.
- You may need to make small adjustments to the color, brightness, halo, or noise in the image, as using the Dehaze filter has some unintended consequences.
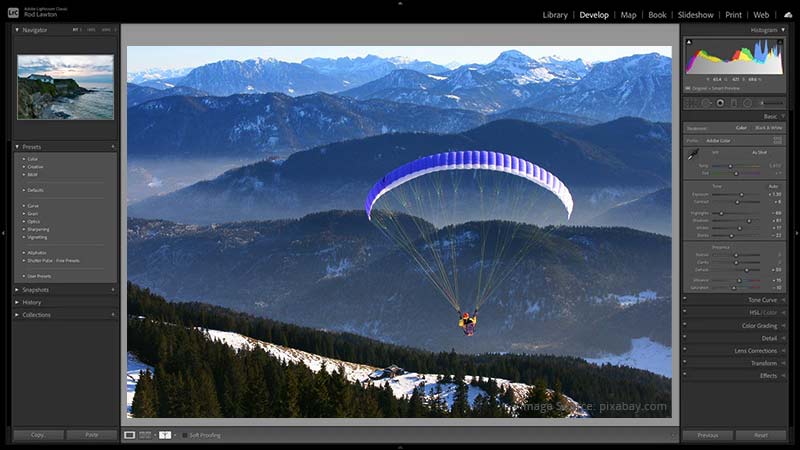
- Once you are satisfied with the image after removing the haze, you can save and export the image.
Moreover, you can even use Masking Tool to selectively Dehaze the photos. The Masking panel in Lightroom has more advanced options to fine tune the haziness in the images.
Note – While using Lightroom or any other photo editing tools, if your image gets corrupted, use Stellar Repair for Photo to fix it. This professional photo repair software can efficiently repair corrupt photos, damaged file headers, and invalid structures of images.
Tips to Decrease Unwanted Haze While Photoshoot
When shooting pictures, unwanted haze can be common, especially in landscape or outdoor photography. Here are some tips to help you decrease haze while shooting to capture clearer images.
- Schedule the photoshoot during the early morning or late afternoon to reduce the haziness in your photos, as haze is more evident during midday.
- Look out for the weather forecast before heading for the outdoor shoot, as clear and dry days are ideal for minimizing haze in photos.
- Try changing your shooting position to minimize the amount of haze between the subject and your camera.
- Use a polarizing filter to reduce haze in your photos by eliminating light reflections to get clearer images.
- Adjust your camera setting, such as shutter speed, etc., to reduce haze in photos.
- Use longer focal lengths in the camera to compress the scene and make the haze less obvious.
Conclusion
Haze in photos can add to a dreamy effect. However, too much haze can turn your perfect shot into a nightmare. Some photographers may appreciate hazy photos for an artistic touch, while others may not. Eventually, it’s a personal preference.
Use a polarizing filter or adjust the camera setting to reduce haze while shooting. Or use the Dehaze tool in Lightroom while editing the picture to fix haziness.