Windows 11 is finally here and most of you must have already installed it on your system. As announced by Microsoft, this new OS will be provided to all eligible devices by 2023. Windows 11 offers multiple new apps and efficient ways to enhance productivity. Certainly, it’s a wholly unique experience for users.
However, the excitement gets lost when you end up losing your crucial files, folders, and favorite photos after upgrading to this new OS. Therefore, it’s always recommended to set up your Microsoft account to transfer files and folders and back up your system files.
If you have lost files after upgrading to Windows 11, check out the possible methods to recover the lost files.
How to Recover Files after Upgrading to Windows 11?
Here are some effective methods to recover files that are lost after Windows 11 upgrade:
Method 1: Sign in to your Microsoft Account with the Right Profile
You may have trouble finding your files after upgrading to Windows 11, if you’re signed into a temporary profile. You need to sign into the right Microsoft account. To do so, follow the given steps:
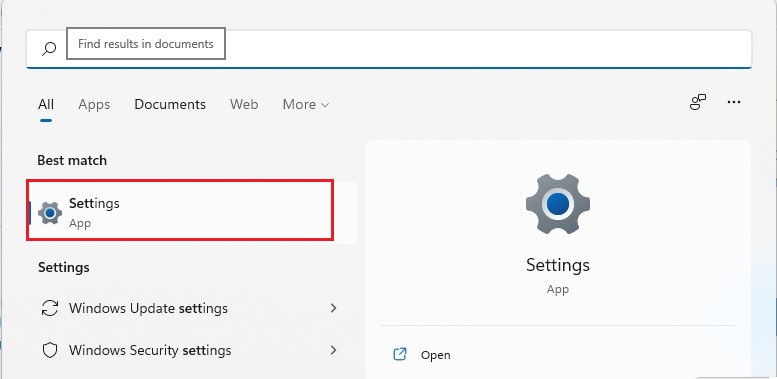
- Go to Search in your Windows 11 system.

- Now, type Settings in the search bar and open it.
- Now, navigate to Accounts given at the left panel.
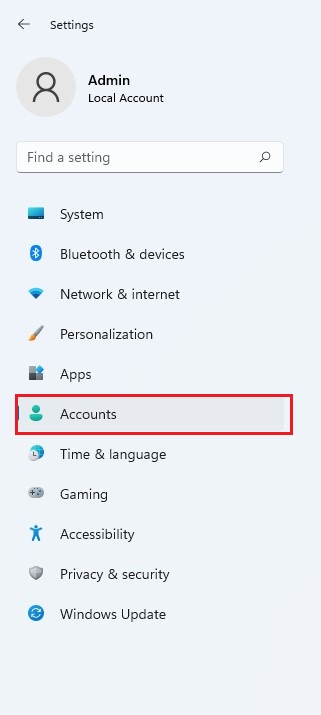
- After this, see if you can access the ‘Sync your setting’ option.
If this option appears, click it. You may receive a message stating, ‘You are logged on with a temporary profile. Roaming options are currently unavailable’ on your screen.
Reboot your system and sign in to your Microsoft account with the right profile.
Note: It’s recommended to back up your files and folders to an external storage media drive. Else, your data will be deleted when you sign out of a temporary account.
Method 2: Recover Files using Troubleshoot Search and Indexing
If you’re not signed in with a temporary profile, you may search for your files through Troubleshoot Search and Indexing. Follow the given steps:
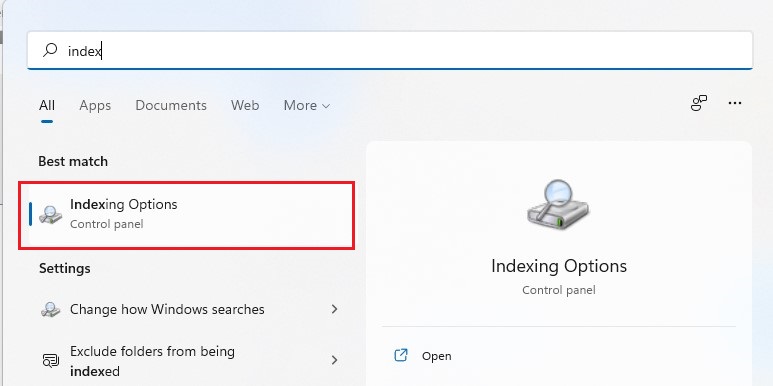
- Go to Search and open Indexing Options.
- Now, navigate to the ‘Advanced’ option.
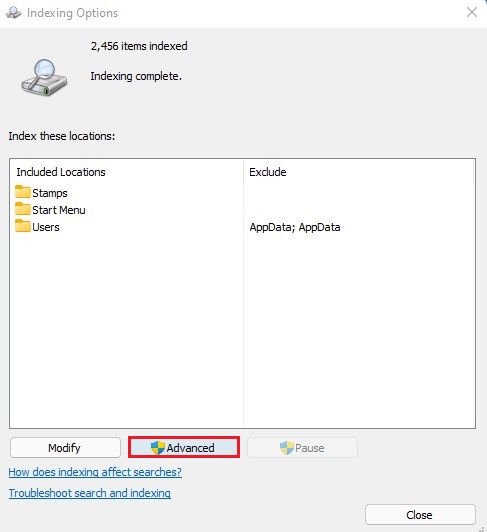
- Next, click Troubleshoot search and indexing.
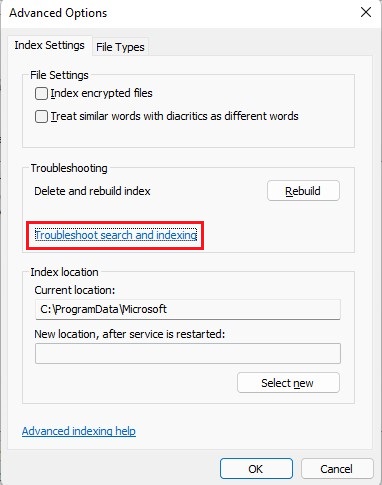
- Select ‘Files, Folders, apps, and settings don’t appear in results’ and click ‘Next’.

- On completion, the results will appear on the screen.
- You may select the files you want to restore and proceed further to save them at the desired location.
Method 3: Unhide Hidden Files
Your files appear to be lost if they’re hidden. You can unhide them by following the given steps:
- Go to Search and click File Explorer or open File Explorer from the Start menu.
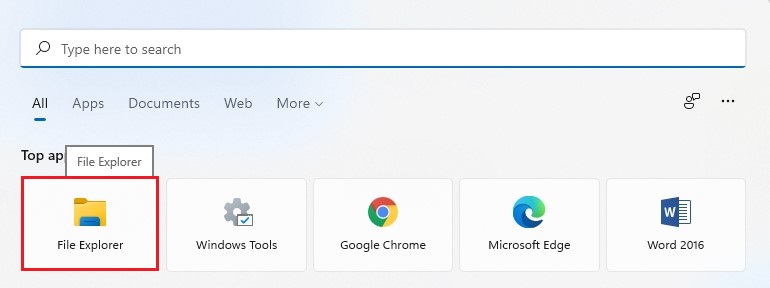
- Go to This PC in File Explorer and then open the drive partition from where you want to retrieve your files.
- There, navigate to View > Show > Hidden items.
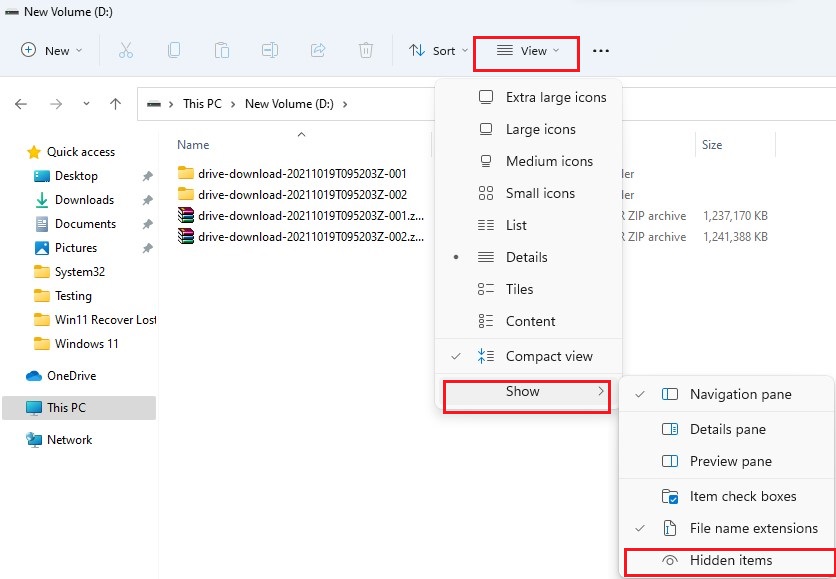
- After this, the hidden folders and files will appear on the screen.
- Open the folder and once you’re able to see the files, save them to the desired location. You can also save the files on an external storage media to create their backup.
Method 4: Restore File from Backup
If you have a backup, use it to restore the lost files after the Windows 11 upgrade. Follow the given steps:
- Go to the Search bar and open Settings.
- Next, navigate to Accounts > Windows Backup.
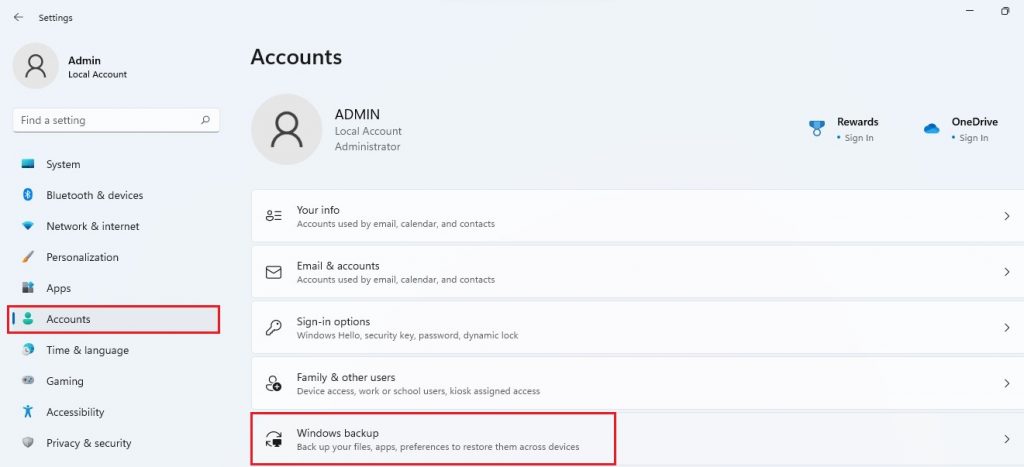
- If you’ve kept the backup options, such as ‘OneDrive’, ‘Remember my apps’, and ‘Remember my preferences’ enabled, you’ll be able to locate your backup and restore files quickly.
- Also, if you’ve backup on an external storage drive, you can connect it to your Windows 11 device and retrieve the files.
Method 5: Recover Files with Data Recovery Software
If you’re still not able to recover the lost files, try Stellar Data Recovery Free Edition. It is an easy-to-use software powered by smart and powerful scanning algorithms that help you find and retrieve files lost due to deletion, drive formatting, corruption, or even malware infection. The software is also efficient at restoring files lost due to Windows upgrade.
The software supports recovery of all file formats and types from Windows PCs, laptops, and external storage media drives, such as HDDs, SSDs, USB drives, SD cards, and more. To retrieve files using this software, follow the given steps:
- Download, install, and run Stellar Data Recovery Free Edition.
- Choose ‘Everything’ or type of data you want to restore on the initial dashboard and click ‘Next’.

- On the ‘Recover from’ screen, select the folder/location or drive from where you lost the files and click Scan. The scanning process will initiate.

- After the scanning process is done, the results will appear on the screen.
- Choose the files you want to restore and click ‘Recover’.

- Now, click Browse to choose the desired location.
- Once the location is selected, Start Saving the files.
Note: Using this software, you can recover up to 1 GB of data free of cost.
To Wrap Up
Recovering lost files after Windows 11 upgrade isn’t a hard row to hoe. You can follow the methods discussed in this blog to get back your deleted, lost, or even hidden files.
Additionally, using Stellar Data Recovery Free Edition can be of big help when the rest of the methods don’t seem to help. It is a DIY free data recovery software that can efficiently retrieve files and folders from Windows systems and storage media drives.
FAQ
How can I transfer my files from Windows 10 to Windows 11?
You need to create a Microsoft account. Once the account is set up, it will connect your device across Microsoft applications and services, such as Edge, Office, OneDrive, etc. When you sign in to your account on Windows 11, your files, folders, and other data will automatically be transferred to the device. Read more.
Can I delete Windows 10 after installing Windows 11?
Usually, after ten days of upgrading to Windows 11, your previous version of Windows (Windows 10) will automatically be deleted from your PC. However, if you’re certain that your files and settings are fine, you can manually do it with the following steps:
- Open Settings > System > Storage > This PC > Temporary files.
- Choose the previous version of Windows under Remove temporary files and then choose to Remove files.
It is to be noted that deleting Windows 10 after upgrading to Windows 11 can’t be undone.
Was this article helpful?