The data on your Mac should be treated carefully and responsibly. Bugs, freezes, hardware, or system failures may occur even despite regular updating and cleaning of your Mac. The system errors may cause data corruption, and consequently, essential data, including DMG files, may be damaged or even deleted.
Here’s the possible scenario: after updating to the latest version of macOS, a folder with files was accidentally deleted, and it turned out to be important. It’s simply necessary to have some tricks up your sleeve for recovering DMG files in such a case.
How to Recover Deleted DMG Files on Mac
If the DMG files on your Mac were deleted, lost, or corrupted, it’s possible to restore them. There are three ways to do this.
Use Trash
Sometimes dragging files to the Trash doesn’t delete them completely. Instead, they are stored in Trash.
To check if the needed file is still in the Trash folder, follow these steps:
1. Open Trash.
2. Look through the items in the Trash folder > locate the DMG files you need.
3. Right-click on them > choose the Put Back option.
 Trash> Put Back option
 Use Time Machine
If you emptied the Trash and your DMG files can’t be located in the Trash folder, you may use Time Machine.
Follow the steps below to restore files using this macOS built-in tool:
1. Open Time Machine from the menu bar.
 Menu bar > Enter Time Machine
 2. Look through the available backups.
3. Select the needed files you want to get back and click on Restore.
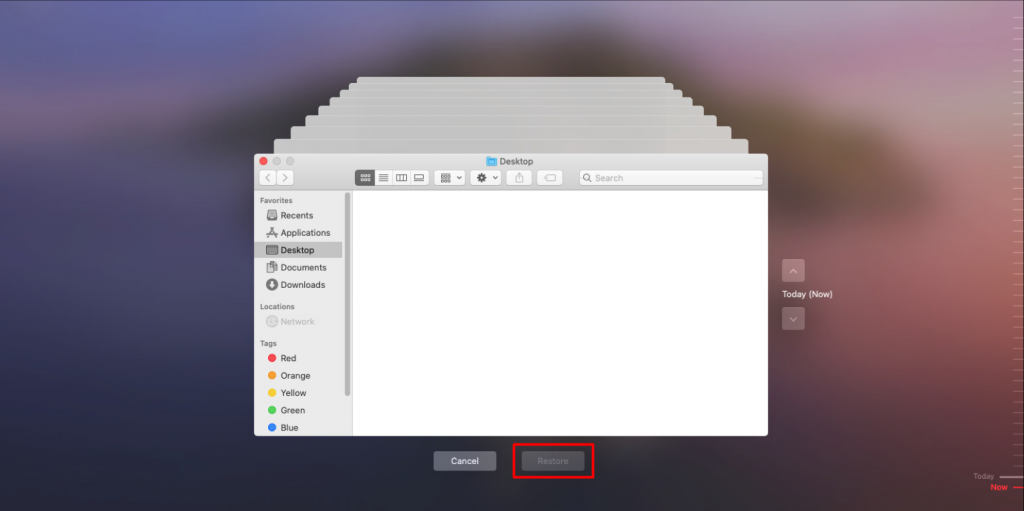 Time Machine > Restore
 Use a professional data recovery software
Another way out is to use professional data recovery apps like Stellar Data Recovery to restore your files. Recovering damaged or deleted files manually can be time-consuming and require professional skills. However, with Stellar Data Recovery Professional, you can forget about these problems, scan your device for missing or corrupted data, and automatically restore them. In addition, the program is capable of performing more complex tasks, such as recovering data from damaged disks, file systems, and many others.
Some other benefits of Stellar Data Recovery Professional for Mac:
- Recovers lost docs, photos, and more.
- Restores corrupted files lost after partition loss or from an unrecognized drive.
- Compatible with M1 and Intel Macs.
- Works smoothly on macOS Ventura.
Here’s how to recover DMG files using the Stellar Data Recovery Professional with ease:
1. Download and open the Stellar Data Recovery Professional app.
2. Go through the installation process.
3. Select the file type you want to recover (or all items).
4. Click Next in the What to Recover window.
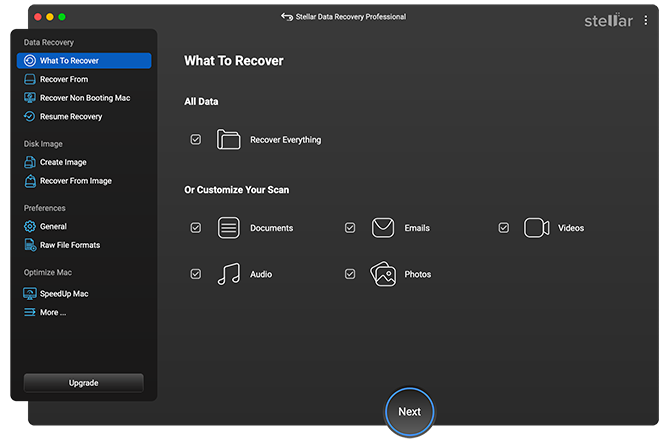 Stellar Data Recovery Professional > Select What To Recover
 5. From the Recover From the window, choose a volume and click Scan.
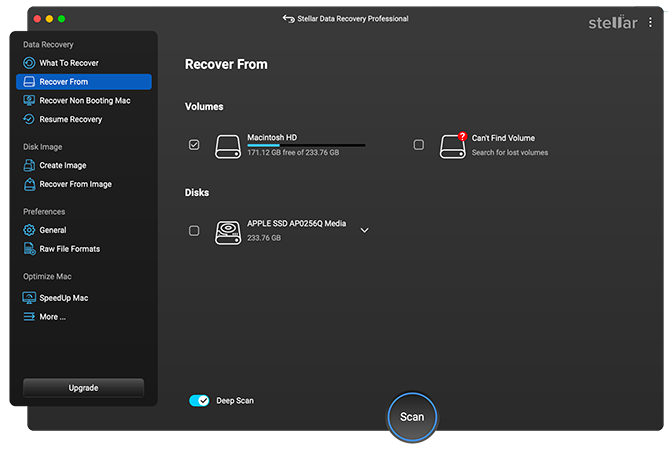 Stellar Data Recovery Professional > Recover From
 6. When the scan is finished, check the files you want to bring back and press the Recover button.
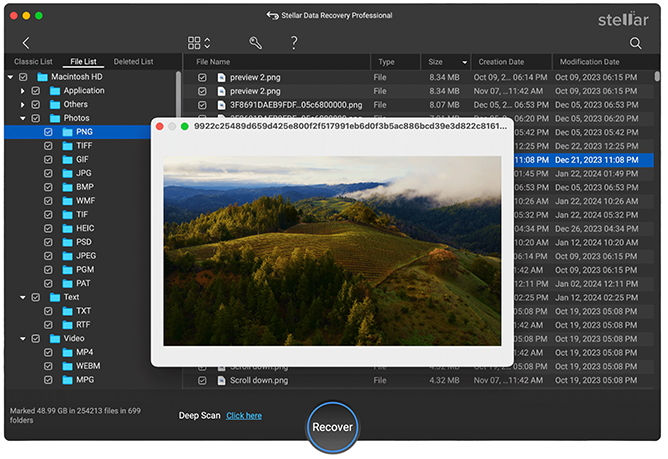 Stellar Data Recovery Professional > Preview & Recover
 How to Fix Corrupted DMG Files on Mac
While DMG files are usually quite reliable, they sometimes can get corrupted. Unfortunately, if this happens, there is little you can do. But let’s not give up and try some things first. Here are a few tricks worth trying.
Make a Backup
Before repairing a corrupted DMG file, make sure you have a backup. While there is a chance that the disk will be repaired, it is equally likely that it will be damaged even more if you try. In this case, a backup is indispensable.
Use Disk Utility
Disk Utility includes several functions you can use to solve the problem. It allows you to create DMG files. Additionally, you can also diagnose and fix disk problems and corrupted volumes with the Disk Utility.
To fix the damaged DMG file with Disk Utility:
1. Open the Disk Utility and try to run the corrupted DMG file.
2. Then right-click on it from the list of devices and click on the Run Fist Aid button.
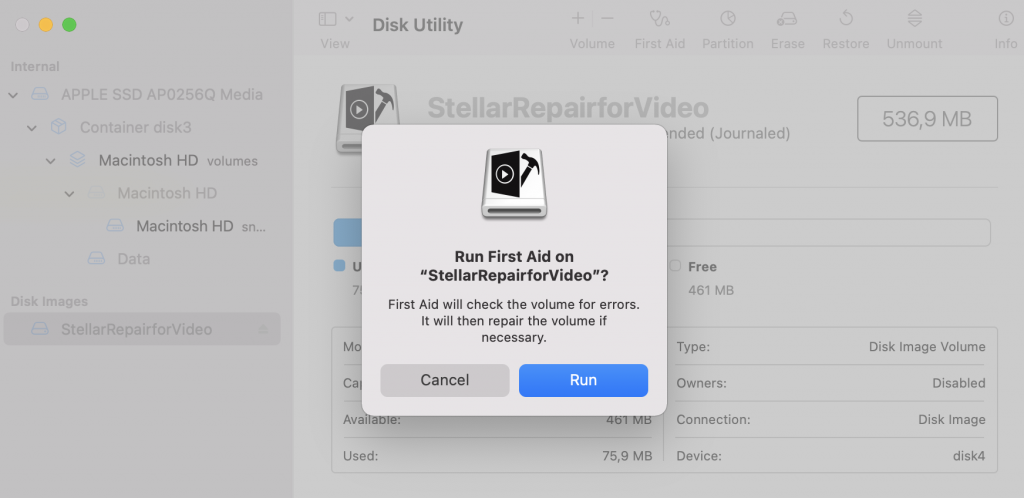 Run First Aid on a corrupted DMG file
 Open the DMG File in Safe Mode
If the problem is related to the image structure, you can mount the image when booting into Safe Mode.
Here’s how to open Safe Mode on Intel-based Macs:
- Restart your Mac.
- Press and hold the Shift key.
- When the login window appears, release the Shift key and log in.
If you are an M1 Mac user, do this:
- Restart your Mac.
- Press and hold the Power button until you see the startup options.
- After that, release the Power button.
- Choose your startup disk and press and hold the Shift key.
- Release the Shift key when the login window appears.
- Log in.
Once in Safe Mode, try opening the corrupted DMG file.
How to Avoid Data Loss
Prevention is better than cure. Here are some simple steps to avoid losing DMG or other Mac data in the future:
- Enable the Time Machine to create regular backups.
- Never use Terminal to delete Files.
Using the Terminal command line, you can’t confirm the deletion of the files, so the slightest mistake in the file’s name leads to the permanent removal of the file. After that, it is hard to restore them. The only way is to use the professional restoring application to get your files back.
- Before you delete any of your files, double-check and make sure you do not remove any important data.
Wrapping Up
DMG files are great for installing apps on a Mac. Encryption and compression features make it much more secure than other file formats. However, it can also be a hassle when macOS doesn’t recognize the file because you can’t open it or access the content. If it happens, don’t worry, as you can still try to fix and restore your DMG file successfully.
FAQs
What is DMG File?
A DMG is a file format that works as a mountable device that includes a software installation package. It is always stored in a .dmg extension.
How to create a DMG file?
There are several ways to create a DMG file.
Here is how to do it via Disk Utility:
- Open Disk Utility and select the storage drive from the sidebar.
- Go to File > New Image > Image from Drive Name.
- Name the DMG file and select where to save the file.
- Click Format, and follow the onscreen instructions.
- Click Save to continue the imaging process.
- Click Done when the process is finished.
Another way is using professional software like Stellar Data Recovery Professional.
- Install and open Stellar Data Recovery Professional for Mac.
- Click Create Image > select a drive to create an image file > click Next.
- Select Range to Create Image screen.
- In the Creating Media Image to Save menu, choose the destination to save the DMG file.
- Name the DMG file and click Save.
Was this article helpful?