‘I installed Lightroom Classic and Photoshop on a new MacBook Pro, copying over my old catalog. But now Lightroom Classic is not cataloging my edited photos from Photoshop CC 2018. How to fix the issue?’
‘Usually, when I work on a picture in Photoshop that was originally in Lightroom, I'm able to save the copy back into Lightroom. But, now, Lightroom is not importing changes done in Photoshop.’
Adobe has designed Photoshop and Lightroom to work together. You can use the editing features of Photoshop and import the changes in Lightroom and vice versa.
When you finish editing a picture in Photoshop and save it, within a few minutes, a TIFF with the Photoshop changes is visible in the Lightroom Library. In Lightroom, you can further make adjustments using its editing tools.
However, there’s a frequent complaint that Lightroom doesn’t import the changes done in Photoshop.
As of now, Adobe has not ascertained any specific reason for the glitch. But mentioned some solutions in community forums that worked for a few users.
If you are facing the challenge in importing changes from Photoshop to Lightroom and inversely, here are the 4 ways that proved to be successful in fixing the issue:
TIP: Recover deleted Photoshop or Lightroom PSD, TIFF, JPEG, TIFF, and other files from Windows and Mac
Here’s the best software to restore your lost Photoshop or Lightroom files without affecting the original photo quality — Stellar Photo Recovery. Use it to get back your precious work lost due to accidental deletion, app crash, or formatting, etc. The software is compatible with all the Photoshop and Lightroom versions and is available for both Mac and Windows OS.


Methods to fix Photoshop not saving back to Lightroom
Method 1: Do not use ‘Save As’
Lightroom refuses to import the changes even if there’s a slight difference in the file name. So when you want to move a photo that you worked upon in Photoshop back to Lightroom, always choose File > Save. Do not select ‘Save As’ option in Photoshop.
Now go back to Lightroom. Your edited photo will be visible in Photoshop in the Lightroom Library.
Method 2: Close Photoshop to import photo changes
If the above method doesn’t help, try this hack. Instead of ‘Save’ in Photoshop, close the application after finishing the work on your photo.
Before closing, Photoshop would ask if you want to save the changes. Click ‘Yes’.
This may import the photo into Lightroom.
Method 3: Reset Preferences in Lightroom
When Photoshop edits do not show in Lightroom, try resetting the Preferences file.
Steps to reset Preferences in Lightroom:
- While opening Lightroom or Lightroom Classic, hold down the Shift + Alt keys on Windows PC. On Mac, use Shift + Option keys.
- The Reset Lightroom Preferences dialog box appears. Choose Reset Preferences.
 Figure: Preferences dialog box in Lightroom
Method 4: Uninstall and reinstall Photoshop and Lightroom
Uninstalling and then reinstalling the apps most of the time fix the problem of Photoshop not saving back to Lightroom Classic CC.
You can begin with uninstalling and reinstalling Photoshop, followed by Lightroom. Use the Creative Cloud Desktop App for the purpose. Also, it’s recommended to run theAdobe Creative Cloud Cleaner Tool. The cleaner tool removes installation records for Creative Cloud applications that may have corrupted.
Make sure you backup your Catalog and Photo files to a secure location using the Backup feature in Photoshop and Lightroom.
Follow the below order when planning uninstall/ reinstall of Photoshop and Lightroom:
- Backup your Catalog and Photo files to a secure location.
- Uninstall Photoshop and Lightroom using the Creative Cloud Desktop app.
- Download and run the Adobe Creative Cloud Cleaner Tool.
- Restart your PC or Mac.
- Install Photoshop and Lightroom using the Creative Cloud Desktop app.
Steps to uninstall Photoshop/ Lightroom:
- Open Adobe Creative Cloud Desktop app.
- Go to Photoshop version/ Lightroom CC.
- Click on the down-arrow and select Manage > Uninstall
 Figure: Lightroom CC in Adobe Creative Cloud Desktop App
Step to reinstall Photoshop/ Lightroom:
- Go to the Creative Cloud Desktop app.
- Scroll to Photoshop <version>/ Lightroom. Click Install.
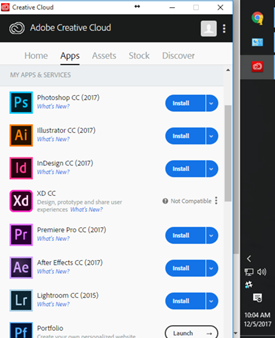 Figure: Install Photoshop CC in Creative Cloud Desktop app
Conclusion
Lightroom and Photoshop allow you to utilize the strengths of both the apps. But the inability to import the changes from Photoshop to Lightroom can be a big hindrance.
Try the above-given methods to fix Lightroom not showing edits of Photoshop.
If you know of any other method that can fix the problem, do share it with our readers in the comment box below.
Also Read: Does Editing JPGs in Lightroom Reduce Image Quality?
Was this article helpful?