Summary: Wrong photo editing can destroy a perfectly captured shot. If you are worried about the final output in post-processing, learn the 10 most common photo editing mistakes you can avoid to get the best results.
Every photo is a story in itself. Be it portrait, landscape, product, fashion, nature, or others, there’s a photographer’s creative vision and objective behind it. Thus, when editing in the post-processing stage, the purpose of the photo should not be deceived. So here comes the importance of photo editing. Bad photo editing can defeat the objective of a shot. So as a beginner, if you are worried about the outcome in the post-processing stage, it would be helpful to know the common photo editing mistakes that you can avoid to get the right picture.

1. Improper cropping of photo
If you think photo cropping is just a simple cut down of size or portions, you’re making a photo editing blunder.
Cropping the right way is crucial for visual appeal and engagement with your photo. Over cropping can leave out the necessary information in your photo. Your photo may miss the story that you wanted to convey. Improper image cropping can also make your subject appear unattractive.
So to avoid this photo editing mistake, it’s essential to know the aspect ratio required for the platform you are editing your picture, like for print, e-commerce, fashion portfolio, etc. Only cut the unnecessary and offbeat details.
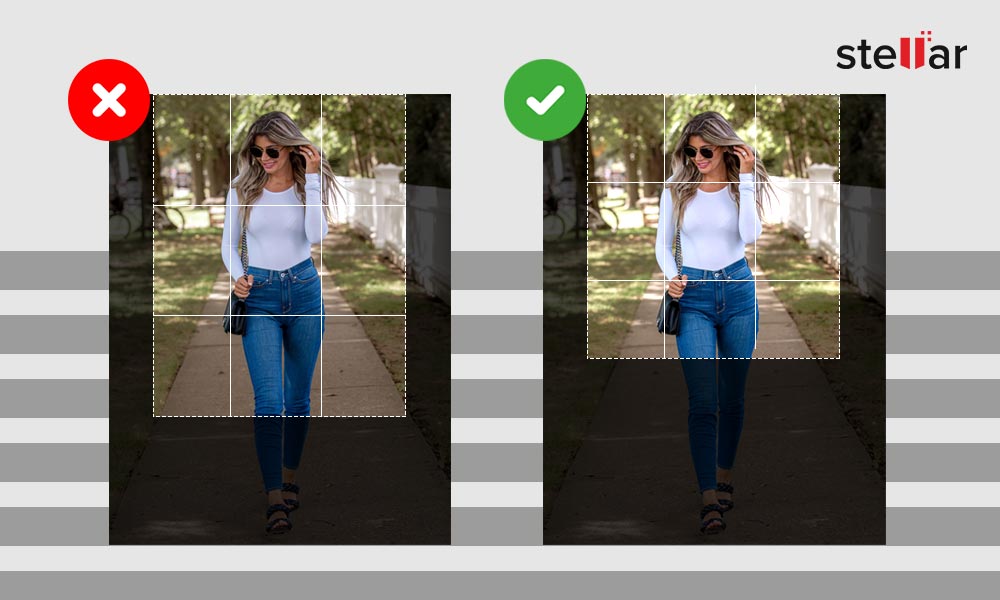
You can use the rule of thirds for well-composed photos after cropping. It says to place your subject either in the left or the right-third of an image, leaving the other two-thirds more open. Although you have the creative freedom, this is usually a safe approach.
2. Unnatural colors in photo
Photo editors often go overboard while retouching colors in a photo. This is a typical example of bad photo editing, especially noticed in product and fashion photos. The color of the products, clothes, or skin is changed so much that they appear totally different from the real. And here, the photo editors fade away the original feel of the photo.
Unless required, set white balance, contrast, and saturation adjustments till the point where the image seems perfectly composed between the natural and the edited picture.
3. Losing details in a photo
Losing details in your photo can be the biggest mistake you can make while editing. Details of an image means how much of any part of the photo you can see like strands of hair, ripples in water, pores of skin, etc. The importance of capturing details in a shot is so important that professional photographers prefer to shoot in RAW format to store maximum detail in a photo. And this obviously gives photo editors a free hand while editing. Although editing would result in some amount of loss in detail, it should not lose the essence of your picture.
For example, when editing a product photo for a retail outlet or e-commerce business, it is important that details of the product are clearly visible without overexposure. If you are post-processing wildlife pictures, it is best to retain minute elements of grass or the skin of an animal.
4. Over sharpening
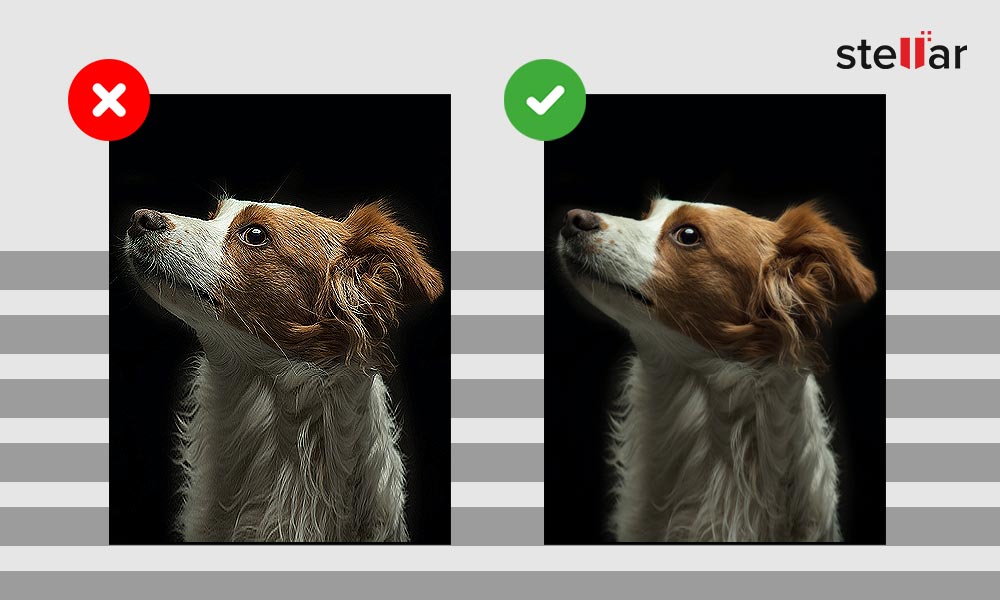
Photo sharpening attracts attention. It enhances the areas of contrast. Sharpening tools in photo editors can fix blur. But too much image sharpening during editing can make the edges more evident. It can result in artifacts and halos around the subject.
Avoid aggressive sharpening. You have to find balance between noise and sharpening.
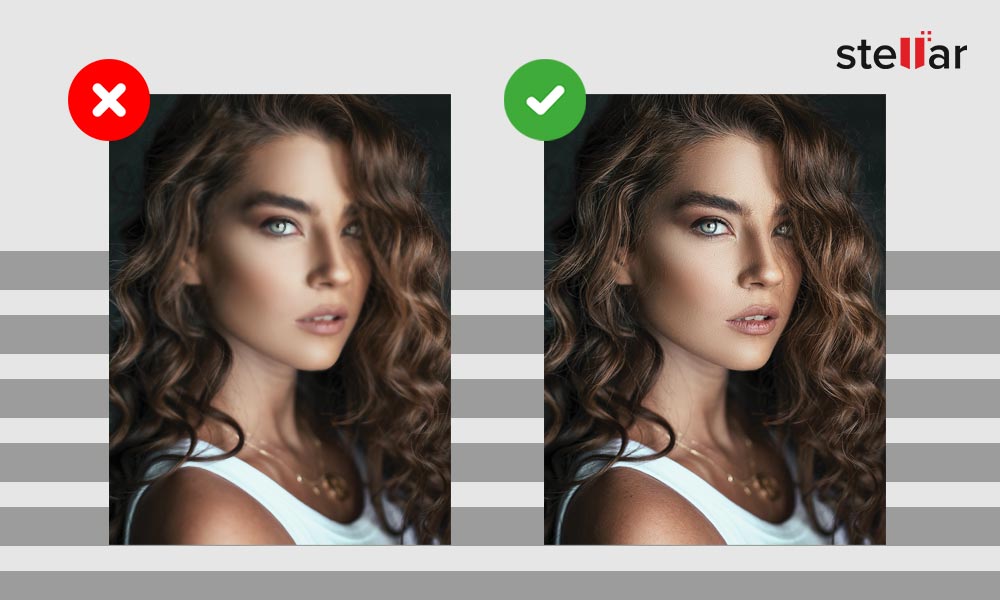
5. Too much contrast in images
Too much contrast can blow out your picture. White will appear too white, and black will be too black. In the process, you tend to lose the details too. Wrong contrast adjustments can make the photos unappealing.
Apply the contrast selectively in portions of the image. Focus on the details. Efficiently use the Curves and Levels in your photo editing software.
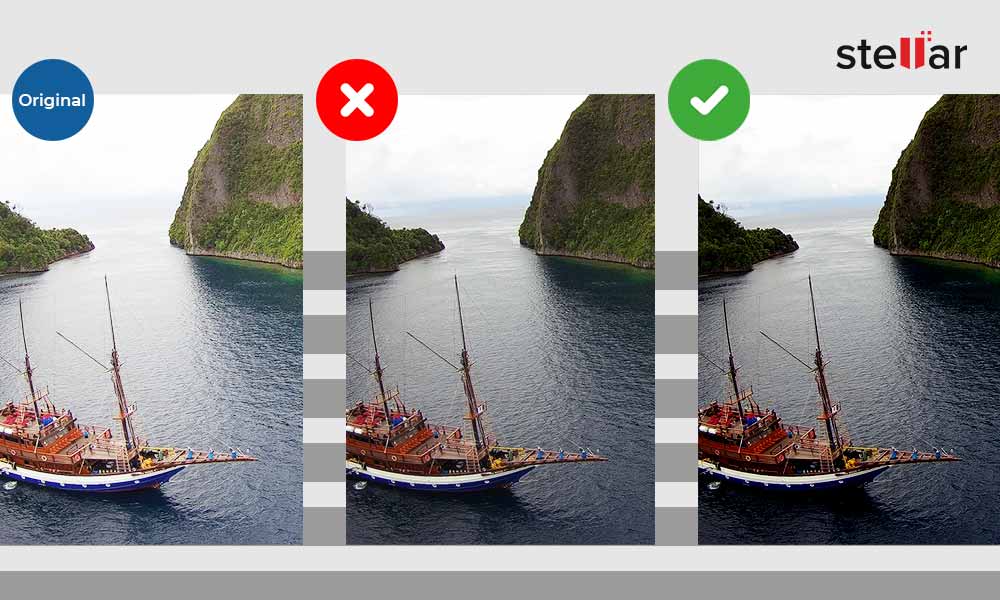
6. Outdoing HDR
High Dynamic Range or HDR tool in photo editing presents the dynamic range, i.e., the ratio between dark and bright portions. Photographers usually use it in outdoor, sunset, or sunrise shots to obtain a correct exposure. You can bring back the deep shadows and bright areas in an image by merging 2 or 3 shots of a picture by using HDR.
However, when overdone, HDR can lead to oversaturated or unreal photo. So to create natural images, use HDR judiciously. Moderation is the key here, when applying HDR to your photos.
7. Excessive retouching the skin
It’s fine to make your subject look beautiful by smoothing skin and texture in portrait editing. But going overboard to achieve perfection can make your subject appear artificial. This doesn’t mean you can’t clean or remove random blemishes, but strike a balance that maintains the naturalness.
Don’t make portraits too smooth that would give the subject a plastic look. A tip is to keep the original and retouch image side-by-side while editing. This way, you can keep a check if you are overdoing the smoothing.
8. Over editing the subject’s eyes in photos
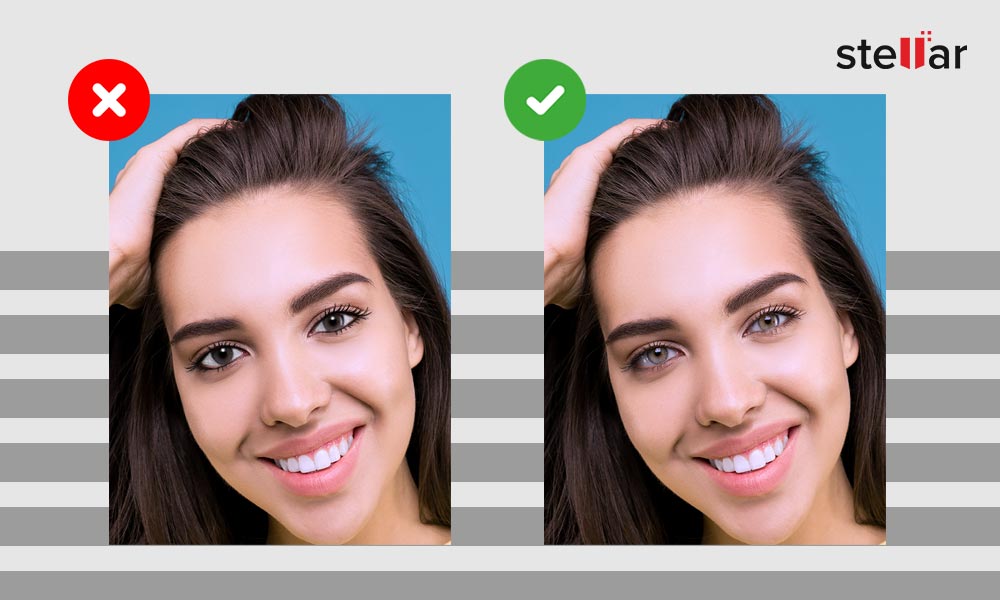
You want your subject’s eyes to stand out, be it human or animal. But even a slight overdoing of the whites or sparkle can make it look unrealistic to the extent of an evil eye!
There are various ways to enhance or brighten the eyes during photo editing. In Photoshop, you can use white balance along with Spot Healing Brush Tool to retouch the white of the eyes or try with an adjustment layer, layer blend mode, and a brush. Dodge and Burn tool can also highlight the eyes details, making them clear.
9. Not calibrating computer monitor
Ignoring monitor calibration is a common photo editing mistake. You don’t want your edited photo to look different after print or when shared on another device with the client. You notice the image color or brightness are not what you had set in the final edited photo. This happens usually when your monitor is not calibrated.
Calibrating your laptop or desktop monitor implies that the color, contrast, and brightness, are set to an acceptable standard, i.e., close to the natural tone.
This ensures the colors in your photos are true to what you have set, and they appear same on other devices. So calibrate your computer screen regularly.
Windows or Mac computers have built-in calibration tools. Adjust the color calibration from the display settings of your computer.
10. Editing on the original image file
There can’t be a greater blunder than working on an original image file. What if you or the client is dissatisfied with the results? You won’t have the original picture for reference. And how would you revert edited photo to original?
The solution is simple. Edit on the copy of the image file. Keep the original file secure in your drive.


How do you know when to stop editing photos?
Just when your photo surpasses the realism, know you have over-edited it. High contrast, distracting shadows, too many highlights, unnatural colors, or halos at the edges are absolute mistakes in your photos. They will distract the viewer and make the picture unattractive. The latest photo editing software are more efficient and mostly use AI. But, don’t get carried away with their capabilities; you must use these photo editing tools carefully. Always remember less is more in photo editing.
Finally
Photo editing is a creative process. There are no fix rules here. However, you must avoid these 10 common editing blunders that can ruin the essence of your picture.


