Summary
Disk Utility got a facelift with the launch of OS X El Capitan. But this makeover didn’t go well for a handful of Mac users. Some of them find difficult to perform regular disk management activities on Apple hard disk drives including partitioning the disk, creating, resizing and deleting a partition.
Good News Arriving Soon
Very soon we will need to partition our Mac hard drive in order to make room for macOS Sierra installation which Apple announced this WWDC 2016 in San Francisco.
Tip
But before the time arrives to partition the Mac hard drive for macOS Sierra installation, it is equally necessary to backup the data on Mac startup disk drive to avoid losing any files during the upgrade or installation processes.
OS X El Capitan Partitioning
With the help of screenshots, I will be explaining some basic set of activities that are to be done while partition the OS X El Capitan drive. Alternatively, the same procedure will be explained with the help of a disk manager utility known as Stellar Partition Manager.
Background
I am using an old 40 GB external hard drive to create, resize and delete partition with Disk Utility and Stellar Partition Manager software.
** Resolving Partition Option Greyed Out issue
- Select the external disk from the left side of Disk Utility
- Unfortunately, the Disk Utility partition option is greyed out (see below screenshot)
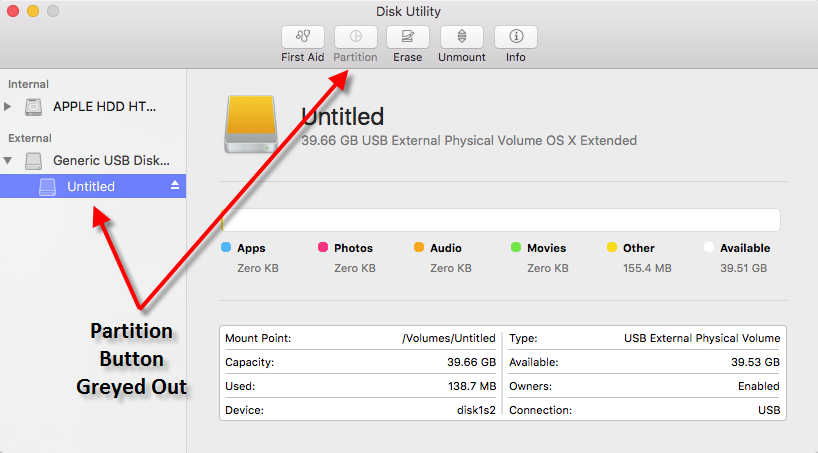 Partition Greyed Out
 Solution: Select the ‘Generic USB Disk Media’ and the partition option will become active.
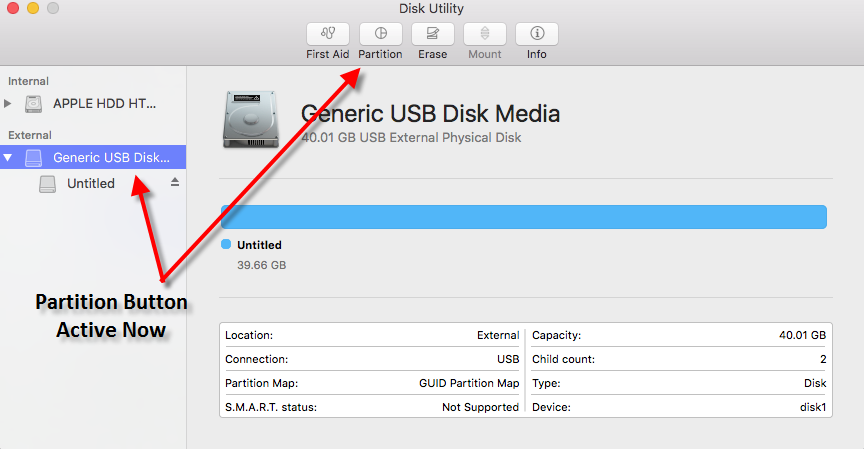 Partition Button is Now Active
 Click the Partition button to start partitioning the external drive
Task 1) To create 3 Partitions of below sizes (using Disk Utility)
- Partition A = 20 GB
- Partition B = ~10 GB
- Partition C = ~10 GB
Step 1) Enter partition name and format i.e. ‘Partition A’ and ‘OS X Extended Journaled’
Step 2) Enter partition size i.e. 20 GB. Press Return and slider will automatically take 20 GB. Else drag the slider to occupy 20 GB of spaces for partition A.
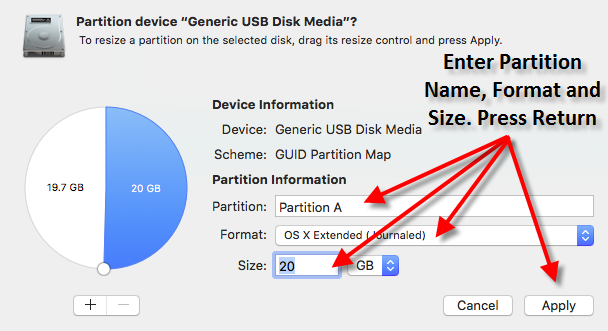 Partition A 20 GB
 Now select the 19.7 GB of the remaining hard drive spaces and click (+) plus sign. Name the 2 partitions as B and C.
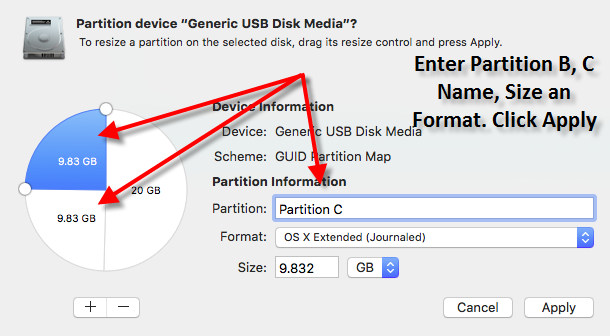 Partition B and C Size
 As shown above, the external hard drive is divided into 3 partitions of sizes 20GB, and two almost 10 Gb of partitions. Click Apply to save the changes.
Outcome Looks Good
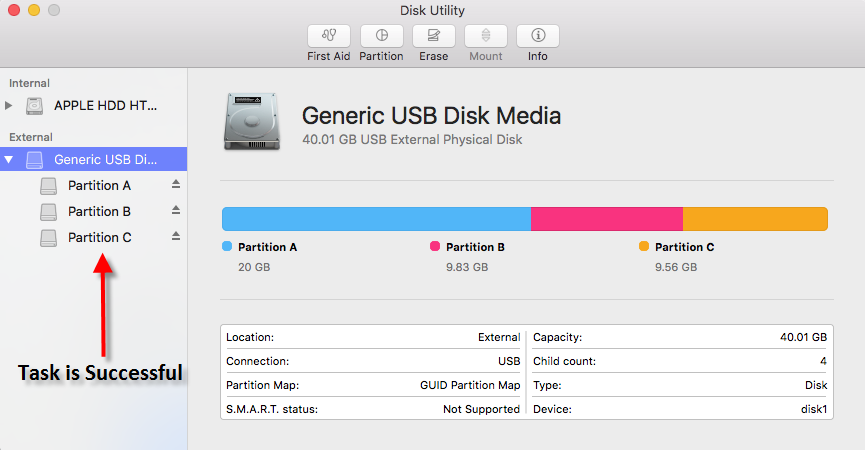 Prolific
 Task 2) To resize the 3 partitions as below requirement (using Disk Utility)
- Resize ‘Partition A’ to 15 GB
- Resize Partition B to ~12 GB
- Resize ‘Partition C’ to ~13 GB
Now, here the problems arrives
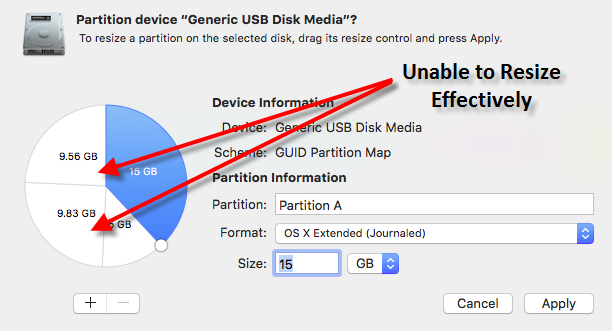 Unable to resize Mac partition
 Entered 15 GB for Partition A and pressed Return. The ‘Partition A’ shrinks to 15 GB but created a new partition of 5 Gb, which is unused.
Now as per our second task, we need to create around 12 Gb for Partition B. Let’s see if Disk Utility allows us to do it perfectly.
Unfortunately, neither the mouse slider nor the Size box is accepting the Partition B to expand to ~ 12 Gb in size. The same issue is bothering ‘Partition C’ which is not expanding to ~13 Gb of size either through the partition slider or with the help of the size box.
No Productivity
Since the partitioning as mentioned in Task 2 cannot be done with the help of Disk Utility on OS X El Capitan we will choose to achieve this task with the help of Stellar Partition Manager utility.
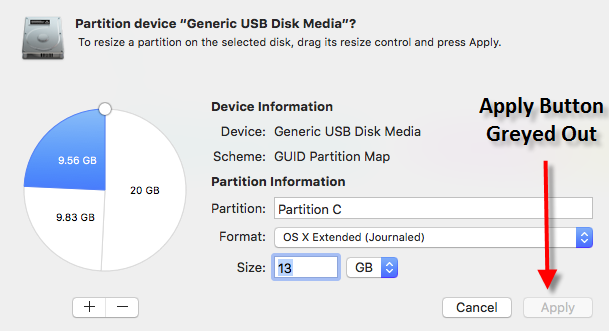 Apply Button Greyed Out
 Stellar Partition Manager
Task 3) To resize the 3 partitions as below requirement (using Mac disk manager software)
- Resize ‘Partition A’ to 15 GB
- Resize Partition B to ~12 GB
- Resize ‘Partition C’ to ~13 GB
Witness the difference b/w Disk Utility and Stellar Partition Manager
Fortunately, Stellar Partition Manager utility collects all the available free spaces on the Mac hard drive or an external hard drive and uses it efficiently for resizing the Mac partitions.
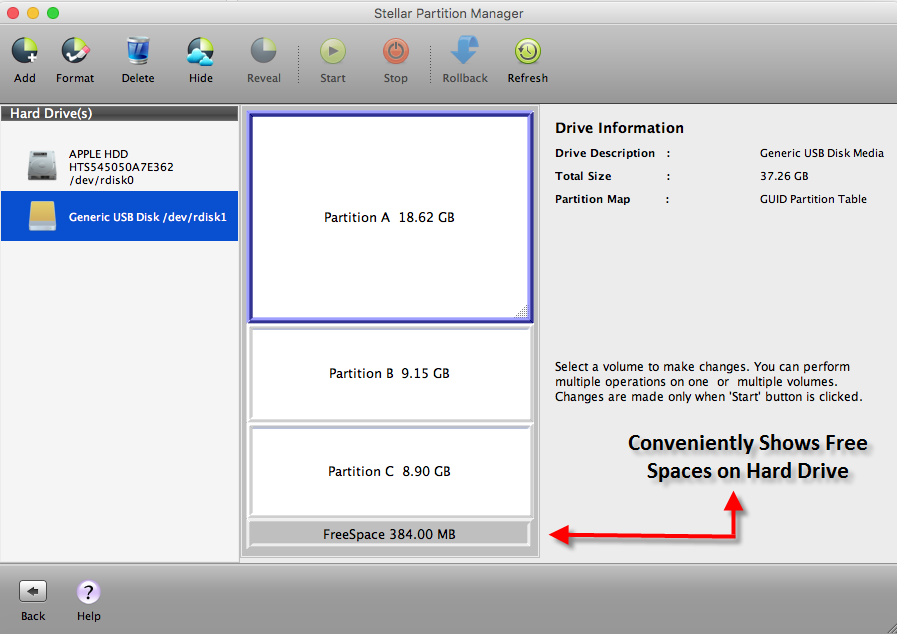 Stellar Partition Manager
 Now let’s achieve our tasks
** Resize ‘Partition A’ to 15 GB by using the mouse to drag the edge and shrink the partition size from 20 GB to 15 GB
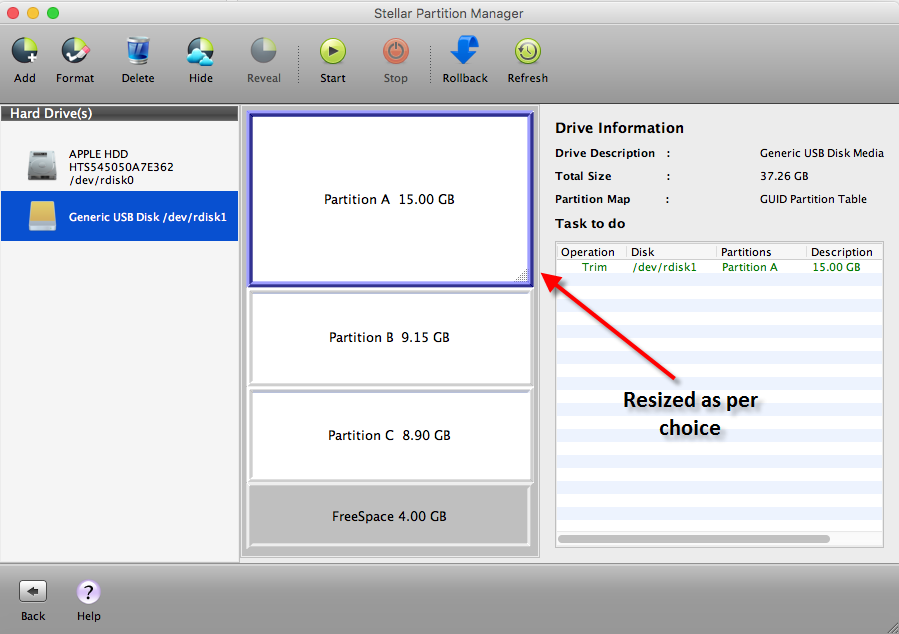 ‘Partition A’ resized to 15 GB without hiccups
 ** Time to resize ‘Partition B’ to ~ 12 GB
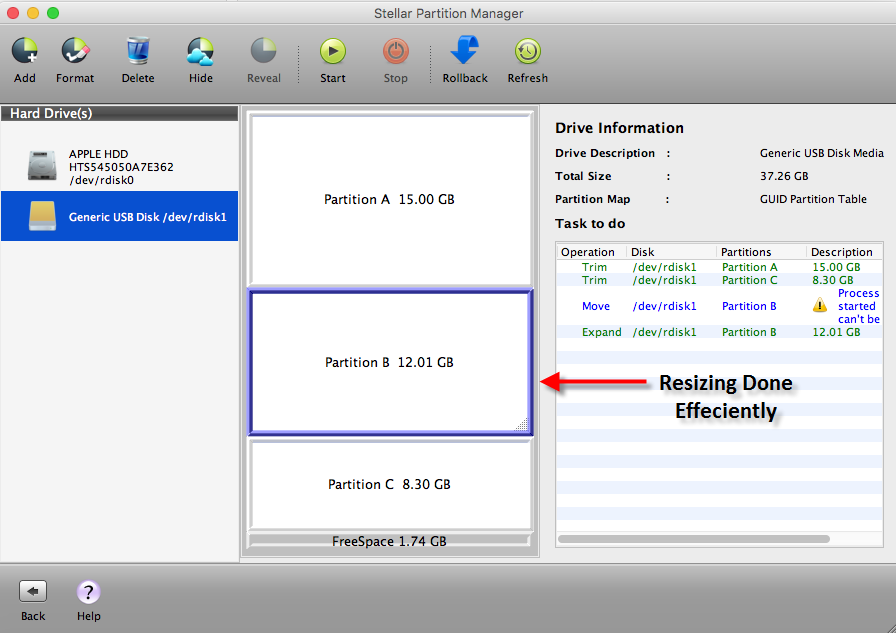 12 GB Resize Easily Done
 ** Time to resize / expand ‘Partition C’ to claim all available free spaces. In the above screenshot, you can see that Partition C is of size 8.3 Gb and only 1.74 GB of free spaces are available. Hence it will take all the free spaces but this external hard drive is only 40 in size so the final size of the Partition C will be 9.42 GB.
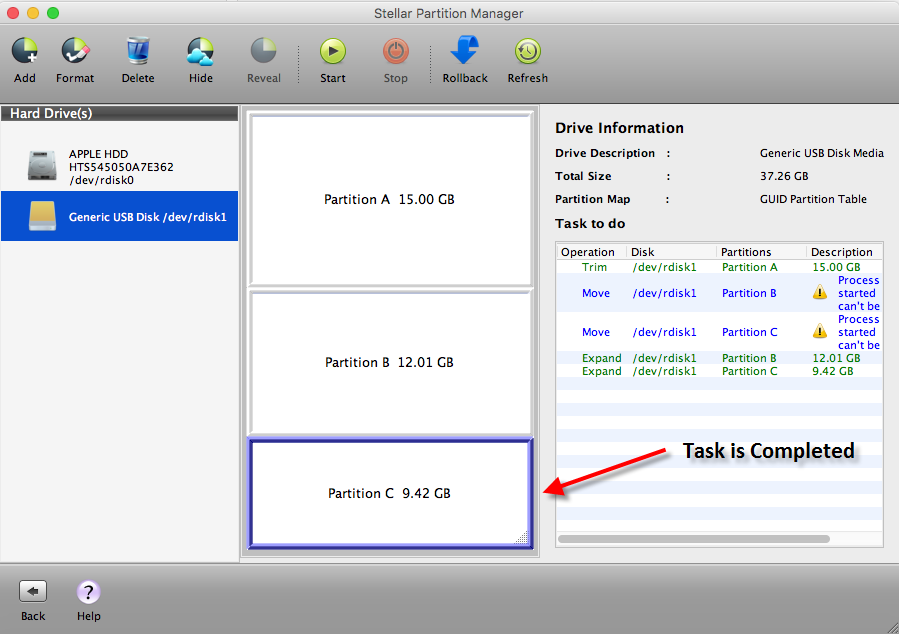 Mac Partition Resizing Done Successfully With Stellar Partition Manager
 Click the Start button mounted on the top menu bar to apply the changes. Hence, we have achieved the partition-resizing task up to 90% with the help of Stellar Partition Manager utility.
Was this article helpful?