Summary: Outlook AutoArchive failure can result in your mailbox becoming large and disorganized, increasing the risk of data loss in your Outlook profile. This blog post has provided several solutions to fix the ‘AutoArchive not working’ issue. We have also mentioned an advanced PST repair tool that you can use if the cause behind the issue is a severely corrupt or large Outlook data file (PST).


When AutoArchive stops working in Outlook, it can affect Outlook’s performance, disorganize your mailbox, and put your mailbox data at a higher risk of corruption. Therefore, resolving this problem as soon as you encounter it is essential. This guide highlights various reasons behind the issue and troubleshooting methods when Outlook’s AutoArchive feature doesn’t work.
Reasons for Outlook Auto Archive Not Working Issue
Several primary and underlying reasons can result in Auto Archive not working issue in Outlook. These are:


- Poor Network Connectivity.
- Outdated Outlook Version.
- Outlook Auto Archive file on Network Drive.
- Faulty Add-ins.
- Incorrect Auto Archive Settings.
- Wrongly-configured Group Policies.
- Damaged or Corrupted Outlook Data File (PST).
Methods to Fix Outlook Auto Archive Not Working Issue
If you’re not able to enable AutoArchive in Outlook, you can follow the easy methods given below in correct order:
Method 1: Check Internet Connectivity
Slow or poor internet connectivity can prevent Outlook from archiving mailbox data, which can result in this issue. To resolve this, you can shut down your internet router and restart it after some time. Alternatively, you can follow the troubleshooting steps on your service provider’s website or contact them for assistance.
Method 2: Update Outlook
An outdated version of Outlook client can also result in connectivity issues, resulting in mailbox data not getting auto-archived in Outlook. In this scenario, you can update the Outlook application to its latest version using the steps mentioned below:
- Open Outlook and navigate to File > Office Account > Update Options > Update Now.

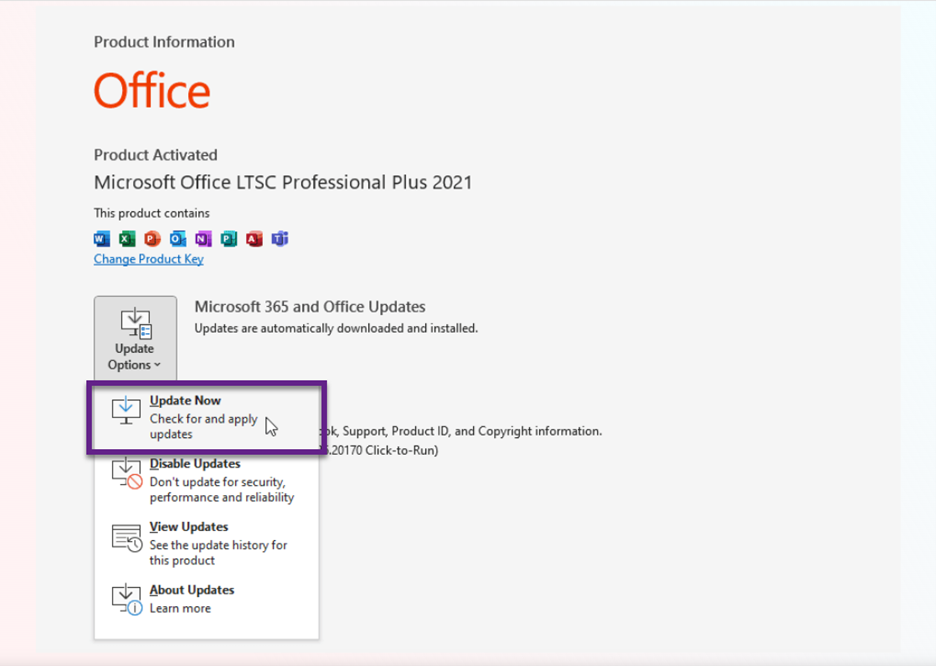
- Now, click Update Now and follow the on-screen instructions to update the application.
Note: After updating the Outlook application, you can download and install Windows updates.
Method 3: Keep the Archive File on Local Storage
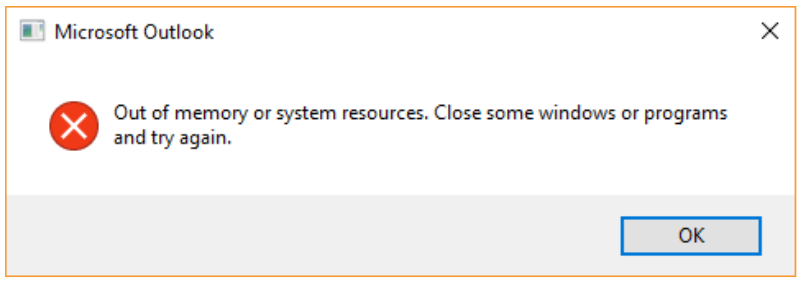
Microsoft doesn’t recommend auto-archiving Outlook mailbox to a network drive and advises storing the archive files on local storage. If you have set the location of the archive file in a network drive, you might also encounter the following error:

Therefore, it is vital to check and set the location of the auto-archive destination file in local storage. To do this, you can follow the steps mentioned below:
- Open Outlook and open AutoArchive settings:
- For Outlook 2007: Tools > Options > Other > AutoArchive
- For Outlook 2010 and above / M 365: File > Options > Advance > AutoArchive Settings.


- In this window, change the location of the archive file to local storage and click OK.
Method 4: Remove Problematic Outlook Add-ins
Faulty or incompatible add-ins can cause Outlook issues and prevent it from automatically archiving mailbox items. To check whether add-ins are responsible for the issue, you can follow the below-mentioned instructions:
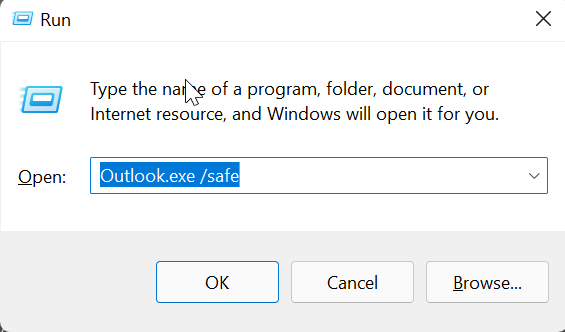
- Close Outlook, open the Run dialog box (Windows key + R), type Outlook.exe /safe, and click OK. This should open Outlook in safe mode.

- Navigate to File > Options, select Com Add-ins in the window’s bottom-left corner, and then click Go.

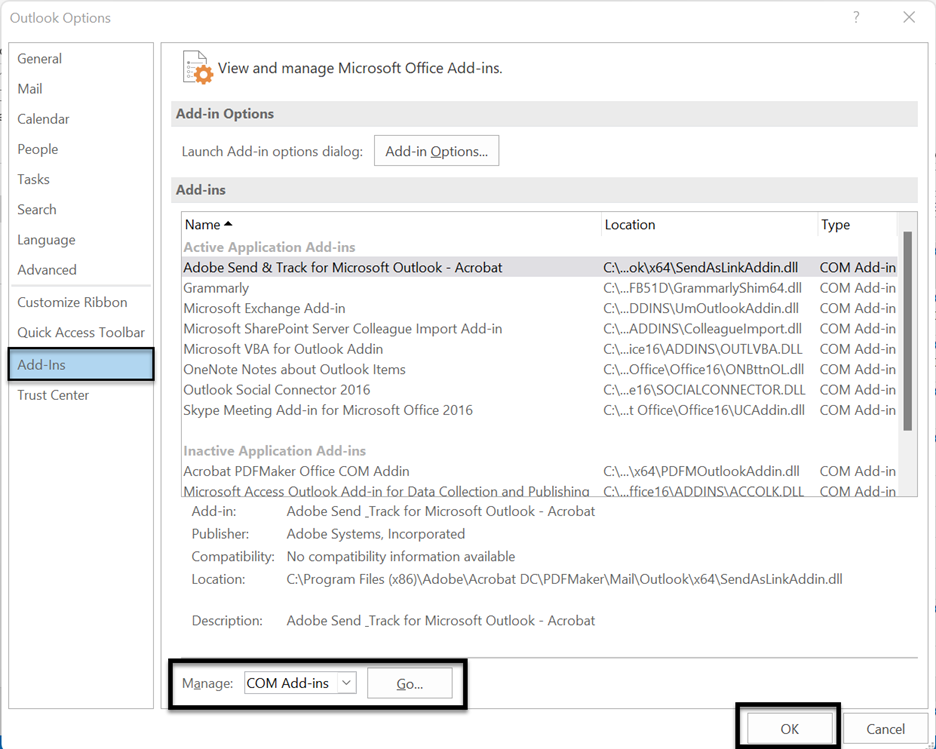
- Make sure to untick all the listed add-ins and then click OK to turn off the add-ins.

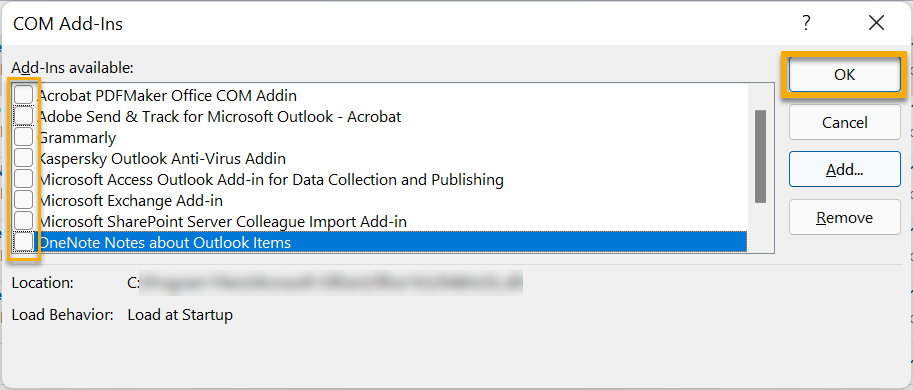
- After disabling the add-ins, restart Outlook normally.
To identify the add-in causing the issue, enable one add-in at a time and restart Outlook. After identifying the problematic add-in, remove it permanently.
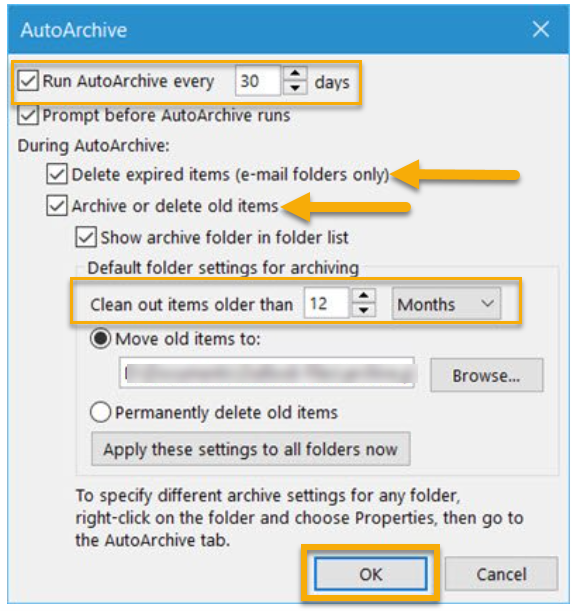
Method 5. Check AutoArchive Settings
Incorrect Outlook Settings can also prevent Outlook from auto-archiving mailbox items. Therefore, it is vital to check AutoArchive settings to ensure they are appropriately configured, mainly in terms of the frequency of auto-archiving. To do this, you can open the AutoArchive Settings window and check for misconfigured settings. Ensure that the Run AutoArchive every XX days checkbox is selected. Once done, click OK to apply the settings.

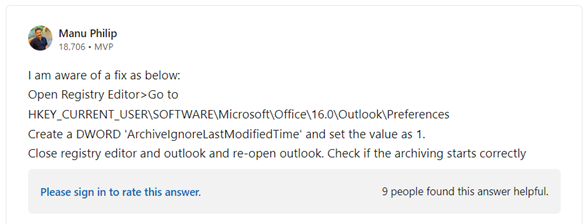
Method 6: Use ArchiveIgnoreLastModifiedTime Registry Key.
The ArchiveIgnoreLastModifiedTime Registry Key forces Outlook to use the sent/received date instead of the modified date of the mailbox item while Auto-Archiving. This workaround has helped several Outlook users resolve this issue.


Here’s how you can create it and resolve the issue:
Note: It is critical to create a backup of the registry files before proceeding with this step.
- Launch the Run dialog box (Windows Key + R), and type regedit to open Windows Registry Editor.

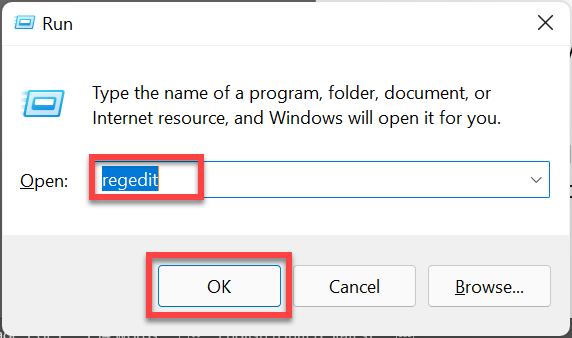
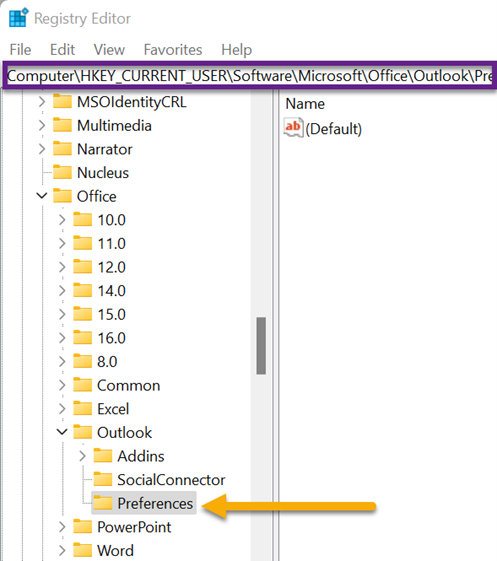
- Now, navigate to the following path:
HKEY_CURRENT_USER\Software\Microsoft\Office\16.0\Outlook\Preferences.
- On the Edit menu, choose New, and click DWORD Value.

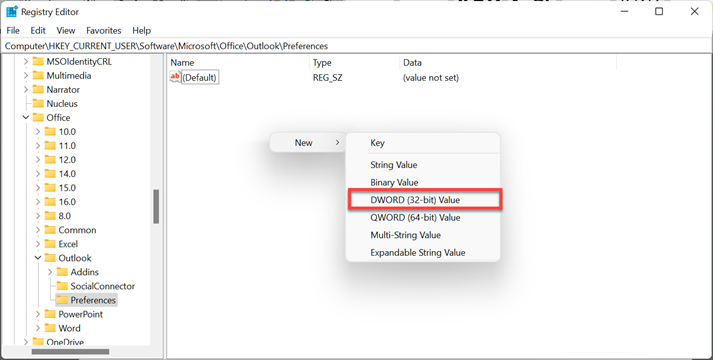
- Here, type ArchiveIgnoreLastModifiedTime, and press Enter.

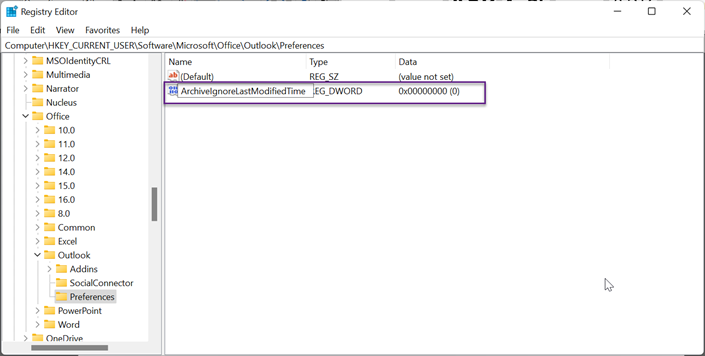
- Right-click this value, click Modify, and set the Value data to 1. After this, click OK.

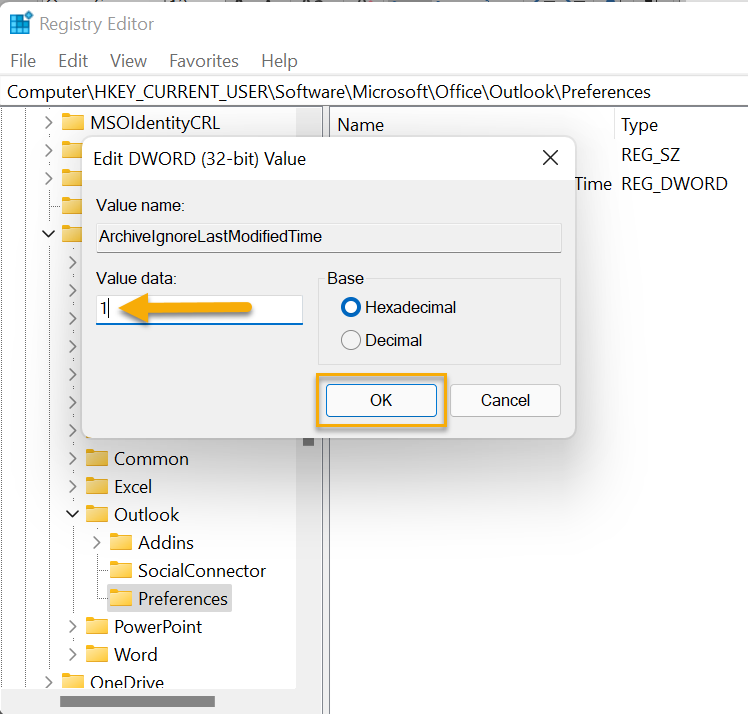
- Now, close the Registry Editor and start Outlook to apply the changes.
This should change the Archive feature to use the sent/received date instead of the modified date to resolve the issue.
Method 7: Check Group Policy
If you can’t find the AutoArchive function in the Archive settings, your network administrator may have disabled the function under a Group Policy. In this scenario, you can contact your administrator for further assistance.
Method 8: Review AutoArchive Exclusions
If an email or another mailbox item is excluded from the AutoArchive function, it won’t be archived. You can verify the status of the specific item by going to File > Properties. If the ‘Do not AutoArchive this item’ checkbox is selected for the item, it won’t be archived. You can turn it off if you want the item to be archived.
Method 9: Check for Corrupt Archive PST File
If your Outlook archive file is damaged or corrupted, Outlook can’t archive new data to that file. In such a situation, you need to repair the Outlook data file using the Inbox Repair Tool, also known as SCANPST.exe. However, this tool can sometimes become unresponsive or crash if the PST size is large or the severity of corruption is high. In this situation, you can use Stellar Repair for Outlook, a professional Outlook PST repair tool. This tool can repair PST files without any file size limitation, irrespective of the levels of corruption. After repairing, it saves the recovered mailbox items in a new PST file. This should resolve the issue and restore the auto archiving.
Conclusion
The Outlook AutoArchive feature is vital for managing the Outlook mailbox size and archiving older mailbox data. However, if this feature stops working, your mailbox size can quickly increase, potentially leading to performance issues. To address these problems, you can explore various methods and workarounds detailed in this post. If a corrupt Outlook data file (PST) is identified as the root cause, you can address the issue using the Inbox Repair Tool (SCANPST.exe). However, SCANPST may freeze or crash, particularly when handling large or severely damaged PST files. In such a scenario, Stellar Repair for Outlook offers a reliable solution. This advanced Outlook PST repair tool is designed to recover large and highly corrupt PST files while maintaining complete data accuracy and structural integrity.


