Exchange Server 2010 offers several features, including the Public Folders that allow to store information, shared calendars and contacts, and have folders to store data and emails to be shared by several people or groups. On the other hand, Office 365 or Microsoft 365 comes with great collaboration and automation tools, like SharePoint Online, Microsoft Teams, and Office 365 Groups. These tend to create a bit of culture shock to the users who are used to other systems, apart from the fact that there are some long exercises the businesses need to do to find a way to integrate, structure the data, and migrate to these new tools. So, until this exercise is done, the businesses must continue to use Public Folders on Office 365 or Microsoft 365.
Until today, there is still no quick solutions for migrating the Public Folders. There are only two conventional methods to migrate Public Folders from Exchange Server to Office 365 or Microsoft 365. You can use Outlook to export small Public Folders to PST and then import them using Outlook. However, this method is not recommended as it takes a lot of time and resources and there is no continuity if the operation is cancelled or stopped.
Ways to Migrate Public Folders from Exchange 2010 to Office 365
The best way to migrate Exchange 2010 Public Folders to Office 365 or Microsoft 365 is to use the scripts provided by Microsoft that create a new migration batch job.
Requirements for Migrating Exchange 2010 Public Folders to Office 365
- Exchange Server 2010 must be updated to the latest updates and Service Packs or at least have the Exchange 2010 Service Pack 3 RU8.
- The user, who will be used for the migration, has the role of Organization Management and Recipient Management.
- No orphaned Public Folders should exist in your AD. These are Public Folders which exist in your schema but do not exist.
- No Public Folders with duplicate email SMTP address.
Pre-Migration Steps to Migrate Exchange 2010 Public Folders to Office 365
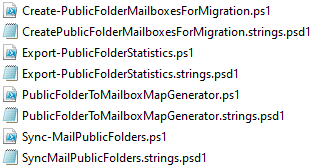
To prepare for the migration, you need to download the scripts provided by Microsoft using the link: https://www.microsoft.com/en-us/download/details.aspx?id=38407. You also need to download the Sync-MailPublicFolders scripts using the link: https://www.microsoft.com/en-us/download/details.aspx?id=46381. When both scripts are downloaded, extract all the files in the C:\Scripts\PFMigration folder. You can use any other folder also.
Preparation
To start off, you need to add the Office 365 or Microsoft 365 domain as an accepted domain in your Exchange 2010 Server setup by using the Exchange Management Shell command as given below:
New-AcceptedDomain –Name “O365 PublicFolders” –DomainName mydomain_com.onmicrosoft.com –DomainType InternalRelay

Next, you need to check if there are any Public Folders which have a pending migration by using the following command.
Get-OrganizationConfig | Format-List PublicFoldersLockedforMigration, PublicFolderMigrationCompleteName, Identity

You also need to check if there are any pending or failed migration processes on the server. For this, use the below command:
Get-PublicFolderStatistics -ResultSize Unlimited | Where {($_.Name -like “*\*”) -or ($_.Name -like “*/*”) } | Format-List Name, Identity

If any of the above is ‘True’, you need to clear them out by using the below command:
Set-OrganizationConfig -PublicFoldersLockedforMigration:$false -PublicFolderMigrationComplete:$false

The next step is to ensure that no Public Folders are created in your Office 365 or Microsoft 365 tenant. Then, create the local Public Folder map to be used to create the structure online. The below command will export the statistics.
.\Export-PublicFolderStatistics.ps1 “C:\Scripts\PFMigration\pfmapping.csv” “ex01.mail.lan”

The below command will generate the map file to create the folder structure.
.\PublicFolderToMailboxMapGenerator.ps1 20000000000 “C:\PFMigration\pfmappingsize.csv” “C:\PFMigration\pfmapping.csv”

Migration Process for Migrating Exchange 2010 Public Folders to Office 365
You can begin the migration process after you have collected all the above. You can start the synchronization by using the following command.
.\Sync-MailPublicFolders.ps1 -Credential (Get-Credential) -CsvSummaryFile:C:\PFMigration\log.csv

At this stage, a prompt will appear asking you to enter your tenant’s Global Admin credentials and Office 365 is not set to receive the data. For this process, you need to know the Legacy Exchange DN of the Local Exchange Administrator and the FQDN for the Outlook Anywhere of the local Exchange Server and run the following command.
$PfEndpoint = New-MigrationEndpoint -PublicFolder –Name PublicFolderEndpoint –RPCProxyServer $Source_OutlookAnywhereExternalHostName –Credentials $Source_Credential -SourceMailboxLegacyDN $Source_RemoteMailboxLegacyDN –PublicFolderDatabaseServerLegacyDN $Source_RemotePublicFolderServerLegacyDN -Authentication Basic
[byte[]]$bytes = Get-Content -Encoding Byte “C:\PFMigration\pfmapping.csv”
New-MigrationBatch -Name PublicFolderMigration -CSVData $bytes -SourceEndpoint $PfEndpoint.Identity -NotificationEmails administrator@mymaildomain.com
If no errors show up, it means that all is fine and you can start the migration of the data using the command below:
Start-MigrationBatch PublicFolderMigration

Although you’ve started the batch job, you are not ready yet as you need to lock the on-premises Public Folders from being updated by the users. To lock the Public Folders, use the command below.
Set-OrganizationConfig -PublicFoldersLockedForMigration:$true

Now, use the below command to run the final sync from the local to the cloud.
Complete-MigrationBatch PublicFolderMigration

Once this is complete, you can remove the local Public Folders or decommission the local Exchange Server 2010.
In Conclusion
As you can see from the above, you need a considerate amount of time to perform the migration process. Also, there are several points of failure in the process. To migrate Exchange Server 2010 Public Folders to Office 365 or Microsoft 365, your Exchange Server must be in top shape and the Public Folder databases must be online and mounted.
Alternatively, you can consider using an EDB to PST converter tool, such as Stellar Converter for EDB that requires less administrative efforts, resources, and time to migrate Exchange 2010 Public Folders to Office 365 or Microsoft 365. Stellar Converter for EDB allows you to open any EDB file from any Exchange Server version and browse through it. You can fully or granularly export the EDB data to PST and other formats. You can export directly to a live Exchange Server database or Office 365 or Microsoft 365.
Was this article helpful?