Summary: When you need to bulk migrate mailboxes from local Exchange Server to Exchange Online, you can use a CSV file to batch migrate the mailboxes. In this guide, we will discuss the detailed process to batch migrate Exchange mailboxes to Exchange Online using the CSV file. We will also mention an EDB converter tool that simplifies the process of migrating mailboxes and other data from on-premises Exchange Server to Exchange Online (Office 365).


It is a challenging job to migrate mailboxes from local Exchange Server to Exchange Online as it requires moving a large number of mailboxes. However, you can use a comma-separated values (CSV) file for migrating a large number of mailboxes in batches. This CSV file contains the required details of each mailbox. You just need to specify the CSV file when using the Exchange Admin Center (EAC) or the New-MigrationBatch PowerShell cmdlet to create a migration batch. Below, we will be discussing the process to migrate Exchange Server mailboxes to Exchange Online using Comma Separated Values (CSV) file.
How to Migrate Exchange Mailboxes to Exchange Online with CSV File?
You can follow the below process to batch migrate mailboxes from Exchange Server to Exchange Online.


Preparing for the Migration
First, you need to create the CSV file. Here’s how:
- Open the Exchange Admin Center (EAC) and click on recipients.

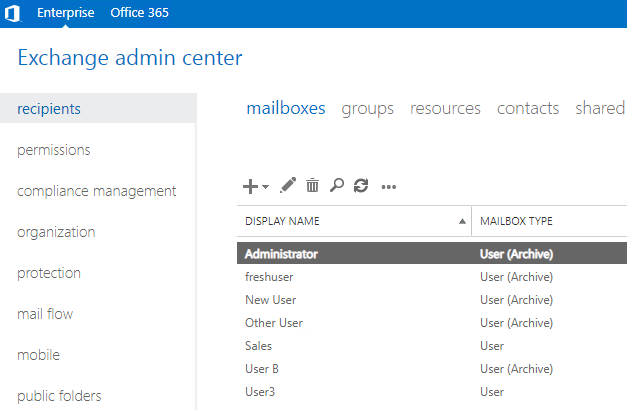
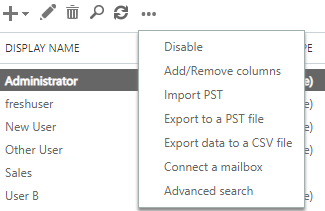
- Click on the more options (…) button and then click on Export data to a CSV file.

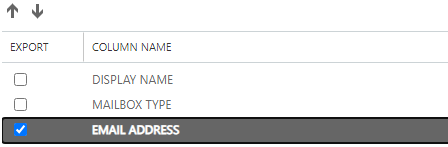
- Select only the EMAIL ADDRESS option and then click on Export. This will download the CSV file to the default Downloads folder. However, you can also choose an alternative location from the prompt.

- Once the CSV file is downloaded, open the file with a notepad and change the EMAIL ADDRESS header to EMAILADDRESS (see the below image). Then, save the file.

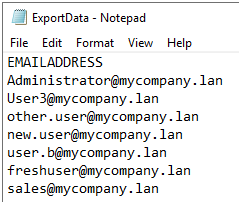
Note: You can also remove any mailboxes that you don’t want to migrate.
Create the Migration Batch
Now, you need to create the migration batch and specify the mailboxes to migrate using the CSV file created above. For this,
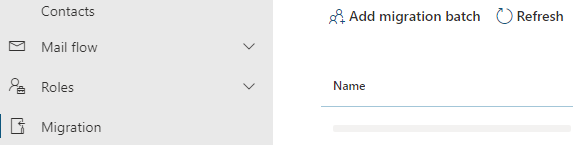
- Open the Exchange Admin Center (EAC) in the Exchange Online. Once logged in, click on Migration and Add Migration batch.

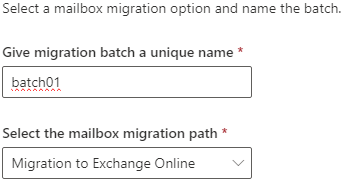
- Enter the name of the migration batch and make sure to select Migration to Exchange Online as the migration path.

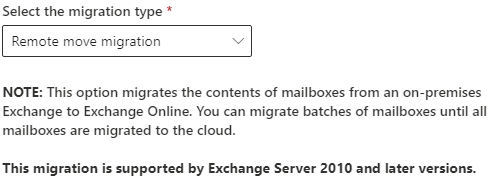
- Next, you need to select the migration type. Here, we will be choosing the Remote move migration.

Before the migration process, there are a few things that you need to set up to migrate mailboxes to the cloud.
You need to configure and set up a server with Entra ID Connect. The users and passwords need to be synchronized with the Entra ID. Once this is complete, you need to configure the Hybrid Configuration Wizard (HCW) and connect the Exchange Online to the local Exchange Server. Verify the domain on the Office 365 ports and assign the licenses of Office 365 to the users.
Read More about Testing a New Exchange Hybrid Configuration with Office 365.
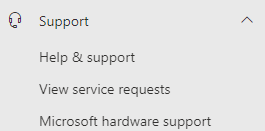
You need to disable the throttling of the EWS in Office 365 when migrating many mailboxes. For this, login to the Microsoft 365 Admin portal and create a New service request in the Support section.

In the search field of the Need Help section, search for EWS Throttling Policy Increase. Then, click on Run Tests.

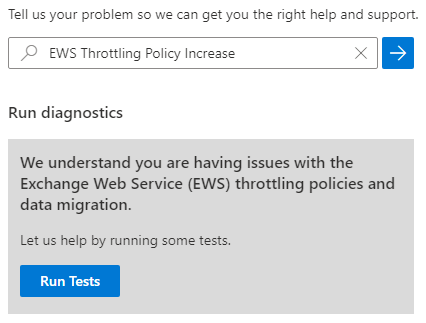
If throttled, you will be notified on the screen. You can select the duration in days.
Once complete, click on Update Settings.
If this is not the case, click on Contact Support to open a case with Microsoft.
If the above is not done, the migration process will be much slower.
Migrating the Mailboxes
On the Exchange Online Admin Center, click on Migration and then click on Add migration batch. Enter the name of the migration batch and select the migration path – Migration to Exchange Online.
Next, select Remote move migration as the migration type and click Next. Then, select the migration endpoint (created by the Hybrid Configuration Wizard).
When it comes to selecting the users, click on the Migrate from CSV file and click Next. On the next screen, set the Exchange Online tenant in the Target Delivery domain.
After this is done, you need to select the schedule of the migration batch.
In the migration option in the Exchange Admin Center (EAC) of Exchange Online, you can see the migration job and its status.


To Conclude
As you have seen above, migrating mailboxes to Exchange Online from a local Exchange Server requires administrative and technical efforts, and a lot of time. In addition, it is limited to migrating only user mailboxes. Alternatively, you can use a specialized tool for migrating data to Exchange Online. Stellar Converter for EDB is one of the recommended EDB to PST Converter software for migrating data from Exchange database (EDB) file to Office 365 (Exchange Online). It allows to you export data from offline/standalone or online (live) databases of any version of Exchange Server to Office 365, with ease and with minimal effort. It can export user mailboxes, user archives, shared mailboxes, disabled mailboxes, and even public folders. It offers features, such as automatic mailbox matching from source to destination, status reports, priority exports for VIP resources, and parallel exports. The tool can also export EDB data directly to another live Exchange server or to PST and other file formats.

