The “Mark Partition as Active” is greyed out by default in Disk Management. This occurs when the desired partition is not marked as the “primary” in the Master Boot Record (MBR). Thus preventing accidental changes to the active partition and causing any booting issues in Windows.
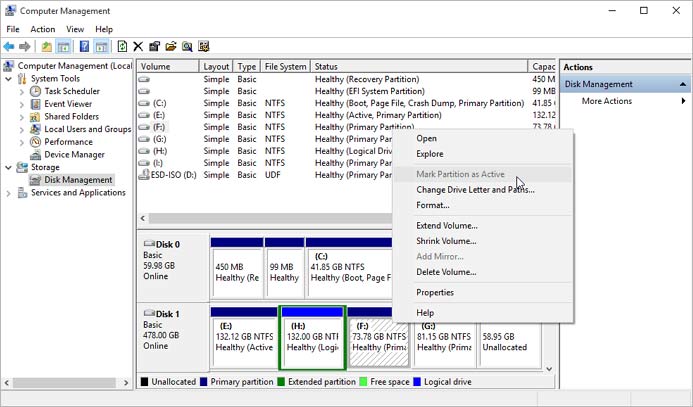
However, there may be valid reasons to switch the active partition, such as testing a new Windows installation or recovering data from a previously used drive. The good news is there is a simple solution to make the “Mark Partition as Active” option available again.
Why is the Mark Partition as Active Option, Greyed Out?
The “mark partition as active” option marks the partition as active or bootable. However, if the disk is not in a bootable state or there are other issues with the disk, this partition will remain greyed out. There can be other reasons for it as well that we will discuss here:
1. Existing active partition – The “mark partition as active” may not be available or disabled if the disk already has an active partition. It must be noted that only one partition on a disk can be marked as active at a time.
2. Incorrect disk type – Certain disks, such as dynamic disks or GPT (GUID partition table), do not use the traditional boot method; rather, they boot on the UEFI mode and hence do not require an active partition.
How Can I Resolve “Mark Partition As Active Greyed Out” On Windows?
If you also find the “mark partition as active” greyed out in disk management on your Windows device, you can prefer to check the following things.
Check for an existing active partition – As you know, only one partition can be active at a time on a disk. Therefore, you must change any other active partitions to inactive before setting a new one.
Verify the disk state – Sometimes, an external disk you want to boot from seems invalid or unbootable. You need to reconnect the disk and check for errors before marking a partition as active.
Convert from dynamic to basic disk – Dynamic disks are more flexible than their counterparts, and they do not use active partitions or have a partition table. This makes the “mark partition as active” greyed out and invalid. To mark this active, you need to change the dynamic disk into a basic disk with the help of DiskPart.
Switch from GPT to MBR – The GPT partitioned disks do not need an active partition. GPT partitions boots on UEFI, whereas MBR uses Legacy BIOS, which requires an active partition. You must check your firmware boot settings to see if your system has a GPT or MBR.
How To Check And Switch From GPT To MBR?
- Restart your computer and press the “F2, F10, or Delete” key during the initial boot process to enter the BIOS setup utility.
- Once in the BIOS, look for a menu or setting related to boot options or orders. This terminology may differ with each manufacturer.
- Then, look for an option about the boot mode. Common options are “Legacy/CSM/BIOS” and “UEFI.”
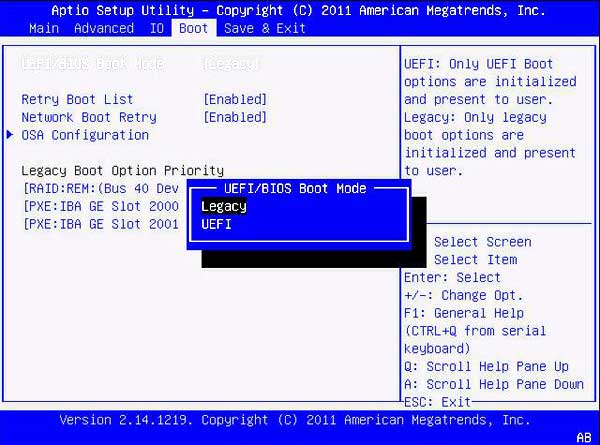
- A system that boots in Legacy or CSM mode uses an MBR (Master Boot Record) partitioning method.
- If set to UEFI mode, it boots on the newer GPT (GUID Partition Table) method.
- Now look for the “Launch CSM” option and enable it. Disabling the CSM activates UEFI/GPT, and enabling it activates Legacy/MBR.
- You can take note of the current boot mode set in the BIOS and switch between Legacy and UEFI, depending on your requirement for GPT or MBR.
- Save the changes and exit the BIOS setup utility, and your system will reboot automatically.
This shall allow you to check your system firmware settings to determine if the system currently boots on Legacy BIOS or UEFI and switch between MBR and GPT.
How to Use Diskpart to Mark Partition as Active?
Once you have checked for the above issues and fixed any or all of them, you can easily fix the Mark partition as active on your Windows system with DiskPart. This will help the system to boot from the partition with the Active flag on your disk.
Follow the below-provided steps to fix the “Mark Partition as Active” greyed out with the help of DiskPart.
- Press Windows+R and type “cmd” in the Run dialog box to open the Command Prompt as Administrator.
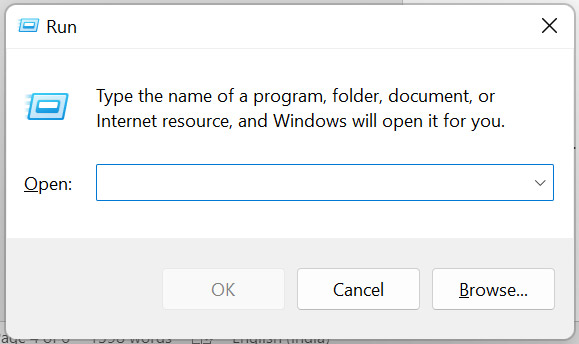
- Type “diskpart” and press Enter to start the DiskPart utility.
- Next, type “list disk” to view a list of all disks on your system. Note down the disk number that you want to change.
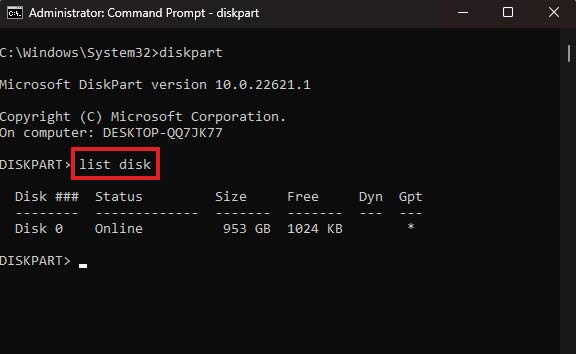
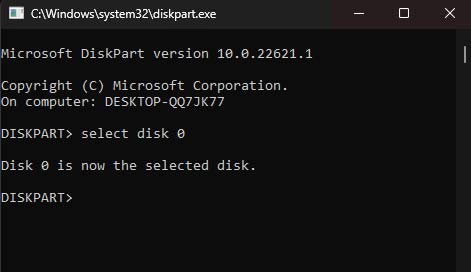
- Next, type “select disk 0” or the desired disk number.
- Next, type “list partition” to view list of all partitions on this disk.
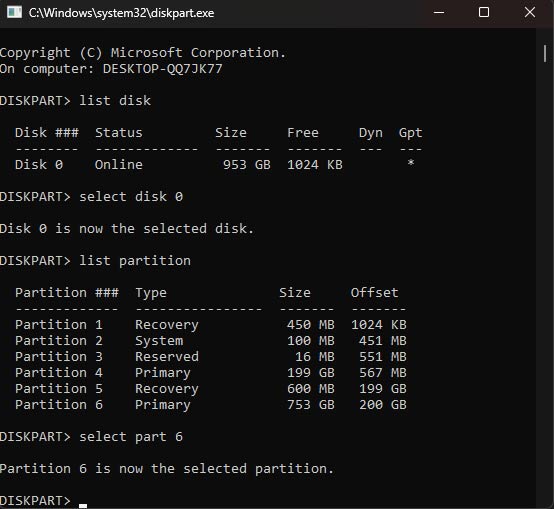
- Next, type “select partition 1,” or the desired partition number you want to mark as active.
- Next, type “active” to mark the selected partition as active.
- At last, type “exit” to close DiskPart and close the Command Prompt window.
Restart your computer and recheck on disk management. The partition you selected on DiskPart should now be marked as the active bootable partition.
You need to be careful while marking active partitions using Diskpart, as setting the wrong partition as active can result in boot issues and make your Windows PC unbootable.
Marked a wrong partition active and lost your data? Here’s an easy way to recover.
When you mark a partition active, it must contain the operating system to boot. A partition wrongly marked as active can make the system unbootable and make your data inaccessible.
In such cases, using professional data recovery software like Stellar Data Recovery Professional can help recover data from an unbootable system. You can follow the steps here to recover lost data.
End Note
So now, you know how to resolve the “Mark Partition as Active” greyed-out issue with the help of DiskPart in a few simple steps. However, you must know that this limitation on your system is a security feature provided by default. If you wish to override this limitation and modify the default system settings, be aware of the potential risks associated with it. Data loss is one of them. Do let us know your thoughts in the comments section below.
Was this article helpful?