When you save a file or any other data on your Mac, it is stored in a specific portion of your hard drive. When you delete the file, it is actually not removed from that space.
Instead, the Operating System of your Mac marks it to be available for rewriting. If the space remains unwritten, the data stored in that space can be easily recovered by using a data recovery tool.
So, when you dispose of or resell your Mac, you need to permanently wipe the data to prevent your data from being stolen and misused.
Why it is Important to Wipe Confidential Data?
When you dispose of or sell your Mac without securely wiping out data on it, you are in grave danger of delivering your personal information, browsing habits, financial details, etc., to those who might use it to cause financial harm or identity theft.
The data stored in your Mac systems in the form of user name and password, bank statement, investment details, project information, browser history, email content, etc., is quite valuable to someone.
They can use it to access your bank account, social media, or email accounts. Therefore, it is important to wipe out all the confidential data on your Mac before you dispose of it or sell it or give it away to anyone.
How to Erase Confidential Data from Mac?
Following are the different ways to completely and securely erase confidential data from your Mac system.
1. Delete Data using Secure Empty Trash
When you delete a file, it moves to the trash bin. It remains there until you empty the trash bin.
You can empty your trash bin by clicking on the finder button in the dock and selecting Empty Trash.
But as discussed earlier, even after emptying the trash, the deleted files remain on the hard disk.
To securely erase your files from the hard drive, follow the given steps.
Step 1: Click and hold the ‘Trash’ icon in the Dock.
Step 2: Hold on the ‘Command’ button and click the trash icon.
Step 3: Click on the ‘Secure Empty Trash’ option to securely remove files from your Mac drive.
Step 4: Use the Finder button to perform the same task. Click on the ‘Finder’ icon in the Dock.
Step 5: Click on the ‘Finder’ tab in menu bar.
Step 6: Select the ‘Secure Empty Trash’ and your files will be removed from hard drive.
You may also consider making the ‘Secure Empty Trash’ a default option to empty trash by using the Finder menu > Preferences > Check Secure Empty Trash.
Note: The Secure Empty Trash feature might not be available on some macOS versions.
2. Erase files using Disk Utility
You can use Disk Utility to erase the data safely. Here are the steps:
For Intel chip based Mac:
Step 1: Switch on your Mac. Press and hold Command + R till you see the Apple logo.
Step 2: Select a user and enter the administrator password (if asked).
Step 3: Select Disk Utility and click Continue in the utilities window.
Step 4: Click Macintosh HD in the sidebar.
Step 5: Click the Erase button in the toolbar and enter the details required as recommended by Disk Utility.
Step 6: Click on the Erase Volume Group option and click Done. If you don’t see this, then click Erase.
Step 7: Once it is done, quit Disk Utility.
For Mac with M1 Chip:
Step 1: Turn on your M1 powered Mac and hold the power button till the Startup Options window appears.
Step 2: Click ‘Options’ and then click ‘Continue’.
Step 3: Select Macintosh HD from the sidebar.
Step 4: Click ‘Erase’ and select APFS as the file system format.
Step 5: Click the ‘Erase Volume Group’ tab.
Once the process completes, your M1 Mac drive is wiped securely.
3. Erase your Confidential Data with Stellar File Eraser
Stellar File Eraser is 100% secure and the most hassle-free software to erase confidential data from Mac.
You can permanently erase files, folders, browsing history, saved passwords, etc., on your Mac system in just a few clicks.
The data erased by using BitRaser cannot be recovered by using any data recovery tool.
You can use Stellar File Eraser to:
- Erase System Traces
- Erase Deleted Data
- Erase Files and Folders
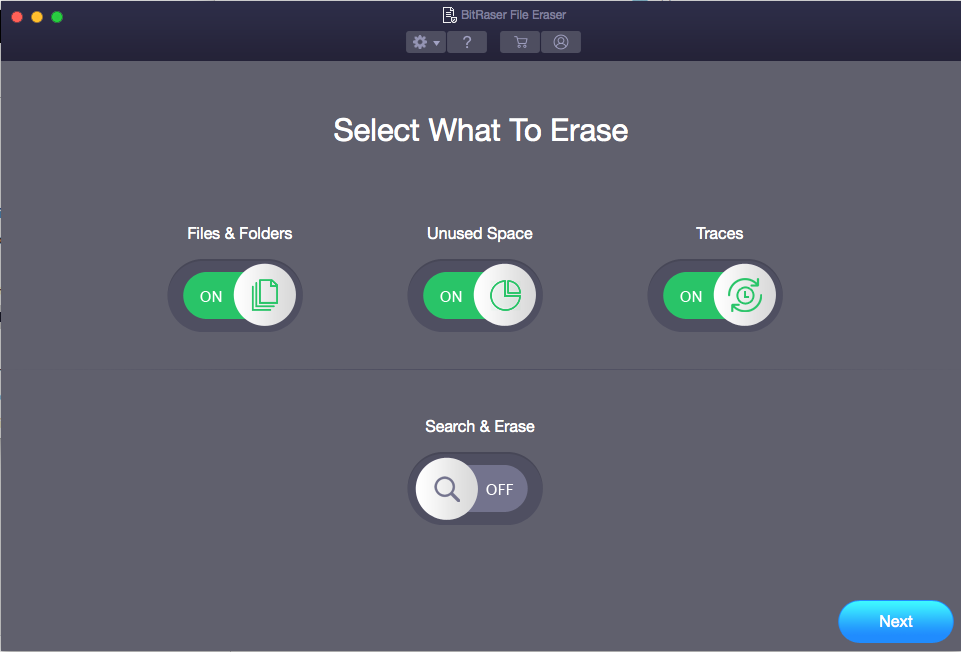
To erase files and folders from your Mac using Stellar File Eraser software, follow the steps below:
Step 1: Install the Stellar File Eraser on your Mac system and Launch it.
Step 2: In the ‘Select What to Erase’ window, click the ‘Files and Folders’ option.

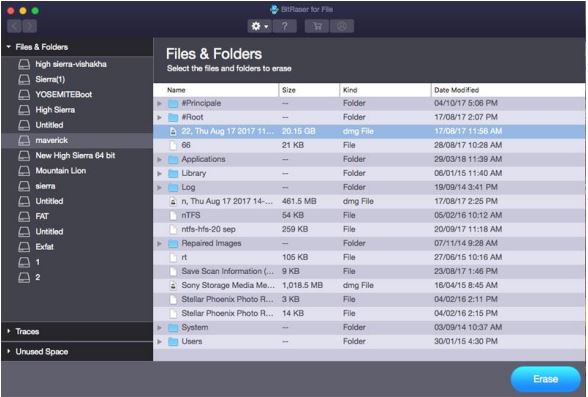
Step 3: Left pane of the window enlists all the volumes of your Mac system, select the volume of your choice.
Step 4: The files and folders of selected volume appear in the right pane. Select the files and folders to be erased.

Step 5: Select the desired ‘Erasing Algorithm’ from the ‘Preferences’ button.

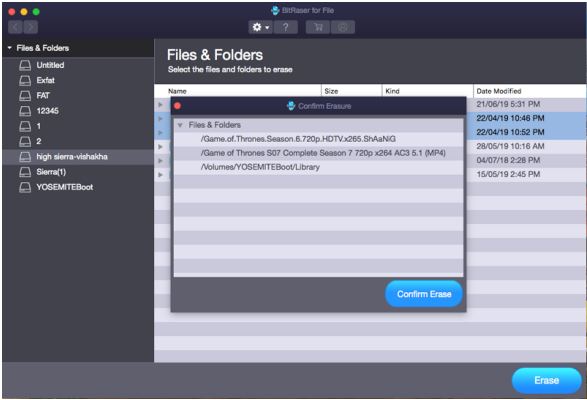
Step 6: Click ‘Erase’.
Step 7: Click ‘Confirm Eraser’ in the dialog box that appears.

Once the erasing process is complete, a message will appear to confirm it.
Note: You need to restart your Mac system after completion of erasing process.
Conclusion
According to a study conducted by Stellar on 311 used drives, 7 out of 10 used devices are prone to the risk of data theft.
So, before sharing your Mac with anyone, handing it over for repair, or exchanging/selling your device, permanently delete the data stored on it.
You can use the methods mentioned in this post to erase your confidential data. However, the best option is to use the file eraser software that can erase data from your Mac beyond the scope of recovery.
Was this article helpful?