Suppose, you’re working on an important project, to be submitted in a few days, and suddenly your system shuts down without showing any warning. You tried to turn it on several times, but it keeps crashing every time or showing a blue screen with a stop code – Kernel-Power Error 41. Now, you’re wondering.
“What is Kernel-Power error 41?”
“Why did it occur in the first place?”
“How can I fix it?”
Well, to get answers for all such queries, let’s start with the basics.
Kernel-Power Error 41: An Overview
When your system shuts down unexpectedly, you may encounter Windows logs event ID 41 on your system the next time you try to restart it. The complete error message may appear as:
Event ID: 41
Description: The system has rebooted without cleanly shutting down first.
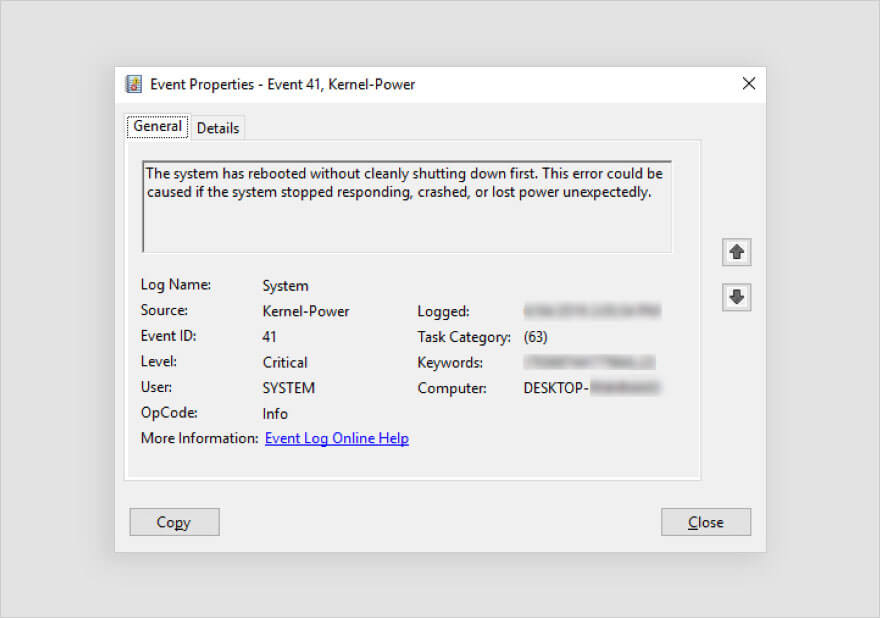
It may occur when some program or spontaneous activity causes a problem for Windows in shutting down correctly. When you reboot your system, Windows may show the stop codes in Event ID 41, including:
- BugcheckCode 159
- SleepInProgress false
- BugcheckParameter1 0x3
- BugcheckParameter3 0xfffff8000403d518
- BugcheckParameter2 0xfffffa80029c5060
- BugcheckParameter4 0xfffffa800208c010
- PowerButtonTimestamp 0Converts to 0x9f (0x3, 0xfffffa80029c5060, 0xfffff8000403d518, 0xfffffa800208c010)
Other than the above, you may also encounter the stop code as “Kernel Power Event ID 41 (63).”
Why does Kernel-Power Error 41 Occur?
There could be several reasons behind this error, including:
- Lack of sufficient power supply
- Hardware failure
- System overclocking
- Memory errors
- Outdated BIOS
- Third-party software
- File corruption
- Driver incompatibility
Scenarios in which Kernel-Power 41 Error May Occur
- Scenario 1: The system gets rebooted automatically due to a Stop error and Event ID 41 consists of a Stop error (bug check) code.
- Scenario 2: The system becomes unresponsive, freezes, or reboots randomly, and Event ID 41 entry lists the error code values of zero or the Event ID 41 is not logged in.
- Scenario 3: The system shuts down automatically when playing graphic-intensive games. The system first restarts and then crashes every time.
- Scenario 4: The system reboots as you press or hold on to the power key.
- Scenario 5: After upgrading Windows from a lower version to the latest version.
Several Windows users have reported that Kernel-Power Error 41 appears with a blue screen and repeatedly crashes the system. Refer to the below query:

In such a condition, the system and its data are at great risk. So, let’s walk you through the best possible methods to troubleshoot this error without further ado.
Recover Data before Fixing the Error
As your system is frequently crashing, there are high chances that you might lose your system data. It is suggested to immediately recover the data from the system. You can use a professional data recovery software, such as Stellar Data Recovery Professional to retrieve the data. The software provides a ‘Create a recovery drive’ feature that allows you to create bootable recovery media for recovering data from crashed or unbootable Windows systems.
Read more: How to recover data from an Unbootable system/ Crashed OS?
How to Fix-Kernel Power Error 41?
Below, we’ve discussed several workarounds that can help you fix this error.
#1. Replace the Faulty Hardware
Usually, a hardware problem is related to the Kernel Power Error 41. Check if you hear any tingling or hindering noise coming from your system. The system’s hard drive may be faulty or damaged or RAM may be defective, due to which you’re facing such an issue. Replace the problematic hardware. Then, try rebooting your system and see if the error has been fixed.
#2. Check the Power Supply
The Kernel Power Error 41 may occur due to an underpowered or faulty power supply problem. You need to make sure that your system has sufficient wattage to handle the installed devices appropriately. Additionally, consider acquiring a UPS (Uninterruptible Power Supply) such as a battery backup power supply.
#3. Disable Overclocking in BIOS
Overclocking is a technique that speeds up the performance of your system’s graphic card, CPU, etc. However, it is not recommended by manufacturers, yet several Windows users do it. You can check if your system has overclocking enabled as it may cause Kernel-Power error 41 (63). To disable overclocking, follow the given steps:
- Reboot your Windows system and when it starts showing you the Windows logo on the screen, turn it off again using the Power key.
- Repeat the same steps thrice, after which you will be able to enter the Automatic Repair environment.
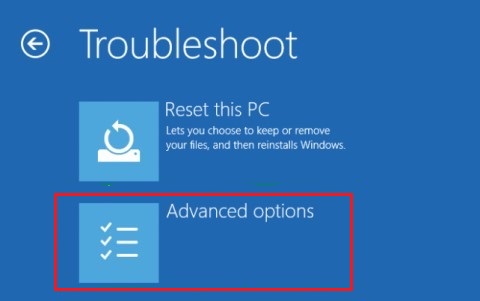
- Once you’re in the Automatic Repair environment, follow Advanced options > Troubleshoot > Advanced options.
- Next, click UEFI Firmware Settings > Restart.
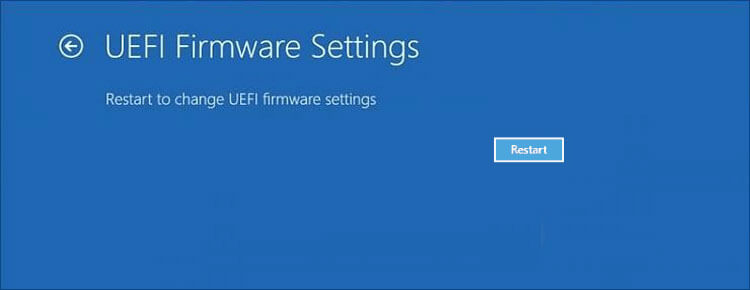
- When the system reboots, it should automatically boot in BIOS mode.
- In BIOS settings, go to Advanced > Performance > Overclocking.
- Disable overclocking, save changes to BIOS, and reboot your system.
- Now, check if the error has been fixed.
| If still the error occurs, you might have problem in booting your PC normally. Hence, we’d advise you to boot your PC in safe mode. This will help you perform the troubleshooting methods without any interruption. Read more to learn how to start PC in Safe Mode in Windows 10? |
If you’re able to boot PC in Safe Mode, perform the below-discussed methods to fix this BSOD error.
#4. Run Memory Diagnostic Tool
Faulty RAM or memory error may also cause Kernel-Power Error 41 BSOD. Some users have reported that the issue was caused due to a faulty RAM. You can run the Memory Diagnostic Tool to check problems with it.
- Type mdsched.exe in the Run dialog box to open Windows Memory Diagnostic Tool.
- Next, click ‘Restart now and cart now and check for problems (recommended).’
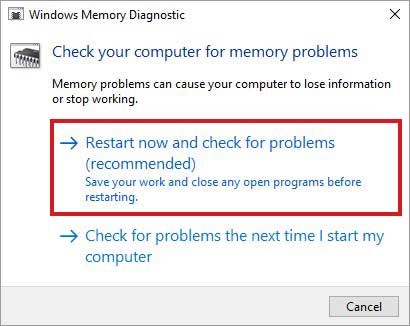
- The system will reboot and a test will begin to check the RAM.
- Wait until the test completes. Once done, see if there is any instructions given to follow.
- Finally, reboot your system and check if the problem persists.
#5. Update BIOS
If an outdated BIOS version is installed on your system, it may cause Kernel-Power 41 Blue Screen error. You can update BIOS to the latest version with the help of the given steps.
Note: Take precautions while updating the BIOS version as sudden power loss or interruption in the process may corrupt the BIOS firmware and may cause more damage to your system.
- To update BIOS, check the make and model of your motherboard. Then, refer to your user manual of the main board.
- Now, type ‘System Information’ in Windows Search Box.
- Next, locate the System Summary. There, you can see the BIOS version. Note it down.
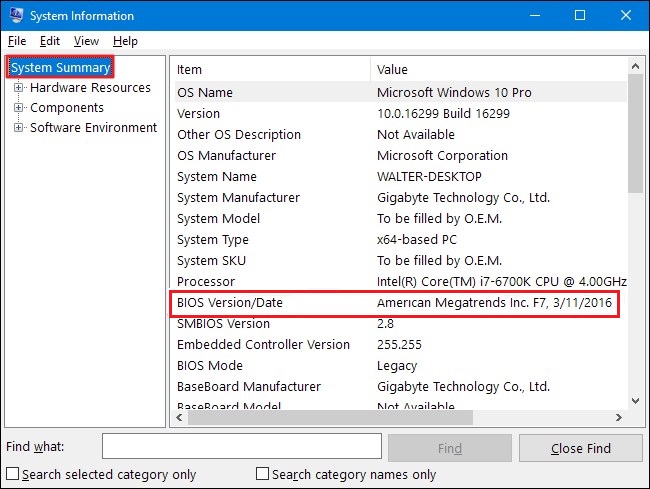
- Different motherboards use different utilities as well as the process. You must visit the manufacturer’s official site of your system’s motherboard and follow the instructions to update BIOS.
#6. Uninstall Faulty Third-Party Software
A corrupted or outdated third-party software installed on your system may be the cause behind this blue screen error. If you find any such software, application, or program on your system, uninstall it to get rid of the problem. Follow these steps to install a program:
- Boot into safe mode. After that, open System Settings and locate Apps.
- Next, navigate to Apps & features.
- There, select the application which is no longer required or malfunctioning while accessing it, and click Uninstall.
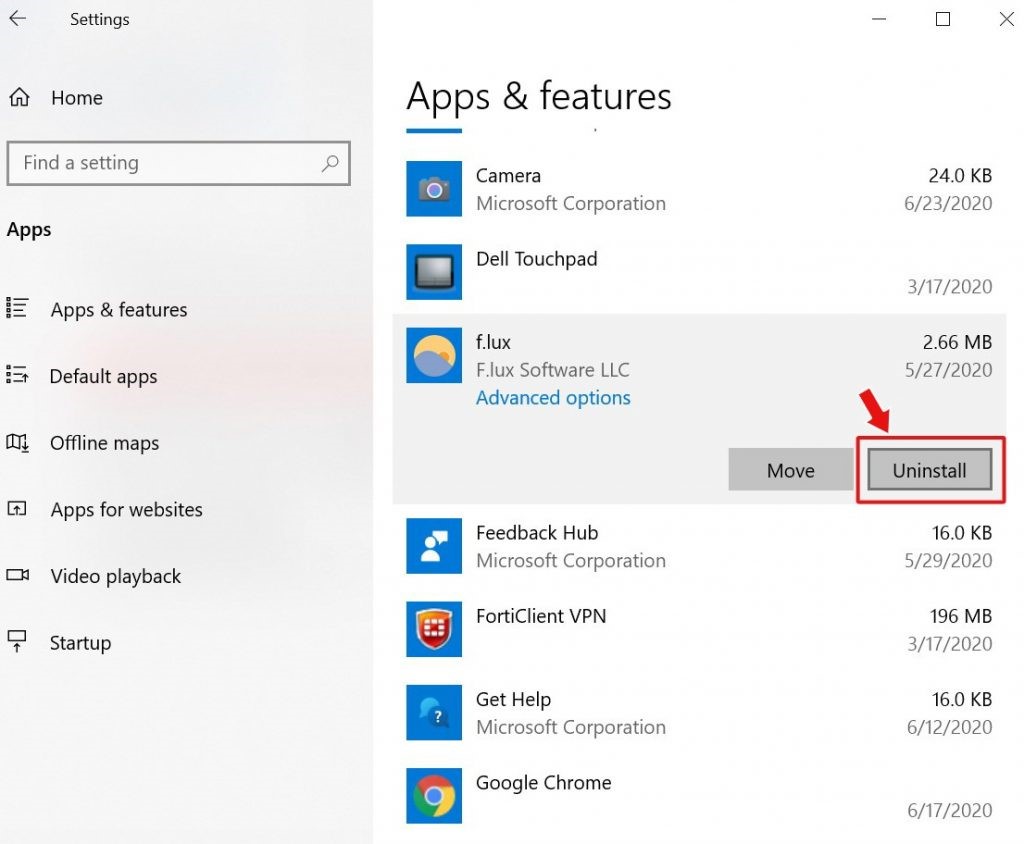
- Now reboot your system and see if the problem is fixed now.
#7. Run DISM Tool and SFC Scan
Corrupt or damaged system files may also be the reason behind Kernel-Power Error 41 63. You can try running DISM and then SFC scan to fix the problem. Follow the below steps:
- Open Command Prompt, run it as administrator, and type the following command:
DISM.exe /Online /Cleanup-image /Restorehealth
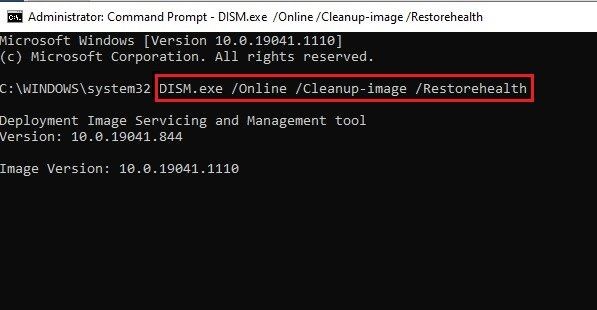
- Let the process run and wait for some time. Finally, it will show the files that need to be repaired.
- Afterward, type SFC/Scannow and hit Enter.
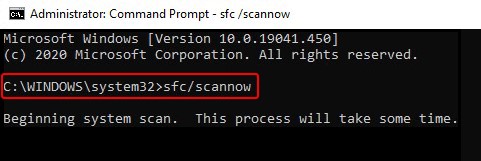
- It may take a while. Once done, close the window and reboot your system to see if the problem is fixed.
Read More: How to Run System File Checker (SFC) Scan in Windows 10#8. Uninstall Device Driver
Outdated or incompatible device drivers may also cause a blue screen of death error on your Windows 10. If you have recently made any changes related to device drivers, consider uninstalling them and install the compatible one. Follow the below steps:
- Go to Device Manager, expand the device for which you recently installed any driver.
- Right-click the driver and click Uninstall device.
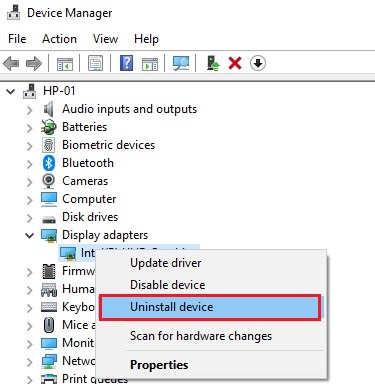
- Now, confirm the action by selecting ‘Delete the driver software for this device’ and click Uninstall.
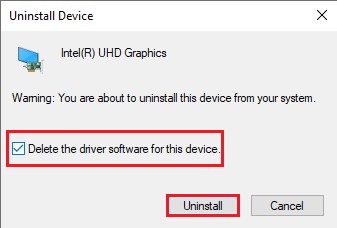
- Close the window, restart your system, and check if the error persists.
Conclusion
If you’re not able to boot your PC or it keeps crashing, we’d suggest you try recovering essential data using professional data recovery software i.e. Stellar Data Recovery Professional. The software allows you to create bootable media with which you can boot into a crashed or non-bootable Windows PC and retrieve the data. Once done with recovering data, you can perform the methods mentioned in this post.
Majorly, the Kernel Power Error 41 error occurs due to hardware problem or insufficient power supply. However, the reasons could be different as discussed above. Hence, first make sure that your system is in good state. If everything is fine, yet the error occurs, try other troubleshooting methods shared in this blog.
Also Read: How to Fix Windows 10 ‘Kernel Data Inpage Error’ Blue Screen
Was this article helpful?