Migrating mailboxes from Outlook user profiles of on-premises Exchange or any other IMAP email server to Office 365 requires you to convert the default OST file into PST format. Microsoft supports various methods to migrate mailboxes from an existing on-premises email server to Microsoft 365, such as cutover, staged, hybrid, IMPA, etc. But these methods won’t work if the current mail server has crashed or is not working.
In such a case, you can import the local Outlook OST file into Office 365 for mailbox migration. However, Office 365 does not support OST files. You need to extract the mail items from the local OST to PST format to import the mail items into Microsoft 365 mailboxes.
This post shares the methods to help you import OST files into Outlook 365. Care should be taken in assessing the proper migration method because in most cases, manual techniques may not work as per expectations, thus disrupting the business continuity.
Methods to Import OST Files into Office 365
Let’s check the methods to import OST files into Microsoft 365.
Method 1: Export OST to PST and Import into Office 365
This is an indirect method and involves three phases with multiple steps.
- Convert OST file into PST file.
- Upload converted OST files to Azure Storage or ship to Microsoft’s data center.
- Import PST file into Office 365.
Note: This method works only if the Outlook profile is active and accessible from Outlook. If the email profile is deleted or you have OST files that belong to old or disabled email accounts, this method won’t work. In such a case, skip to Method 2.
Follow these steps to export OST to PST via Outlook account:
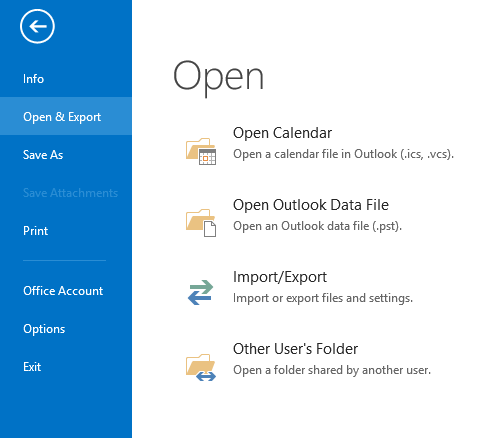
- Open Outlook and go to File > Open & Export > Import/Export.
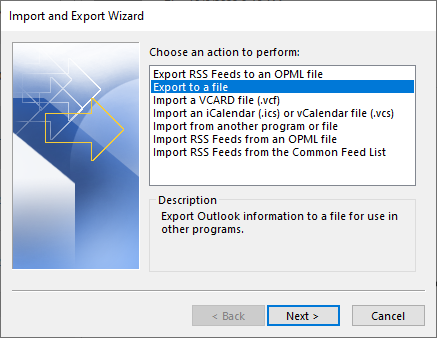
- From the options, choose ‘Export to a file’ and click ‘Next.’
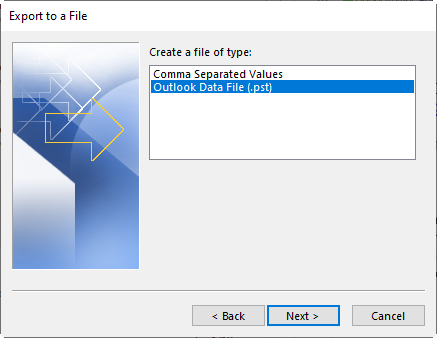
- Choose ‘Outlook Data File (.pst)’ from the options and click ‘Next.’
- Select the mail account or choose individual mailboxes, such as ‘Inbox’ or ‘Sent Items’ to export them (select one item at a time).
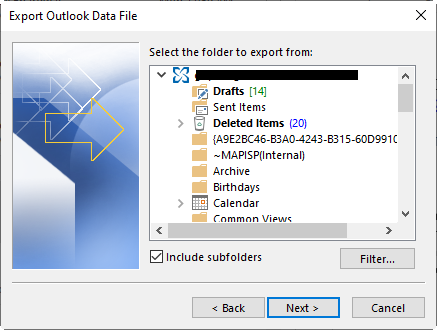
- Click the ‘Include subfolders’ checkbox and click ‘Next.’
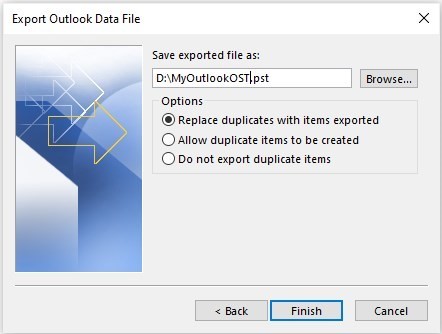
- Then click ‘Browse’ to select a save location on your PC or external media.
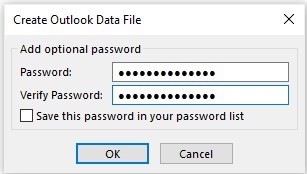
You may enter a password to protect the exported PST file. This step is optional. You may click ‘OK’ without entering the password.
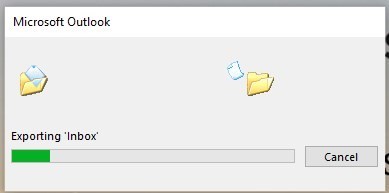
This begins exporting OST mailbox items to PST data file.
2. Upload Converted OST Files to Azure Storage or Ship to Microsoft Data Center
Once you have converted all the OST files into PST format, you can upload them to Azure Blob storage using the Azure AzCopy — a command-line-based tool.
You can also use the “Drive Shipping” method where you need to copy all the converted OST files to a BitLocker-encrypted hard drive (2.5-inch) and ship the drive to one of Microsoft’s data centers. Microsoft will upload the PSTs to Azure Blob storage on your behalf but will charge $2/GB or $2000/1000 GB (1 TB) of PST files.
3. Import Converted OST Files into Office 365
Next, you need to create user accounts on Office 365, assign licenses, create a CSV mapping file, upload it, assign an Import Export role, and then start the import job to import the converted OST files into Office 365 mailboxes. It may take a few weeks to a month or more to upload and import all mailboxes. Besides, Microsoft 365 also limits you from importing PST files larger than 20 GB or mail items larger than 35 MB by default.
You can use an OST to PST converter tool, such as Stellar Converter for OST Technician to import OST files directly into Office 365 mailboxes. This helps you to export all your offline Outlook data (.ost) files to Office 365 with the original folder structure and hierarchy without any limitations.
You can import as large as 50 GB (or larger) OST files into Microsoft 365 in a few clicks, thus saving time and effort. This software can help Exchange or IT administrators to migrate or import mailboxes of users whose accounts are deleted.
The steps are as follows:
- Install and open the software.
- From the main interface of the software, click Choose Manually and then click Browse to select the OST file. You can also select inaccessible or orphaned OST files that belong to deleted or disabled mailbox profile.
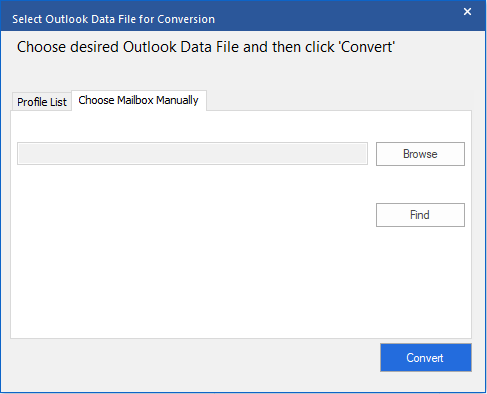
- Click Convert to initiate the conversion process.
- The software will list all mail items from the OST. Preview them and validate the data.
Note: This option also helps you to select the desired items if you do not want to import the entire data of the OST file.
- From the main menu, click the Save Converted File option.
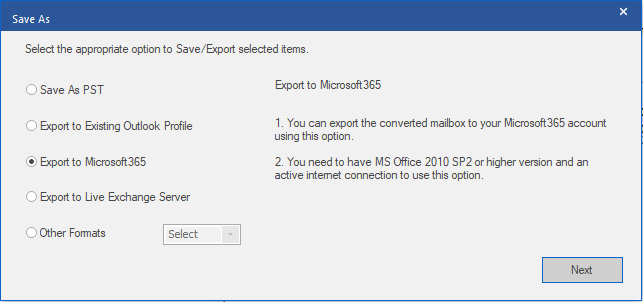
- The Save As dialog box lists multiple saving options.
- Select Export to Microsoft 365 and click the Next button.
- Enter the Office 365 or Microsoft 365 credentials and click OK.
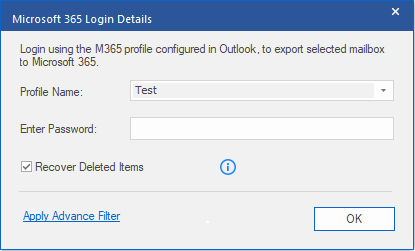
- This will export the OST file to Office 365 mailbox directly.

Conclusion
Microsoft 365 provides cloud-based email services (Exchange Online) along with a plethora of apps and services, making it a value-for-money proposition for many SMEs. You don’t have to worry about security, updates, or hardware management. You also get access to cloud and desktop-based Office apps, such as Word, Excel, Outlook, etc. with no additional cost.
This guide shares the manual and software-based methods to import OST into Office 365. The manual techniques are complex and tedious, and may not produce the expected results. On the other hand, the OST to PST converter tool is more convenient and easy to use. You can import the OST files directly into Office 365 by using the software. Also, the software helps retrieve deleted items from the mailboxes.
Was this article helpful?