Stellar Data Recovery Professional for Windows is one of the most powerful data recovery software available for the Windows 10 platform, which also works well with all the previous versions up to Windows XP.
The software recovers data from diverse data loss scenarios. Some of the common data loss scenarios the software can handle include Deletion, Formatting, Malware Infection, Partition Loss, Encryption, Bad Sectors, and File System Corruption. You can securely use the software in these data loss cases by following the procedures mentioned in the article.


Foremost, users need to download the software from the official website of Stellar Data Recovery; this is just to ensure that users get the latest, genuine software without any extraneous adware or malicious software packaged with the tool.
Click the ‘Free Download’ button to download a copy of the software on your Windows PC; the software requires only a few MBs of the drive space.


1. Double-click the .exe file to install Stellar Data Recovery Professional for Windows.
2. On the Select Setup Language dialog box, select the preferred language from the drop-down list. Users can change the language even after the installation from Advanced Settings.
3. Complete the installation process by following the instructions of the wizard. Restart PC.
4. Finally, launch the software by double-clicking the software’s icon present on the desktop. The main interface of the software opens.
We illustrate in detail the simplest data loss scenario of accidental deletion of files (say emptying of Recycle Bin or use of the Shift + Delete key combination) in the next section.
Steps to Recover Data From Storage Drive
SELECT
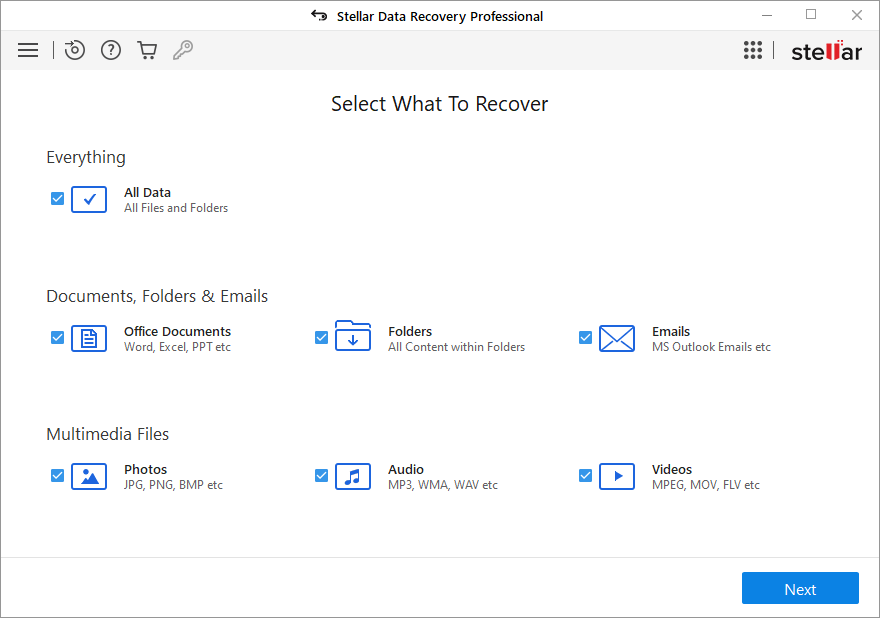
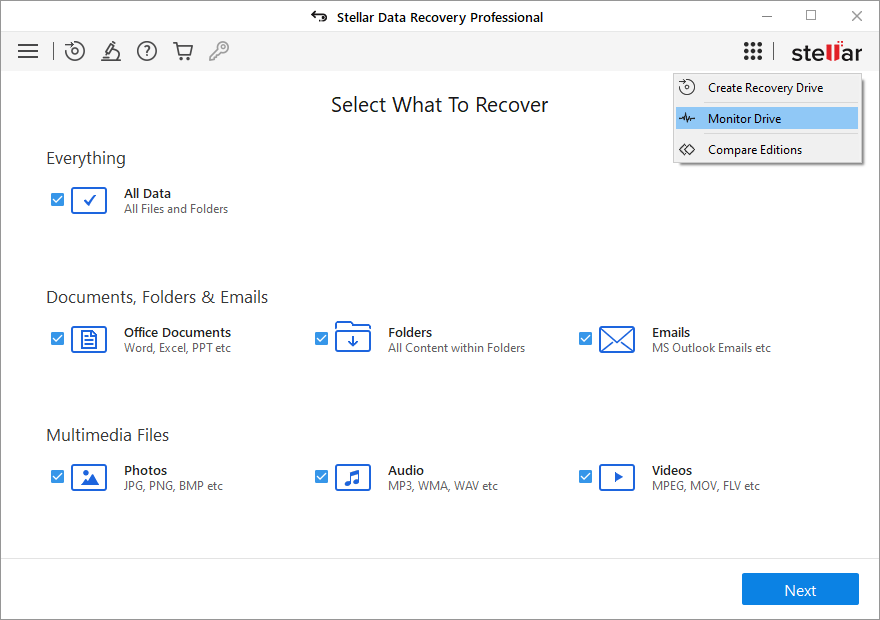
Step 1: From the ‘Select What to Recover’ screen, opt for ‘All Data’ in case you do not want to specify the file type and leave the intelligent recovery task to the software. Or else unselect the first option and select only those files types from the subsequent options that you specifically want to recover. Click Next.

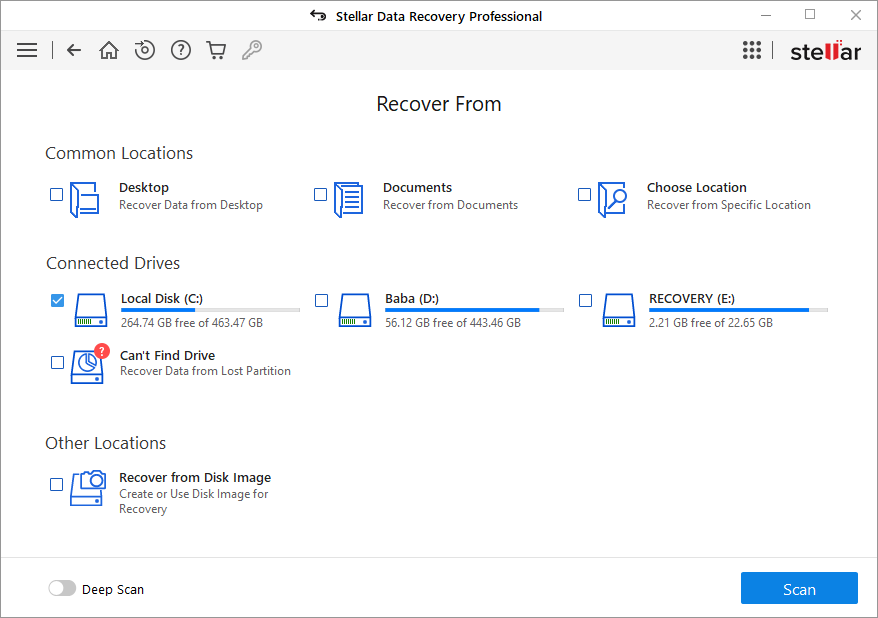
Step 2: From the ‘Recover From’ screen, specify the data loss location. Choose ‘Desktop’ to recover data from the emptied Recycle Bin case. For files shift-deleted from specific folder, select ‘Choose Location’ to specify the exact folder. Or else select the connected drive from where the user has deleted the data.

SCAN
Step 3: Once the select operation is over, click the Scan button to perform a quick scan of the selected location. Users can also turn on the ‘Deep Scan’ toggle switch before clicking the Scan button to perform comprehensive scan of the selected location. Or else they can click the ‘Click here’ link beside Deep Scan whenever the recovery engine does not show the required files.


PREVIEW
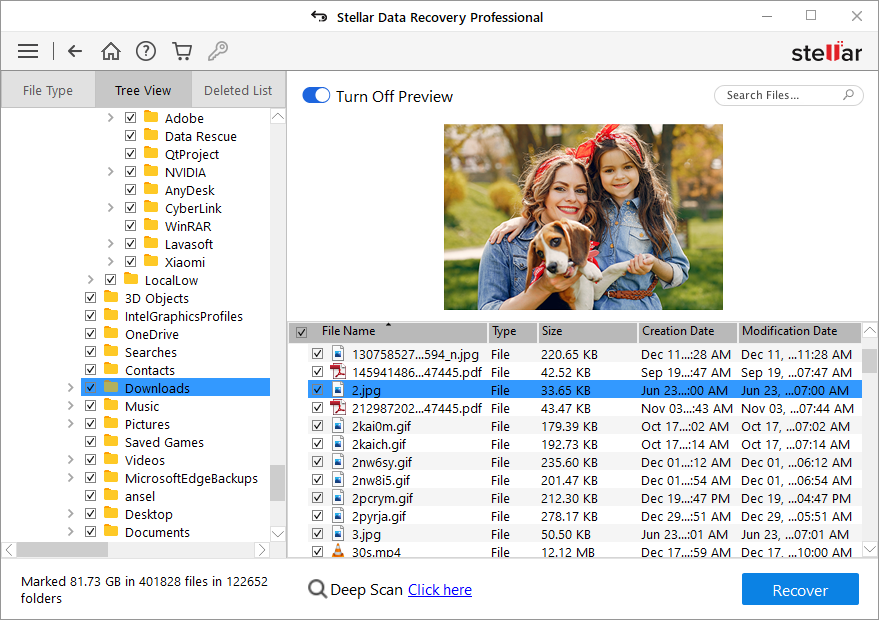
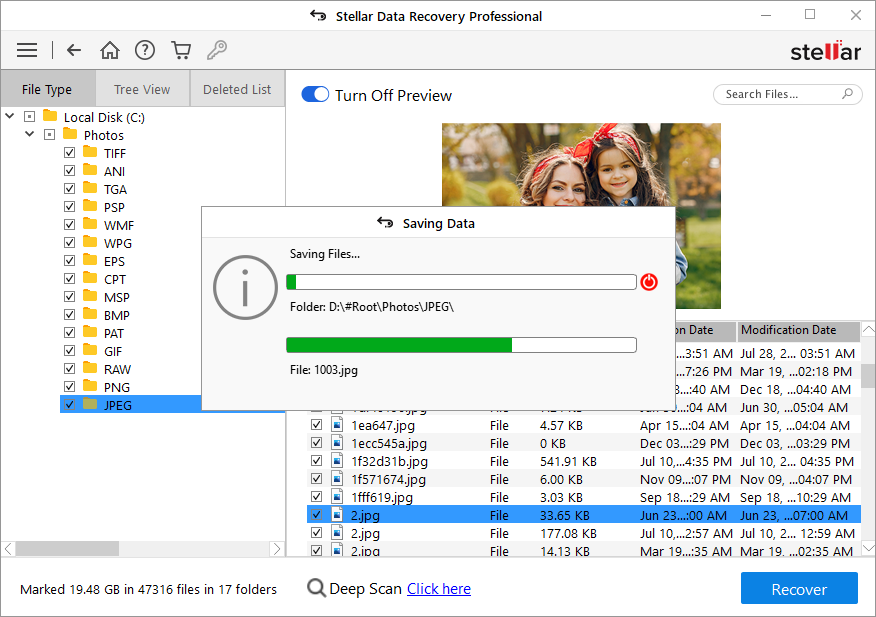
Step 4: During the scan time, the wizard displays real-time preview of the scanned files on the top right pane, which users can set using ‘Turn Off/On Preview’. Once the scan is over, the wizard segregates items in three views: File Type, Tree View, and Deleted List. Click the ‘Deleted List’ tab to open all the all the deleted items in folder structure. Click the required file to preview.

RECOVER
Step 5: Once a preview of files is over, select all the desired files to be recovered. Click the Recover button. On the Recover dialog box, click browse to specify the destination to save the recoverable files. Click ‘Advanced Settings’ to specify compression option, recovery option, or add a filter. Click ‘Start Saving’ to save the file to the specified location.

Users can use this DIY software in a similar fashion with simple on-screen instructions to recover data from all data loss scenarios.
You can use:
- ‘Can’t Find Drive’ to recover lost partition and,
- ‘Recover from Disk Image’ to create image of the storage drive that’s affected with bad sectors or use an already created image for recovery.
How To Monitor the Health of Your PC Storage Drive
Stellar Data Recovery Professional also gives you the option to monitor the health of your PC hard drive. From the home screen of the software select “Monitor Drive” under “More Tools” and you will get the interface for Drive Monitor.

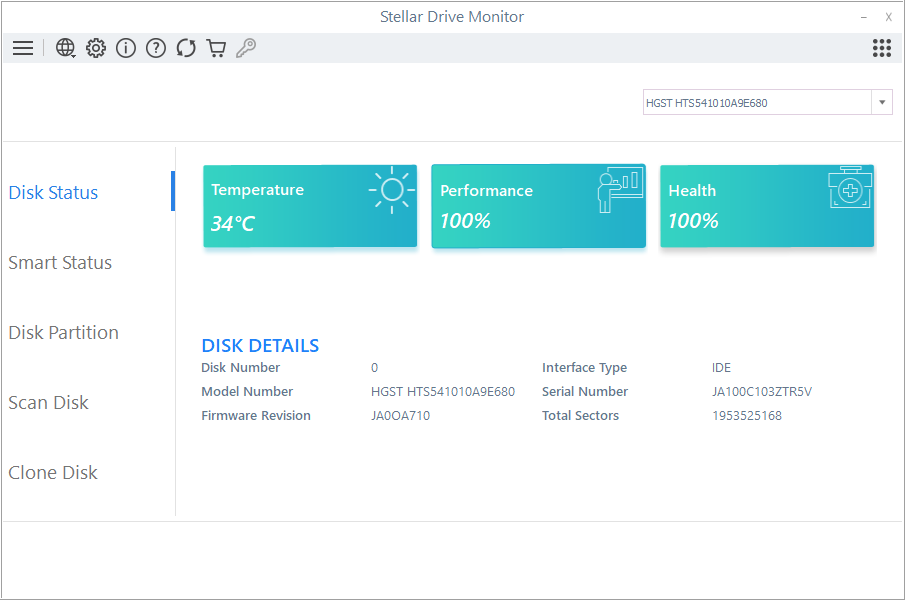
Disk Status: Once the Stellar Drive Monitor Screen opens with the Disk Status pane, click the dropdown list present on the top right corner and select the drive that users need to monitor. Click Refresh. The wizard displays Temperature, Performance, and Health of the selected storage drive at the top and Disk Details at the bottom of the right pane.

Smart Status: Select the ‘Smart Status’ option from the left pane to know the drive’s SMART attributes. Select the drive from the list and click Refresh. The top section specifies whether the drive has PASSED or FAILED together with Serial Number, Interface Type and Capacity of the drive. In addition, Smart Details include ID, Attribute Name, Status, Worst, Threshold and Fitness of the storage drive. Click Refresh.

Disk Partition: Select the ‘Disk Partition’ option from the left pane to know the partition details. Select the drive from the drop-down list and click Refresh. The top section displays graphical representation of the drive partitions together with other attributes. The Partition Details section specifies Partition (drive letter together with file system), Status (healthy or failed), and Space (available storage capacity out of total capacity as well as percentage of the free storage space).

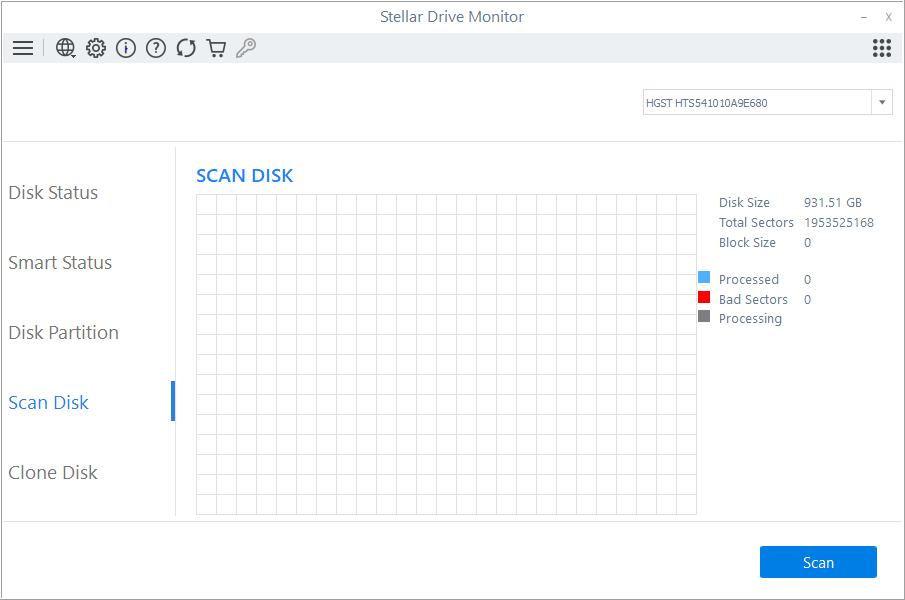
Scan Disk: Select the ‘Scan Disk’ option from the left pane to map bad sectors (if any). Select the drive from the drop-down list and click Scan. The screen displays Disk Size, Total Sectors, and Block Size on the right. Three color code Blue (Processed), Red (Bad Sectors) and Gray (Bad Sectors) helps indicate the status of each sector.
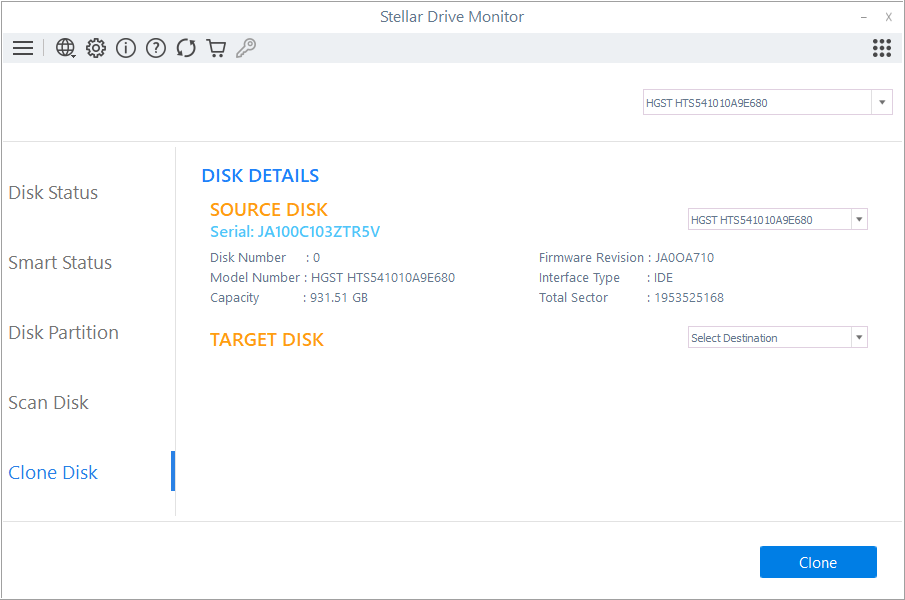
Clone Disk: Select the ‘Clone Disk’ option from the left pane to clone a severely corrupt storage drive. Then select the source disk and target disk from the drop down menu. Click Clone. Please note the source disk and target disk needs to be different. Drive Monitor clones the entire storage drive, which users can then use to scan and recover files.

Conclusion
The article presents detailed instructions on how to use Stellar Data Recovery Professional for Windows. It illustrates the steps to recover data from a storage drive securely.
In addition, the article also highlights the newly introduced star feature—Stellar Drive Monitor, which is useful to monitor the health status of the selected storage drive as well as create exact replica of a failing drive by using the Clone Disk functionality.
Free download the software today to get its preview and once satisfied, purchase a license key to unleash its complete data recovery and drive monitoring capability.


