Do you have a Mac laptop (MacBook Air, MacBook Pro) or desktop (iMac) with a damaged display or one that no longer turns on? In fact, you may not require a fix to recover or continue using your computer to access all of its data.
How to Access Mac with a Broken Screen?
If your Mac screen suddenly stops working, don’t worry. It’s still possible to use it, which can be done by connecting an additional display or specific remote applications. Let’s talk about several ways how to use MacBook with a broken screen.
1. Connect External Screen to Your Mac
Here is what to do to connect an external screen to you your MacBook with a broken screen:
- Determine which Apple adapter and cable (see instructions below) you’ll need to connect your Mac > connect the screen to your Mac.
- Open System Preferences > Displays.
- Click the Arrangement tab.
- Don’t select the Mirror Image check box (unless you want the second screen to display the same content as the original screen).
- You will see a white bar at the top of the screen > drag this bar to the screen you want to make the primary.
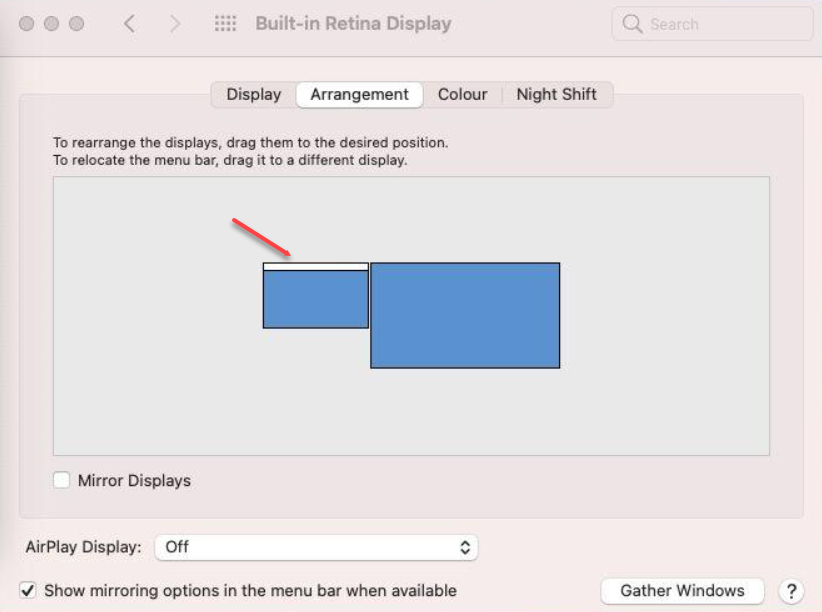 System Preferences > Displays > Arrangement
 What Cable Do You Need to Connect Mac And Display?
It should be simple, but since Apple has changed ports on Macs over the years, it can be hard to figure out which connectors you need to connect a monitor to your Mac. That’s even before you examine the ports on the back or display to figure out which connector is required.
- USB-C to HDMI: The Apple USB-C Multi-Port Digital AV Adapter lets you connect a Mac with Thunderbolt 3 to an HDMI display.
- USB-C to VGA: The Apple USB-C VGA Multiport Adapter lets you connect to a VGA display or projector. It’s an analog connector and does not support HDCP (High-bandwidth Digital Content Protection) content, for example, HD movies.
- Mini Display Port to VGA: You can use the Apple Mini DisplayPort to VGA Adapter to connect a Mac with Mini DisplayPort or Thunderbolt ports to an external display or projector that uses VGA.
- Thunderbolt 3 (USB-C) to Thunderbolt 2 adapter: You can use the Apple Thunderbolt 3 (USB-C) Thunderbolt 2 Adapter to connect a Thunderbolt display to a new Mac.
- The Thunderbolt 3 Dock: connects your MacBook to a docking station with various connections, including one or more HDMI, DisplayPort, or VGA ports, using a single cable. It will also contain more USB connections, including a Gigabit Ethernet port for wired Internet access and other connectors.
2. Connect via Screen Sharing or VNC
macOS supports remote screen access over a local network, but only if Screen Sharing is enabled in the Sharing preference pane. In this scenario, take the following steps:
- Turn on the Mac.
- On another Mac (on the same network), go to the Finder and look if you see your Mac’s name in the Locations section.
- If yes, choose the Mac option. Is the Share Screen icon visible in the Finder window’s upper-right corner?
- If so, click it and enter your account information into the Screen Sharing app.
- If everything is done correctly, you should be able to log in.
You can use the default VNC screen-sharing software from any computer connected to the network remotely. You’ll need to activate Screen Sharing and create a password for VNC viewers.
3. Use Target Disk Mode
Target Disk Mode may come in handy if everything else fails. It allows a Mac to be mounted as an image disk on other Macs. Here is what you need to do:
- Turn off your damaged Mac.
- Connect it to the Mac you want to put it on using the proper like-to-like cable.
- Hold down the T key while restarting your damaged Mac.
If everything is done correctly, your Mac with a damaged display will appear on the connected Mac as a mounted disk.
The procedure differs if you have a Mac with Apple Silicon. Here is what you should do:
- Use a USB-C or Thunderbolt cable to connect both Macs (but sadly not the one that comes supplied with MacBook).
- Restart the M1-Mac with the cable connected to load the starting choices by pressing and holding the power button.
- Then, choose Share volume from the Options > Utilities menu.
- The drive should show on the other Mac after you input your password. The shared drive can be located in the System Preferences > Network section.
How to Prepare Your Mac Before the Fix?
Before getting your screen fixed by professionals, start backing up your essential data to ensure it remains safe in case something goes wrong.
If you lose any of your data, the macOS backup will allow you to restore everything.
Here is how to back up your Mac with Time Machine:
1. Connect an external hard drive to your Mac.
2. Open Time Machine by clicking on Apple Menu in the top left corner of the screen > System Preferences > Time Machine.
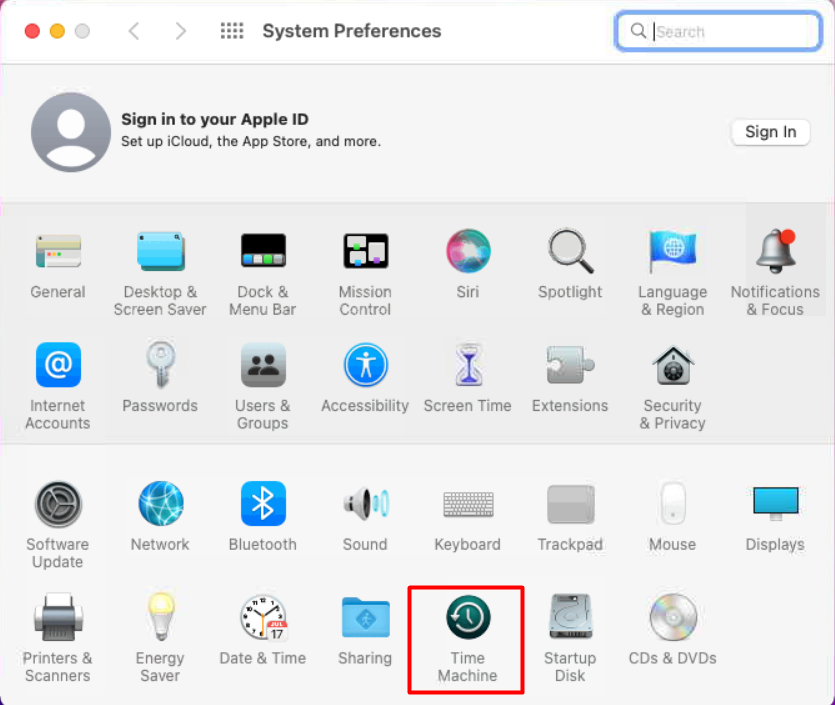 System Preferences > Time Machine
 3. Next, click on Select Backup Disk.
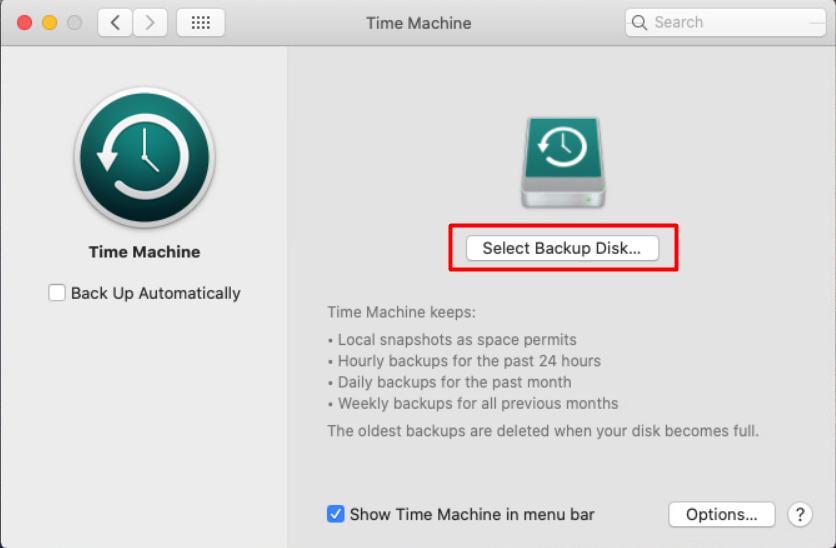 Time Machine > Select Backup Disk
 4. Choose the needed disk and hit the Use Disk button.
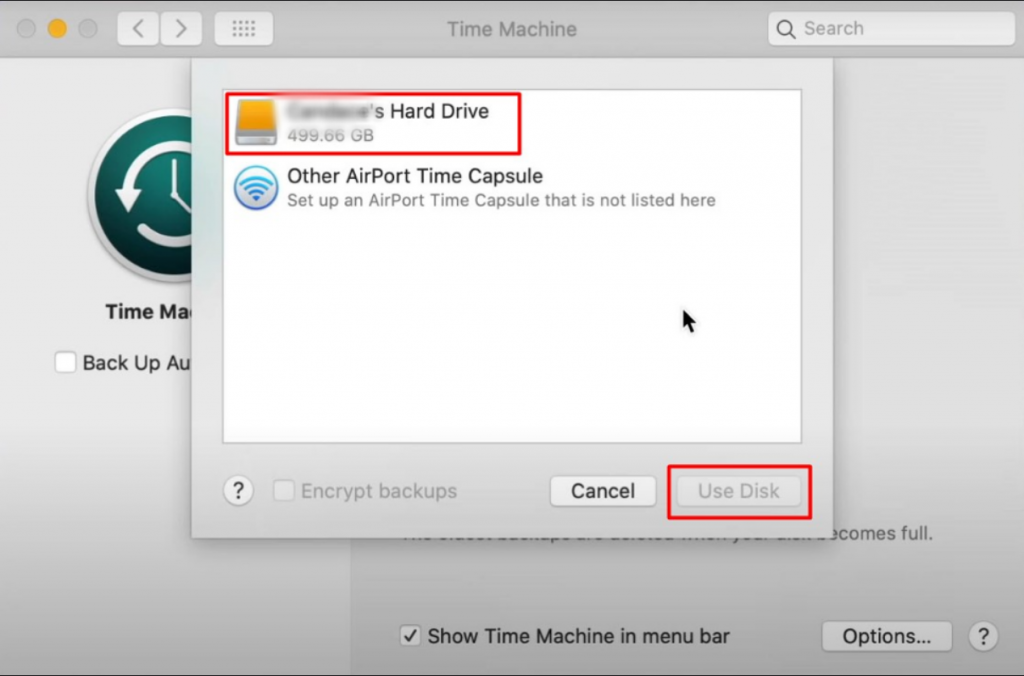 Time Machine > Select Backup Disk > Use Disk
 Voilà. Time Machine will now have the most recent backup of your system.
Another way to retrieve your missing files if they were lost after having your Mac fixed is to use Mac data recovery software. Using helpful data recovery software such as Stellar Data Recovery Professional for Mac, you may recover lost files on your Mac. It’s a simple tool that will assist you in retrieving your files.
Follow the instruction below to recover lost data:
1. Download & install the Stellar Data Recovery Professional for Mac software.
2. After installing the application, launch it and select the type of data you want to recover (photos, videos, documents, etc.). You can recover all or just the information you need.
 Stellar Data Recovery Professional > Select What To Recover
 3. Next, you’ll be required to select the location from which you want to recover the selected files.
 Stellar Data Recovery Professional > Recover From
 4. When the scan is finished, the files that can be retrieved will be displayed. Choose which ones you require.
 Stellar Data Recovery Professional > Preview
 5. The final step is to select the target folder on your Mac and begin the recovery procedure.
Wrapping Up
Tips from this manual are within the power, even for beginners. It’s enough to spend a few minutes, and in some cases incur additional expenses, to buy the necessary cables. Also, back up your files to have a backup plan.
Read more:
Was this article helpful?